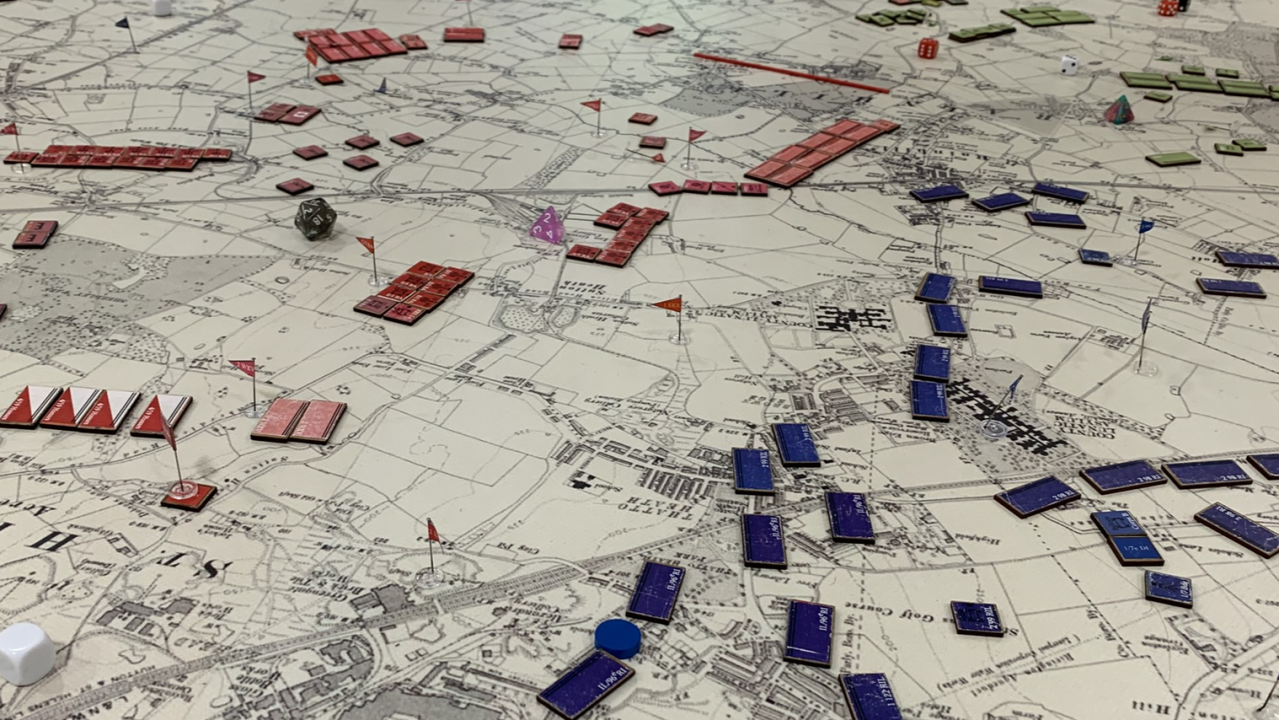
Yet another battle for Liverpool - A large game of Pluie de Balles.
by Jorit Wintjes
Introduction
Yet another big Pluie de Balles wargame at Helmut-Schmidt-Universität/Universität der Bundeswehr Hamburg, and once again the Liverpool scenario developed by the Conflict Simulation Group was used. The scenario assumes that in 1883 a French invasion in southern Britain, after initial successes, met stiffening resistance around Dorking, causing the French push towards London to eventually stall. As a result, French high command decided to open another front and managed to capture Liverpool and Birkenhead in a surprise attack, creating a bridgehead for a major push inland towards Manchester.
Now, a few days after the initial capture, a French army corps, 4e Corps, has arrived tasked with pushing eastwards and preparing the ground for the offensive against Manchester. While the French were preparing for the expansion of the bridgehead, the British were hastily drawing together units for an offensive of their own, trying to regain Liverpool; the British now have a corps-sized formation, the we, ready for operations against Liverpool.
Opposing Forces and Objectives
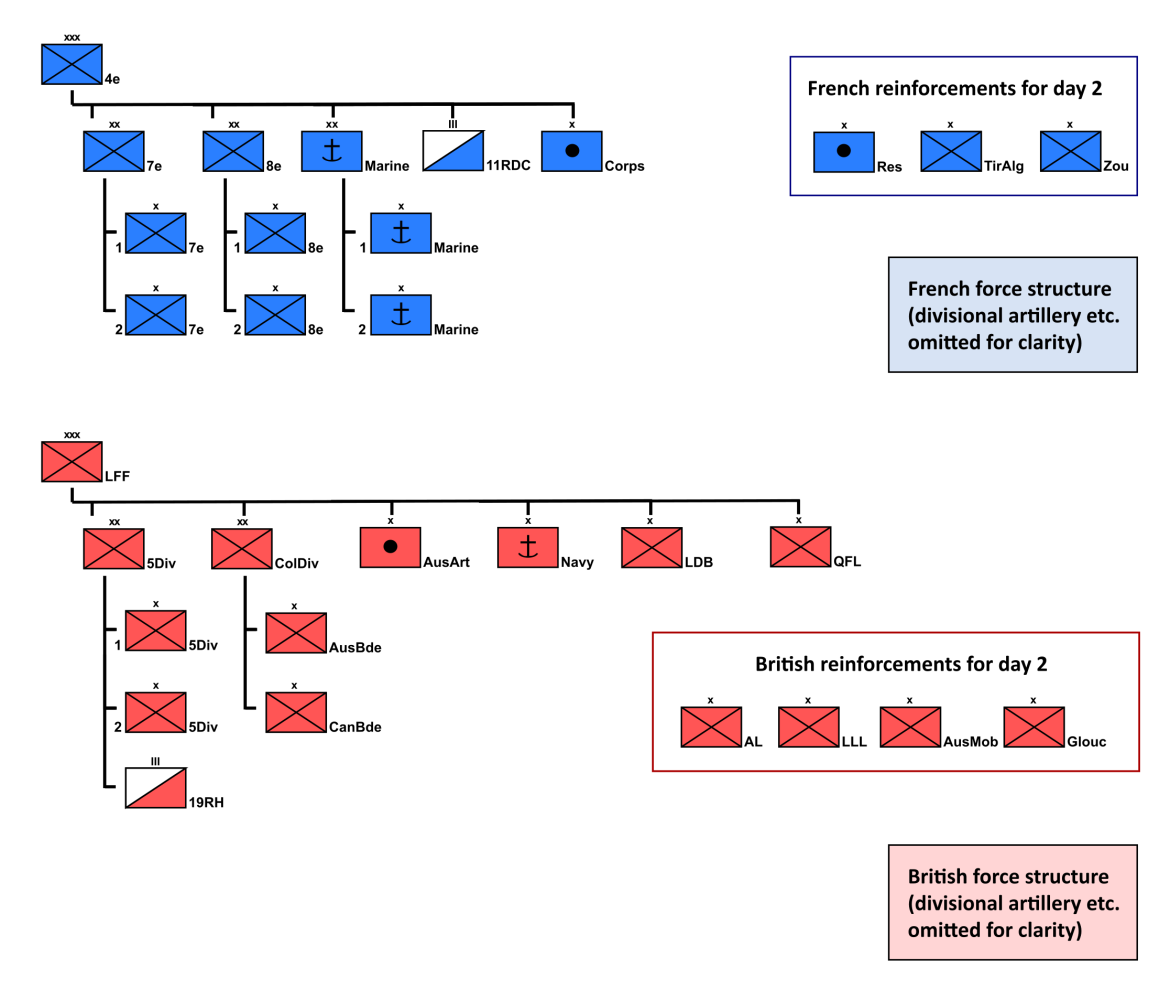
force structure for both sides
French 4e Corps was composed of two divisions, 7e Division d’Infanterie and 8e Division d’Infanterie, supported by several batteries of heavy and super-heavy artillery, two regiments of cavalry and a makeshift naval division of two brigades supported by a number of armoured trains; a small number of French warships were operating off the coast.
The Liverpool Field Force was composed of a regular infantry division (5 Division), a colonial division made up of an Australian and a Canadian infantry brigade, several batteries of heavy and super-heavy artillery, a powerful naval brigade and a handful of volunteer units; the Royal Navy operated a small base for torpedo boats, and a gunboat managed to get inshore as well.
French starting positions were around Liverpool, in Birkenhead and near Mostyn Station, where the French navy had put ashore one of the two naval brigades. British forces started from positions in Widnes, Warrington and Earlestown; a British naval brigade was defending Chester, while the British torpedo boat base was located at Connah’s Quay.
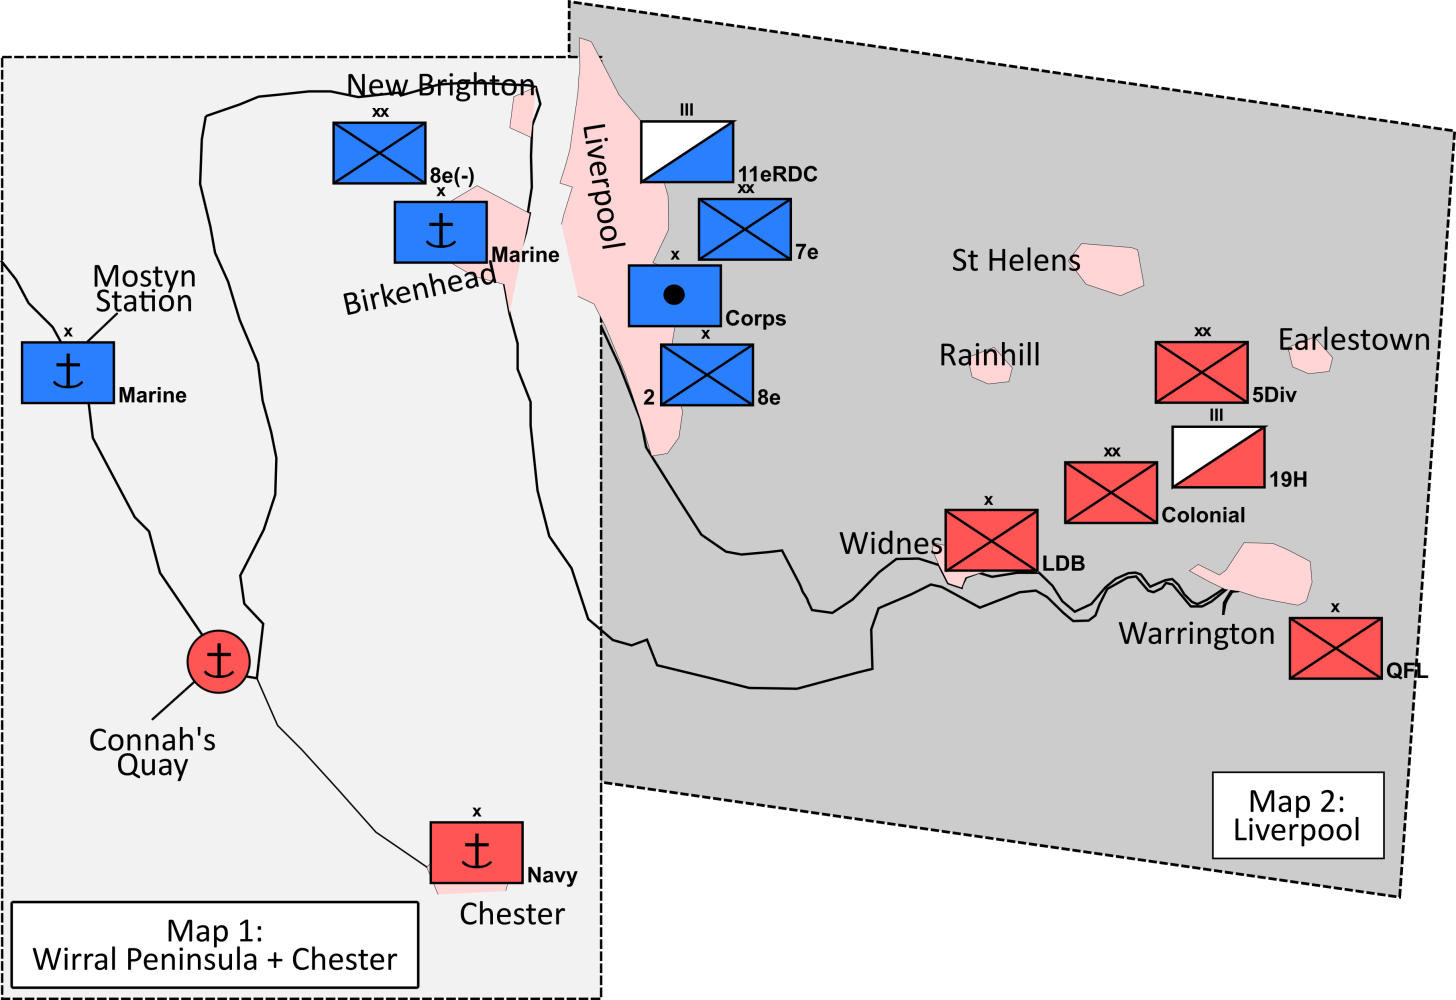
initial dispositions for both sides
The French had three main objectives:
1 - Defending the original bridgehead, Liverpool harbour being crucial for the planned follow-up operations.
2 - Capturing Warrington and Earlestown; the line Warrington - Earlestown would then be the starting line for the operations against Manchester.
3 - Destroying the British torpedo boat base, thereby removing any threat to French supply ships, and capturing Chester; with Chester in French possession, supporting the planned follow-up operation would be easier, and any problems in Liverpool could at least partly be offset.
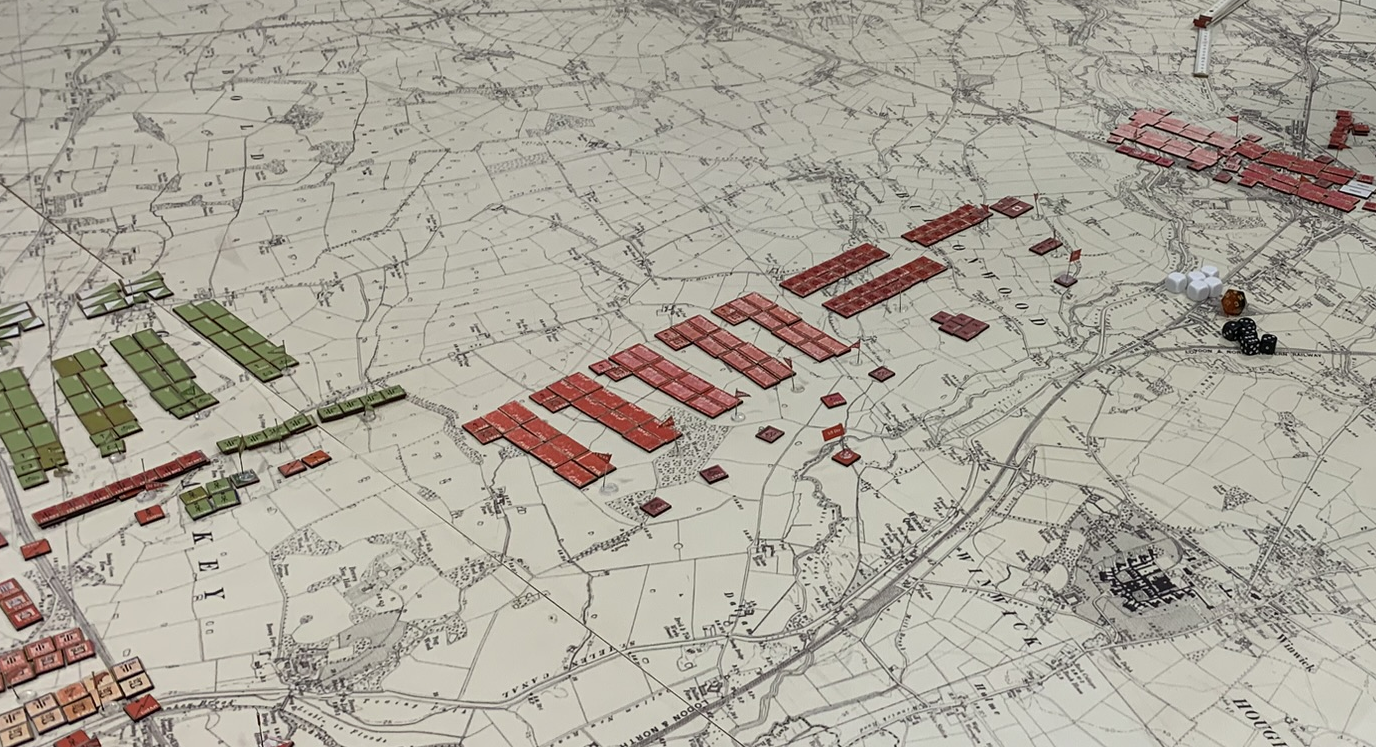
British division north of Warrington
The British also had three objectives:
1 - Defending Widnes, Warrington and Earlestown; the train stations in the two latter cities were the main supply hubs for the British side.
2 - Defending Chester and the Torpedo Boat base at Connah’s Quay; Chester was the key supply point for all British operations on the Wirral Peninsula, while the torpedo boats provided a crucial capability against French supply sships.
3 - Denying the enemy the use of harbours to reinforce the army corps already in Liverpool; this was crucial for preventing any further push out of the bridgehead and required either capturing Birkenhead or Liverpool, or putting the Liverpool harbour area under fire control by artillery positioned to the north of Liverpool harbour or on the northernmost tip of the Wirral Peninsula; it also put additional emphasis on objective 2, as holding Chester also meant preventing a harbour and potential disembarkation point from falling into enemy hands. Plans
Both sides planned according to their objectives.
The French plan assumed the main British effort to take place on the Wirral Peninsula. As a result, the two naval brigades there were to be supported by 8e Division, which transferred one of its infantry brigades to 7e Division; Birkenhead was to be defended, while the naval brigade at Mostyn Station was to make its way southwards to Chester, taking out the British torpedo boat base on the way. The French staff decided to launch an attack from Liverpool eastwards along the railway line running from Liverpool via St Helens to Earlestown; 7e Division d’Infanterie with its two brigades and one brigade of 8e Division d’Infanterie were to push quickly through any enemy defences, supported by French heavy artillery. French cavalry was to bypass St Helens and try to get into the British rear.
The British plan was based on the assumption that the main French effort would take place on the Wirral Peninsula. Here, the defence effort initially rested solely on the Navy brigade which was tasked with both holding Chester and defending the Torpedo Boat base. All other British units were to attack from a starting line running northwards from Warrington. Crucially, while the British did have some cavalry at their disposal, they left their right flank somewhat unguarded, which would nearly have disastrous consequences. At the last moment, while the units were already deploying, a small but powerful volunteer brigade was hastily transferred to Chester, arriving there about two hours after operations started.
The Course of the Battle
The battle that unfolded was quite chaotic; even so, four phases could be made out:
1 - Initial Movements and First Contact
For the first few hours, units were closing in on each other. To the east of Liverpool, after about two hours heavy artillery started firing on both sides, signalling the beginning of a process of attrition that eventually would be of dramatic proportions.
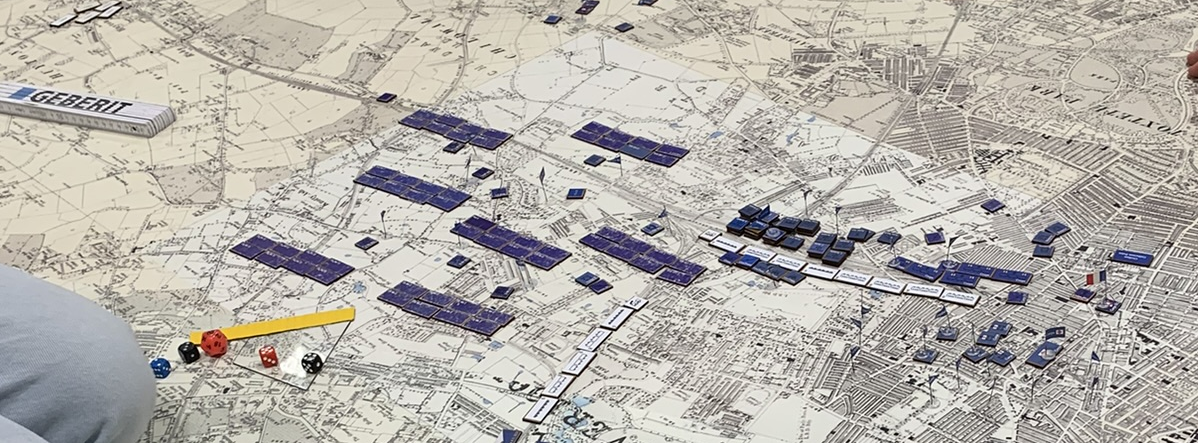
French brigade in the outskirts of Liverpool
On the Wirral Peninsula, French and British armoured trains were skirmishing, while the French naval brigade at Mostyn Station tried to move southwards towards Chester. At sea, British torpedo boats were successful in sinking most of the French ships, while the British gunboat successfully slowed down the French naval brigade. Crucially, however, apart from causing some casualties, British forces did not manage to prevent the French from building up their attack on Chester.
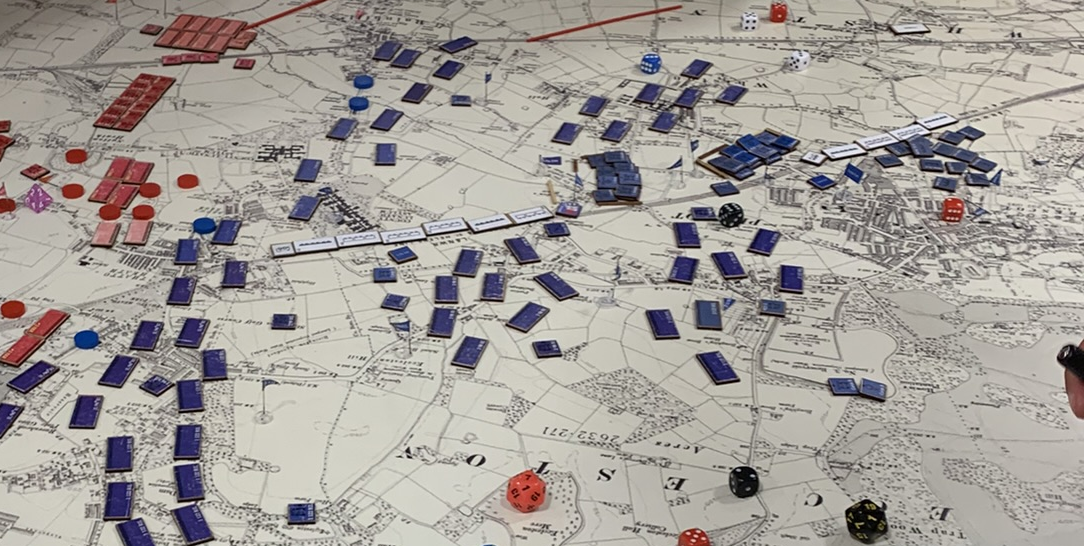
first contact between French and Briish forces
2 - Attrition
East of Liverpool, after a few hours, heavy, prolonged fighting began in the area around St Helens and west of Widnes. French forces had slightly deviated from their initial plan and attacked on a broad front from Widnes to St Helens. While French artillery was taking a heavy toll, French losses were nnthing short of staggering. While the brigade attacking St Helens managed to more or less stay intact, the French brigade in the centre was annihilated, creating a gap into which the British pushed the Canadian brigade, which then turn southwards and attacked into the flank of the French brigade attacking Widnes. After about two hours of heavy fighting, the French threat to Widnes was eliminated, although British casualties were also heavy.
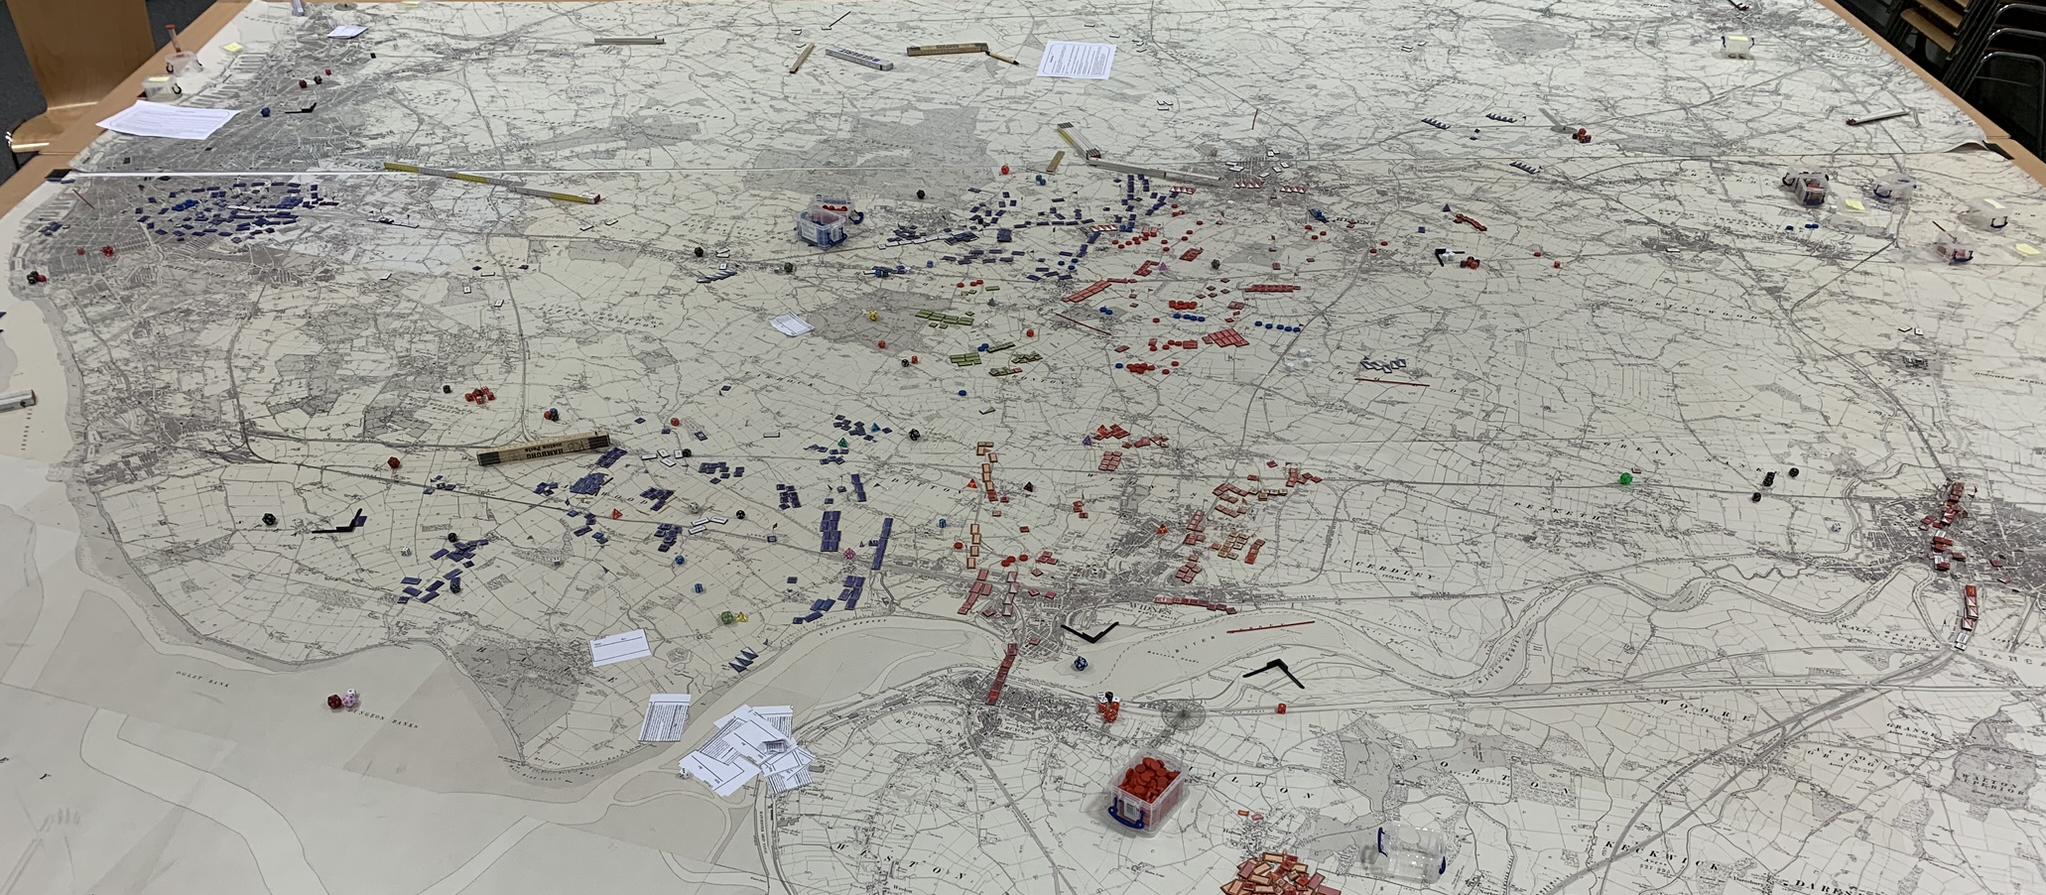
the Liverpool map at the end of the first day
On the Wirral Peninsula, French forces were making steady progress towards Chester.
3 - French High Water Mark
Even with 7e Division accumulating huge losses, around noon on the second day things did not look too bad for the French. On the Wirral Peninsula the British volunteer brigade that had been transferred on the day before was largely destroyed and French forces were approaching Chester, preparing for an assault that would be costly; on the way, they managed to destroy the British torpedo boat base.
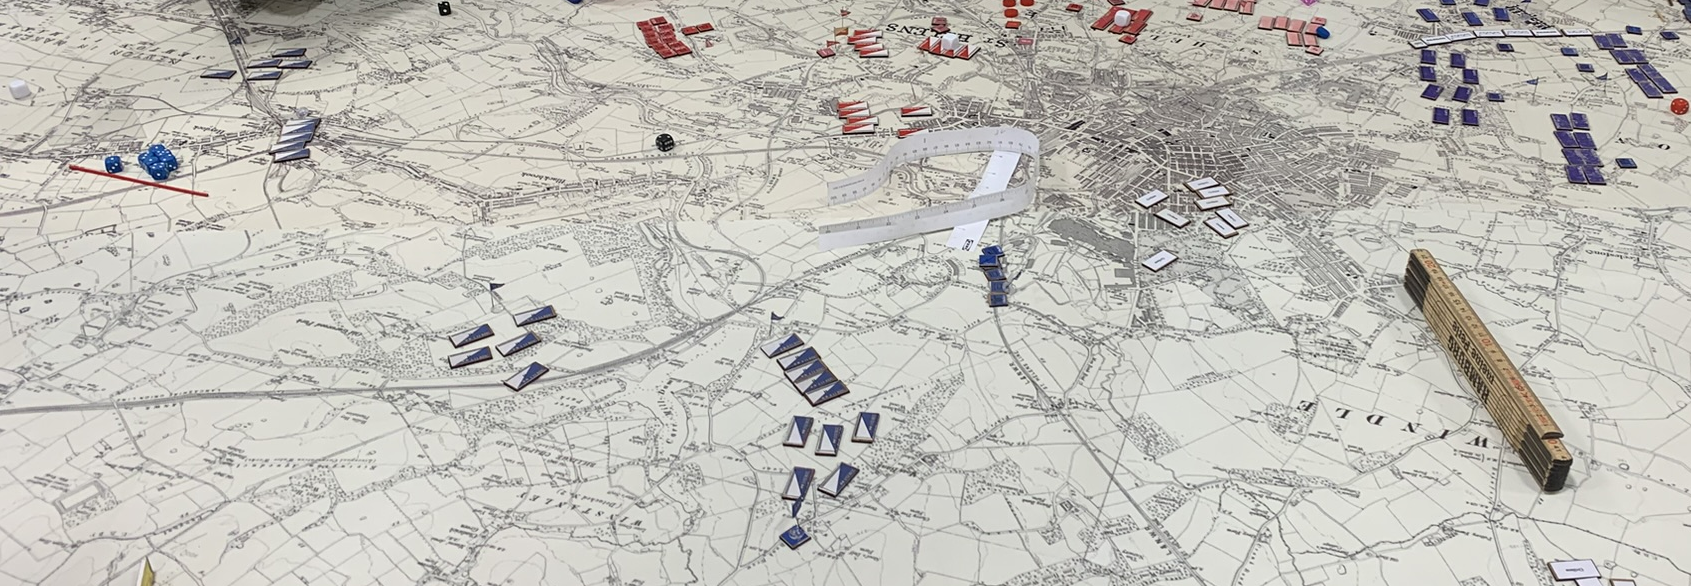
French cavalry moving into the British rear
East of Liverpool French cavalry had already on the first day managed to get into the rear of the British line and were causing great difficulties for the British; luckily for the latter, they were too weak to significantly influence the course of the battle. At about the same time signifcant reinforcements arrived, bringing French fighting strength back to around three brigades east of Liverpool. The tide had not yet turned, but a window of opportunity was beginning to open for the French side.
4 - Decision
In the late afternoon, however, insurgents started to appear in the city of Liverpool, making things rather difficult for French rear echelon units. More importantly, British artillery, the effectiveness of which had gradually increased over the past hours, was proving to be the decisive factor in the battle for Liverpool - successively, most of the French artillery and nearly all new reinforcements fell victim to the increasingly accurate fire of the British heavy batteris. The British also experienced a major setback as a key VIP was captured by French cavalry; as a result, British offensive operations came to a halt for some time, with a temporary ceasefire in effect; as the French had however evacuated most of the city, British forces managed to get into the northern parts and, crucially, into the harbour area during the lull in the fighting.
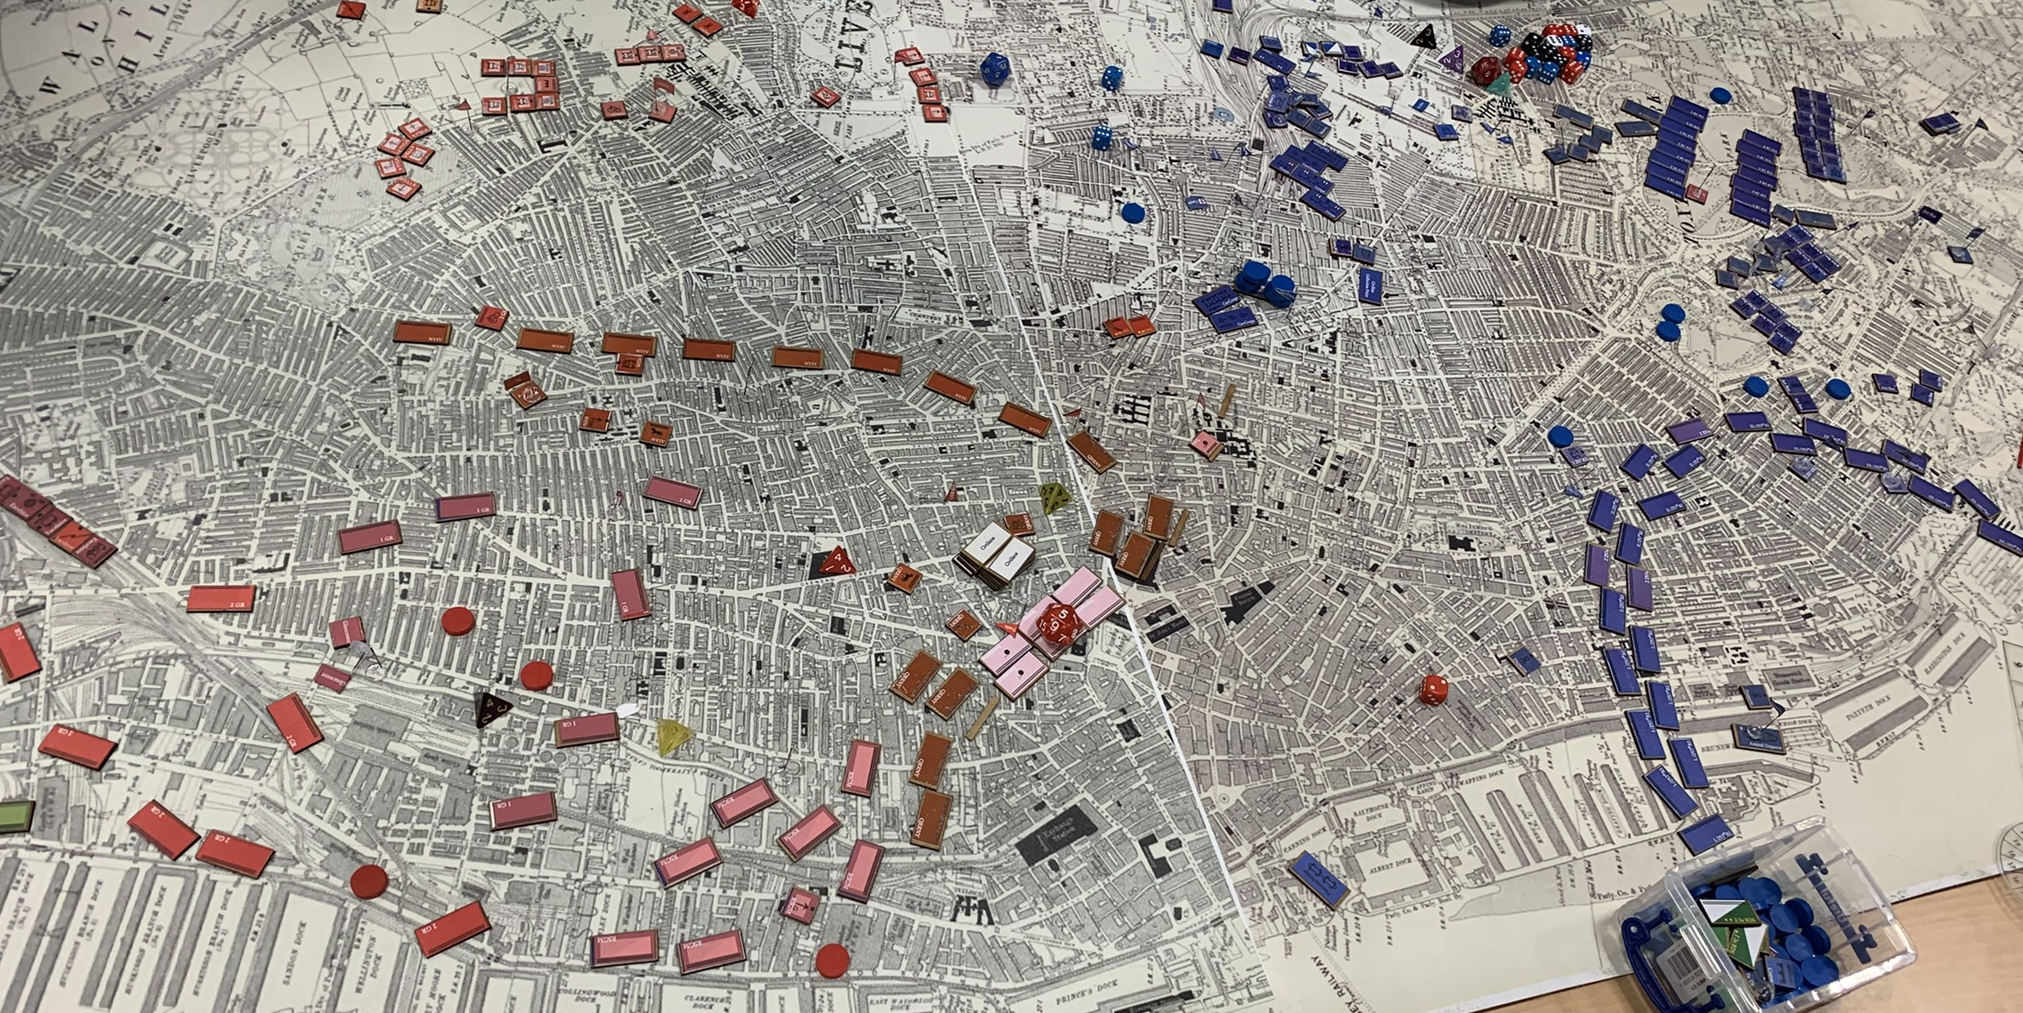
the end in Liverpool
On the Wirral Peninsula, French artillery was now firing into Chester; British forces were putting up a dogged defence, but by the afternoon the city was surrounded, and French infantry was pushing into the city from the South.
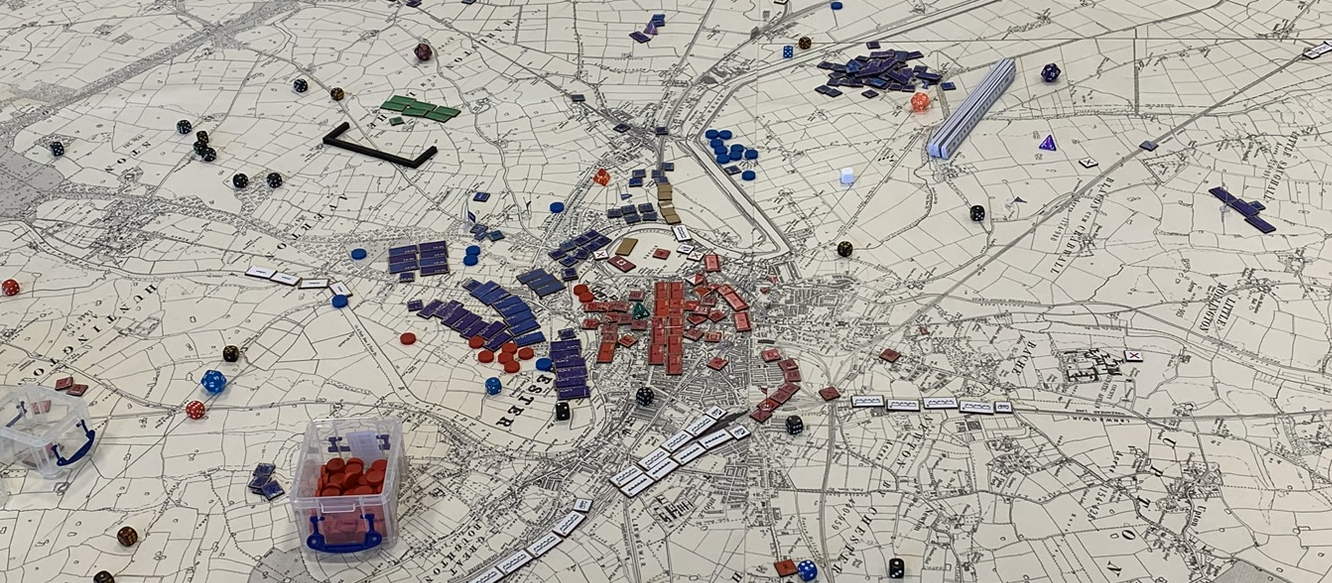
French forces pushing into Chester
Finally, after nearly seven hours of heavy fighting, the umpires called it a day.
British forces were in control of Liverpool harbour, while the French were about to capture Chester. Both sides had suffered extreme attrition, though British units were in marginally better shape. As the planned French thrust towards Manchester was now impossible, the British certainly had achieved some of their objectives; however, the loss of Chester was a setback that provided the French with the opportunity to plan a new operation against Manchester. It was a British victory, but only a marginal one.
Conclusion
Once again PdB had excelled at confronting participants with a situation in which events were time and again slipping out of control of those involved into them. On both sides staff teams valiantly struggled to keep up-to-date with what unfolded on the big maps, with decidedly mixed results.
Thus the British staff managed to have a fairly good picture of the events on the first day, but as the battle heated up and information from the force commanders became more erratic, the quality of the situational picture deteriorated rapidly to a point where the British staff team still assumed heavy fighting was underway at Widnes and St Helens when British elements were already pushing into Liverpool. The French staff faced similar difficulties, eventually being overtaken by events as well.
The main reason for the gradual loss of situational awareness by the staff teams was the deteriorating quality of the messages they received. As the pressure on the field commanders increased due to the intensive fighting, both the frequency and the quality of their reports back to the staff teams suffered, creating considerable friction; often force commanders, when faced with the choice of moving their forces or writing up a meaningful report chose the former - understandably so, one should add.
As a result, the staff teams sometimes were in a situation where decisions had to be made based on incomplete and outdated information, and members of the staff teams experienced the frustration of having to chose from a range of options, all of which were bad to some degree or another. The force commanders were likewise exposed to the fog of war: not only were those operating on the Wirral Peninsula unaware of events east of Liverpool, but due to the size of the maps even in one room participants were sometimes unaware of developments in different parts of the map.
As noted above, attrition on both sides was considerable. Each side had an infantry strength of close to 50,000 men (taking together initial forces and later reinforcements), and at the end of the second day the French army corps was doen to perhaps 8,000 men, while British forces amounted to perhaps 10,000 men at most. As both sides were essentially launching sequences of frontal assaults against enemies well-supported by artillery, losses of this magnitude are not unrealistic and indeed fit to what contemporary invasion novel literature assumed might happen in the case of a foreign invasion in Britain.
Apart from the kinetic action, both sides were also challenged with “VIP missions”; enemy agents had to be located among the refugees clogging the roads, reporters had to be cared for a, French lieutenant needed to be escorted from the company he was serving in back to the Corps HQ and even the favourite grand niece of Queen Victoria required rescuing. The Conflict Simulation Group uses these injects to increase the workload for the staff teams, who have to pass down the mission to their force commanders and try to keep some semblance of control over its execution. As intended, the VIP missions contributed not insignificantly to the stress and chaos staff teams and force commanders were exposed to.
The participants, students of Helmut-Schmidt-Universität/Universität der Bundeswehr Hamburg, deserve a final word. Pluie de Balles is an experience that is quite often not really enjoyable, and having to kneel on the map for hours on end, with pandemonium around only punctured by the umpires shouting “Change!” every two minutes, exposes participants to significant stress. Yet despite these adverse circumstances, and in the face of things first not going to plan, then going sideways and finally going decidedly wrong, they still displayed great fighting spirit, giving their best to the end.
The success of competitive wargames depends largerly on the readiness of both sides to comit themselves fully to the exercise, and whatever deficiencies there may have been with regard to planning and information processing, both sides definitely did not lack commitment.