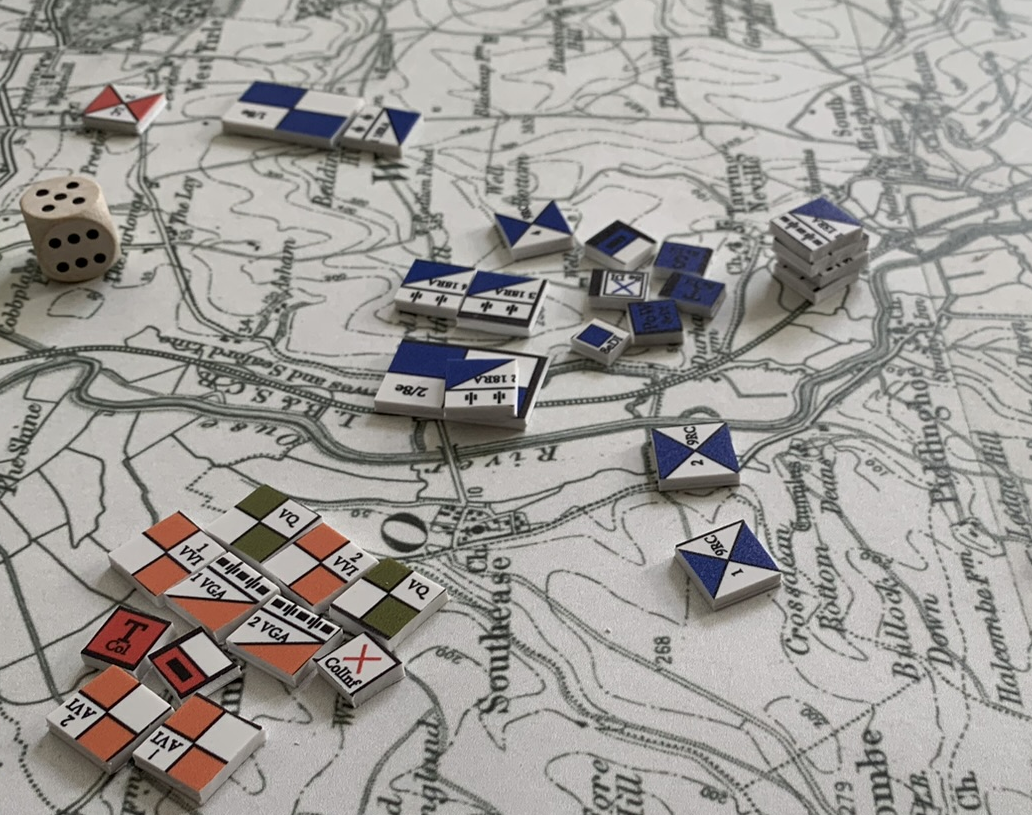
CoSimG visits the Royal Danish Defence College.
by Jorit Wintjes
I. Introduction.
At the beginning of October, the Conflict Simulation Group was invited to the Royal Danish Defence College Forsvarsakademiet to run an operational “Sussex Sorrows” wargame. “Sussex Sorrows” is CoSimG’s slightly simplified version of an early 1870s Prussian Kriegsspiel published by Jacob Meckel, arguably the most important Kriegsspiel theoretician who introduced the distinction between tactical, operational and strategic Kriegspiele. While for tactical Kriegsspiele CoSimG normally uses the rules published by Wilhelm von Tschischwitz (for more information see elsewhere on this page, for operational-level wargaming “Sussex Sorrows” allows for a wider variety of challenges for the participants, who have to deal not only with the kinetic action on the battlefield but also with aspects of civil-military interaction, logistics, casualty management etc.
In order to allow for full immersion scenarios for “Sussex Sorrows” usually run for a miminum of 4 to 5 hours; ideally they cover two days with events on day one influencing day two. For the wargame run at the Royal Danish Defence College a shorter scenario was selected as the time available was limited as the main purpose was an initial exposure to the Kriegsspiel’s potential for letting participants get lost in the fog of war.
As most scenarios run by the Conflict Simulation Group, this one was built around a supposed French invasion of Britain as well. Participants were divided into two teams red (British) and blue (French), with each team further subdivided into a corps HQ team and two divisional HQ teams. All communication between the teams went through the facilitating team, which was located in a separate room.
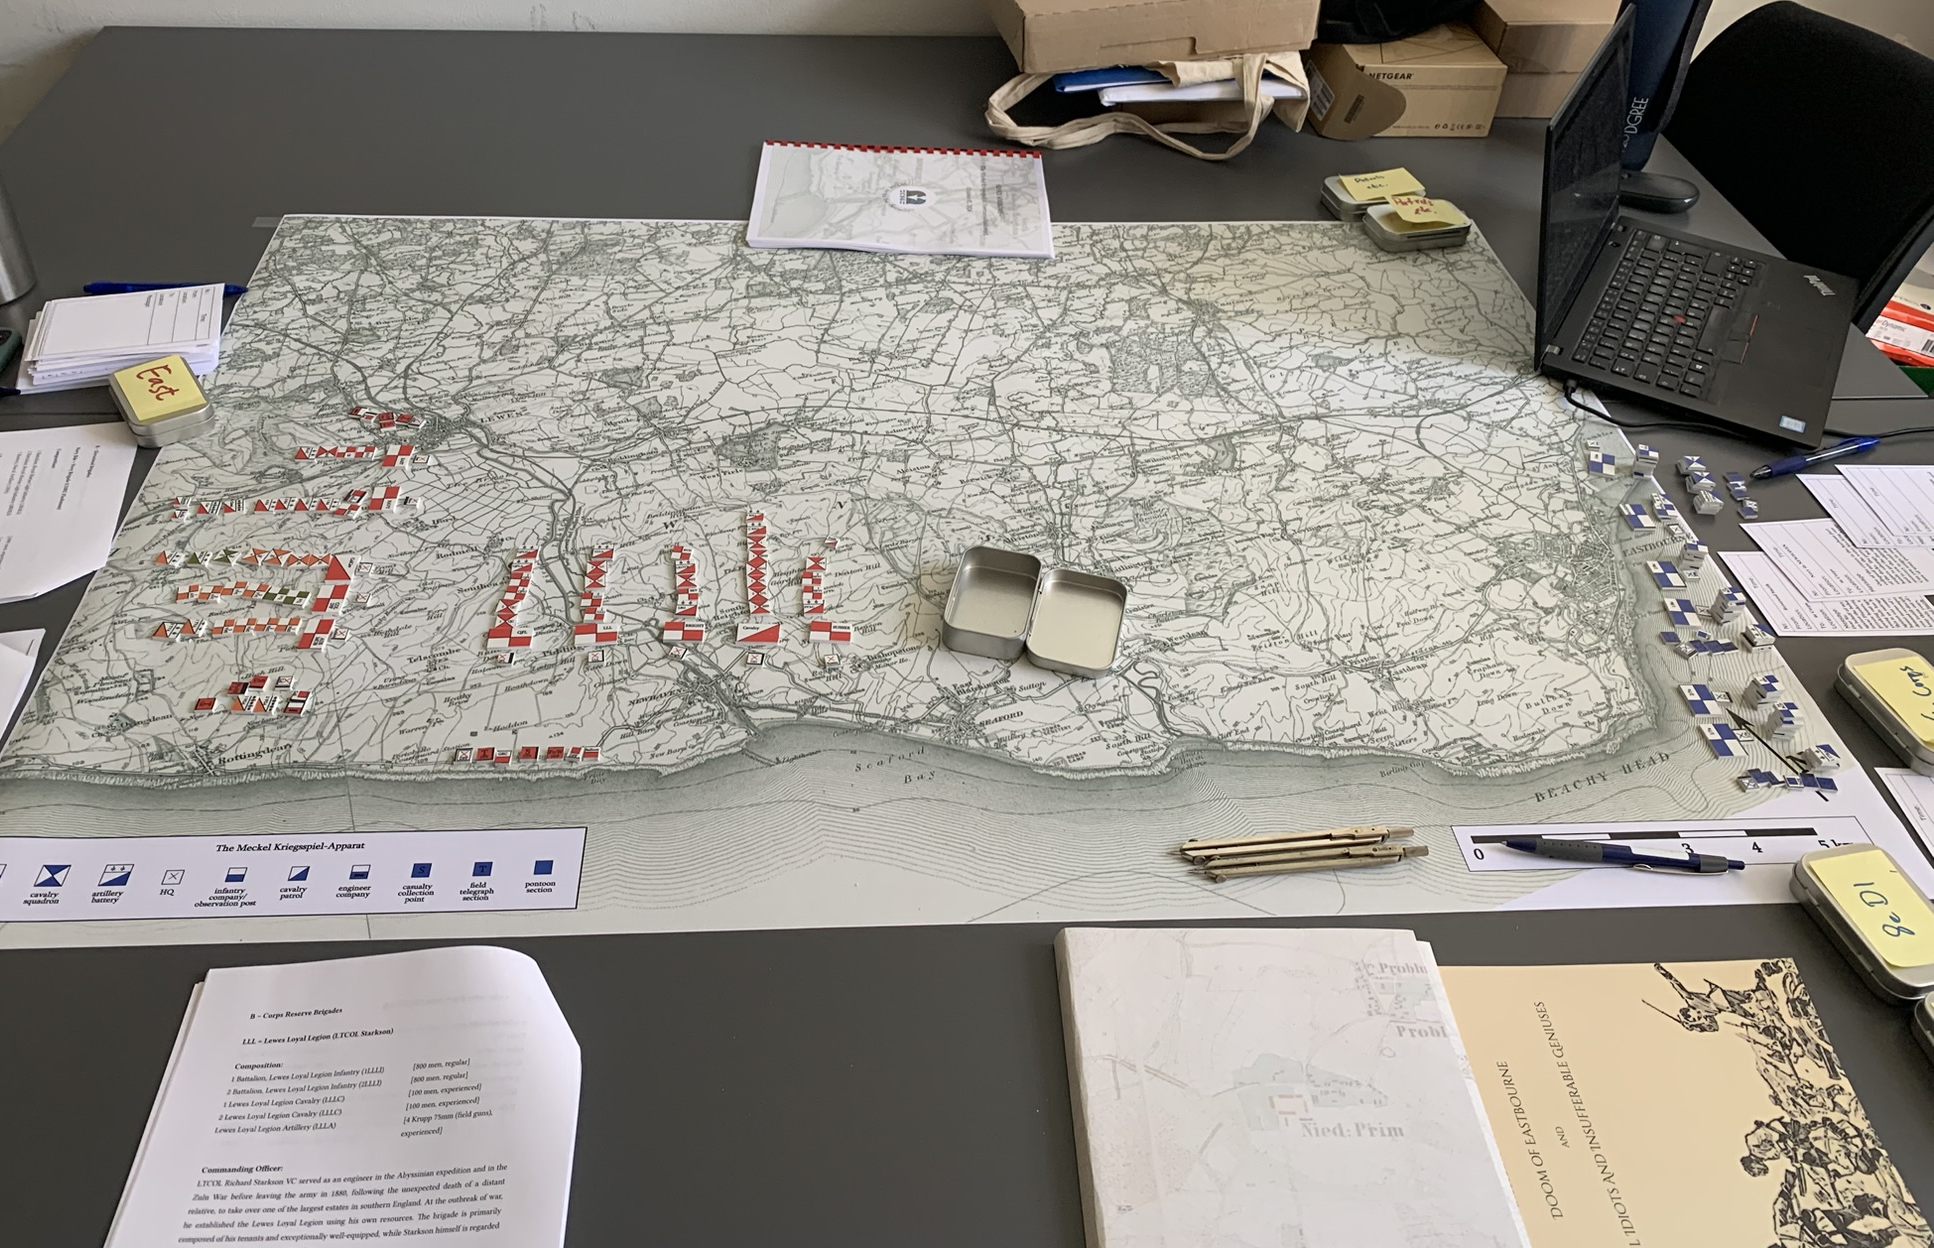 fig. 1: The facilitators’ table before the beginning of the game.
Both sides were provided with an information package offering detailed information on their mission, the overall situation and the forces at their disposal. The actual battle was supposed to take place on June 10, 1883. The events leading up to it were summarized in the blue information package as follows:
After luring most the enemy Channel Squadron into the Mediterranean our navy has managed to neutralize the enemy’s remaining major surface vessels in a daring torpedo boat raid during the night of June 5th/6th. In the early hours of June 6th elements of 7e and 8e Division d’Infanterie have successfully taken the towns of BRIGHTON and NEWHAVEN in Sussex in a surprise attack. With the enemy navy mostly away in the Mediterranean and most of the professional army dispersed around the country or serving in the colonies, the defence of southern England is left mostly to local volunteer units of little quality. Paris intends to take advantage of this current window of opportunity. Armée du Nord has been formed out of three full army corps; it will march on LONDON and force a decision, i.e. a peace on highly favourable terms, before the enemy is able to concentrate his land forces sufficiently to oppose us or threaten our seaward laines of communication. To achieve that objective LONDON must be reached in force by D+20 (26th of June). It is needless to say that maintaining momentum and initiative is of utmost importance for this operation to succeed.
The red information package had a slightly different version:
After luring most the Channel Squadron into the Mediterranean, the enemy has managed to neutralize the remaining major surface vessels in a daring torpedo boat raid during the night of June 5th/6th. In the early hours of June 6th, the enemy then successfully landed on the SUSSEX coast, taking NEWHAVEN and SEAFORD in the process. Currently, the enemy is amassing forces within the newly won bridgehead around these two towns. While an army corps is currently in the process of being concentrated around LONDON and ships are being called back from the Mediterranean, our forces available for the next days in the Sussex area are quite limited, consisting mostly of local militia and volunteer units, supported by elements of a mixed Australian-Canadian division put together from various colonial units that were only recently disembarked in LIVERPOOL. We are quite certain the enemy’s intent is to march on LONDON in strength as soon as possible to force a decision before we are able to move sufficient reinforcements into theatre.
The French mission was to break out of the bridgehead along two axes: Lewes had to be either taken or controlled in order to allow follow-on forces to push northwards, while Eastbourne had to be neutralized in order to remove a threat against French logistics; Royal Navy torpedo boats were operating from there and had already managed to sink French transports. The British mission was not merely to defend Lewes and Eastbourne. Instead, they were to attack Newhaven and to negate the use of the harbour to the enemy, either by outright occupying the town or using artillery to command the harbour.
Unfortunately - for both teams - each were led to believe their opponent actually had a defensive mission. The French did not know about the British concentration of forces for the attack on Newhaven, and according to the British intelligence estimate any French attempt to breaking out of the bridgehead was still some time into the future. As a result, a chaotic and messy meeting engagement developed.
II. Force Composition.
On the French side, 4e Corps had two infantry divisions on strength (the 7e Division d’Infanterie and the 8e Division d’Infanterie), with 13 battalions of infantry and four batteries of 90mm field guns each. In addition, an additional infantry brigade of six battalions (104e Brigade d’Infanterie), four batteries of heavy artillery and two regiments of experienced cavalry were at the disposal of the corps HQ. A naval brigade of three battalions and two batteries of 37mm guns was deployed in Newhaven and Seaford, guarding the bridgehead itself. The overall strength of 4e Corps was 33,500 foot, 960 horse and 68 guns (16 heavy).
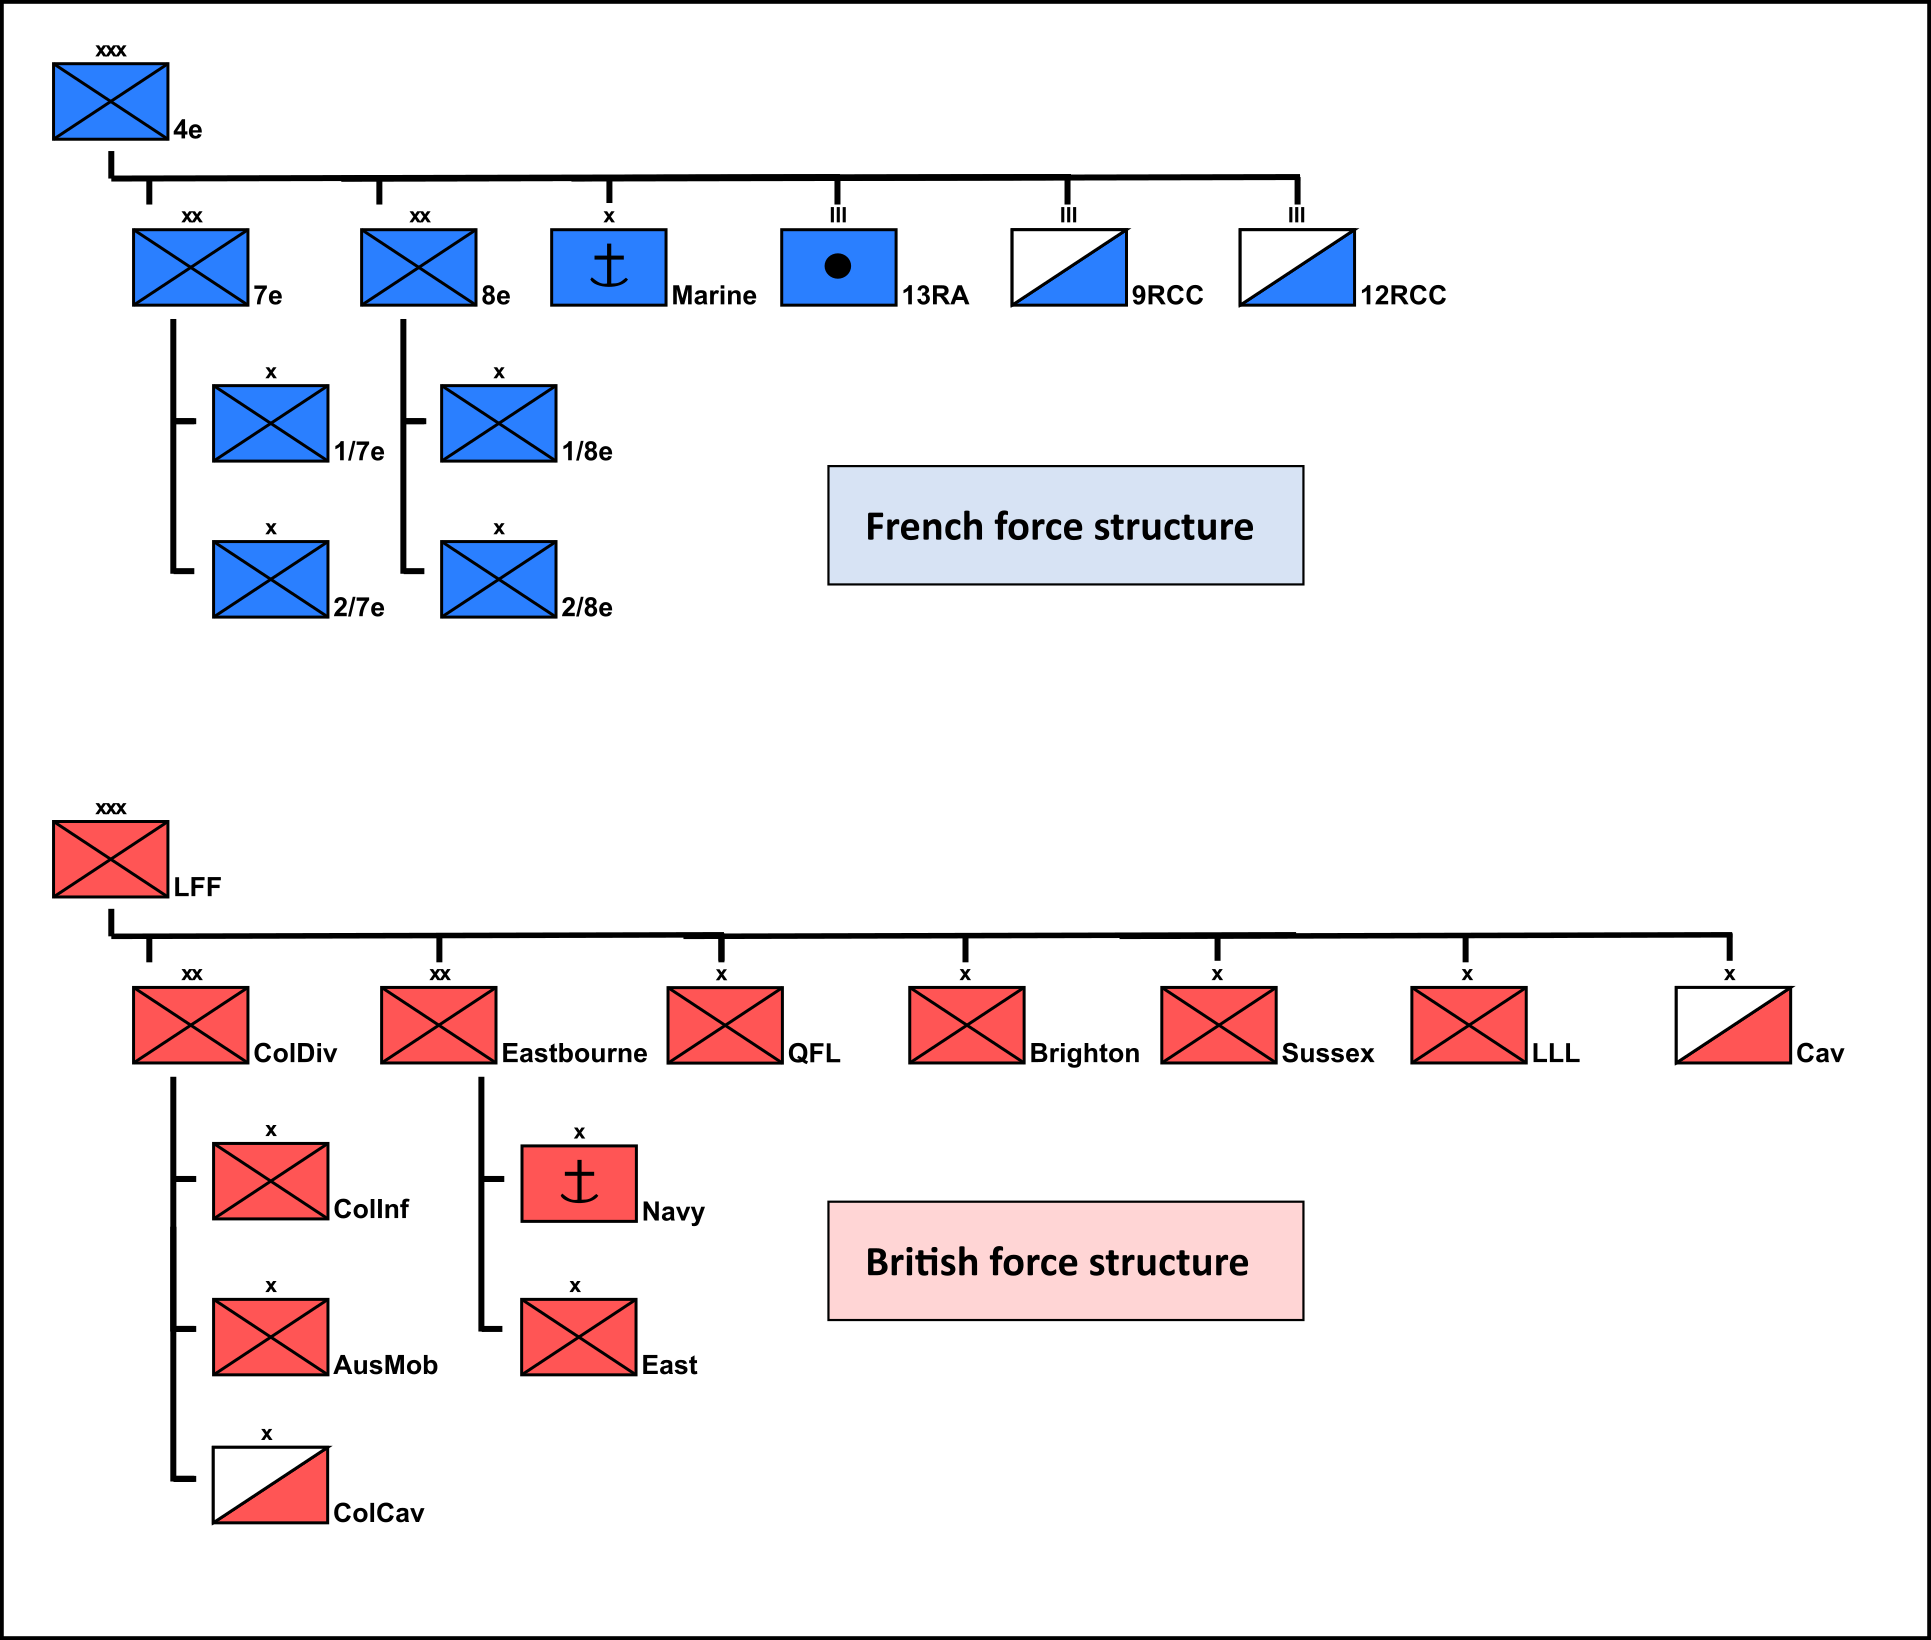 fig. 2: Force composition.
On the British side, a makeshift corps called Downs Field Force had been thrown together for the planned attack on Newhaven. It was composed of a Colonial Division of three brigades, an infantry brigade of four Australian and two Canadian battalions, a cavalry brigade of four Australian squadrons, one Canadian squadron and one battery horse artillery each from Australia and Canada, as well as an experimental mobile brigade composed of four battalions of mounted infantry and two batteries of horse artillery, all from Australia. The second division, Eastbourne Division, was composed of a weak volunteer brigade and a naval brigade that was heavy in artillery (including two batteries of 6in guns), but included only two battalions of infantry. In addition, corps HQ had further four volunteer brigades of different capabilities as well as one experienced cavalry brigade supported by two batteries of horse artillery on strength. In total, the Downs Field Force could muster 14,800 foot, 1,800 horse and 89 guns (16 heavy).
III. The action.
Both sides had missions that included significant challenges. The French had a significant superiority in infantry and better artillery, but had to attack on two axes against targets widely separated from each other. The British could converge onto a single target, but had to do so from different directions and were unsure about the intentions of the enemy. On top of that there was little time to properly prepare the plan and digest all information provided by the facilitators, which was intentional. Despite these challenges, both sides came up with good plans.
The French decided to push 8e Division against Lewes, while 7e Division was to attack Eastbourne. In order to support the attack on Lewes, which was the main effort, four batteries of heavy artillery were attached to 7e Division, giving it a powerful instrument with which to pummel any British opposition. Meanwhile, 104e Brigade was to be kept in reserve, either to reinforce any stalled advance or to protect the beachhead.
The British also had their two divisions attack; Colonial division was to move southwards from Lewes, while Eastbourne Division was to attack from Eastbourne westwards. The remaining brigades were initially kept under direct corps HQ control and tasked with pushing southwards west of the Cuckmere valley. The intention was to draw out the supposed defenders of the bridgehead to make it easier for the attacking divisions to get into the flanks of the enemy. While the Eastbourne Division attacked with two brigades roughly abreast, the Colonial Division sent its infantry brigade southwards on the western bank of the river Ouse; at the same time, the mobile brigade, supported by the cavalry brigade, was to push southwards to the sea, then turn eastwards and attack Newhaven.
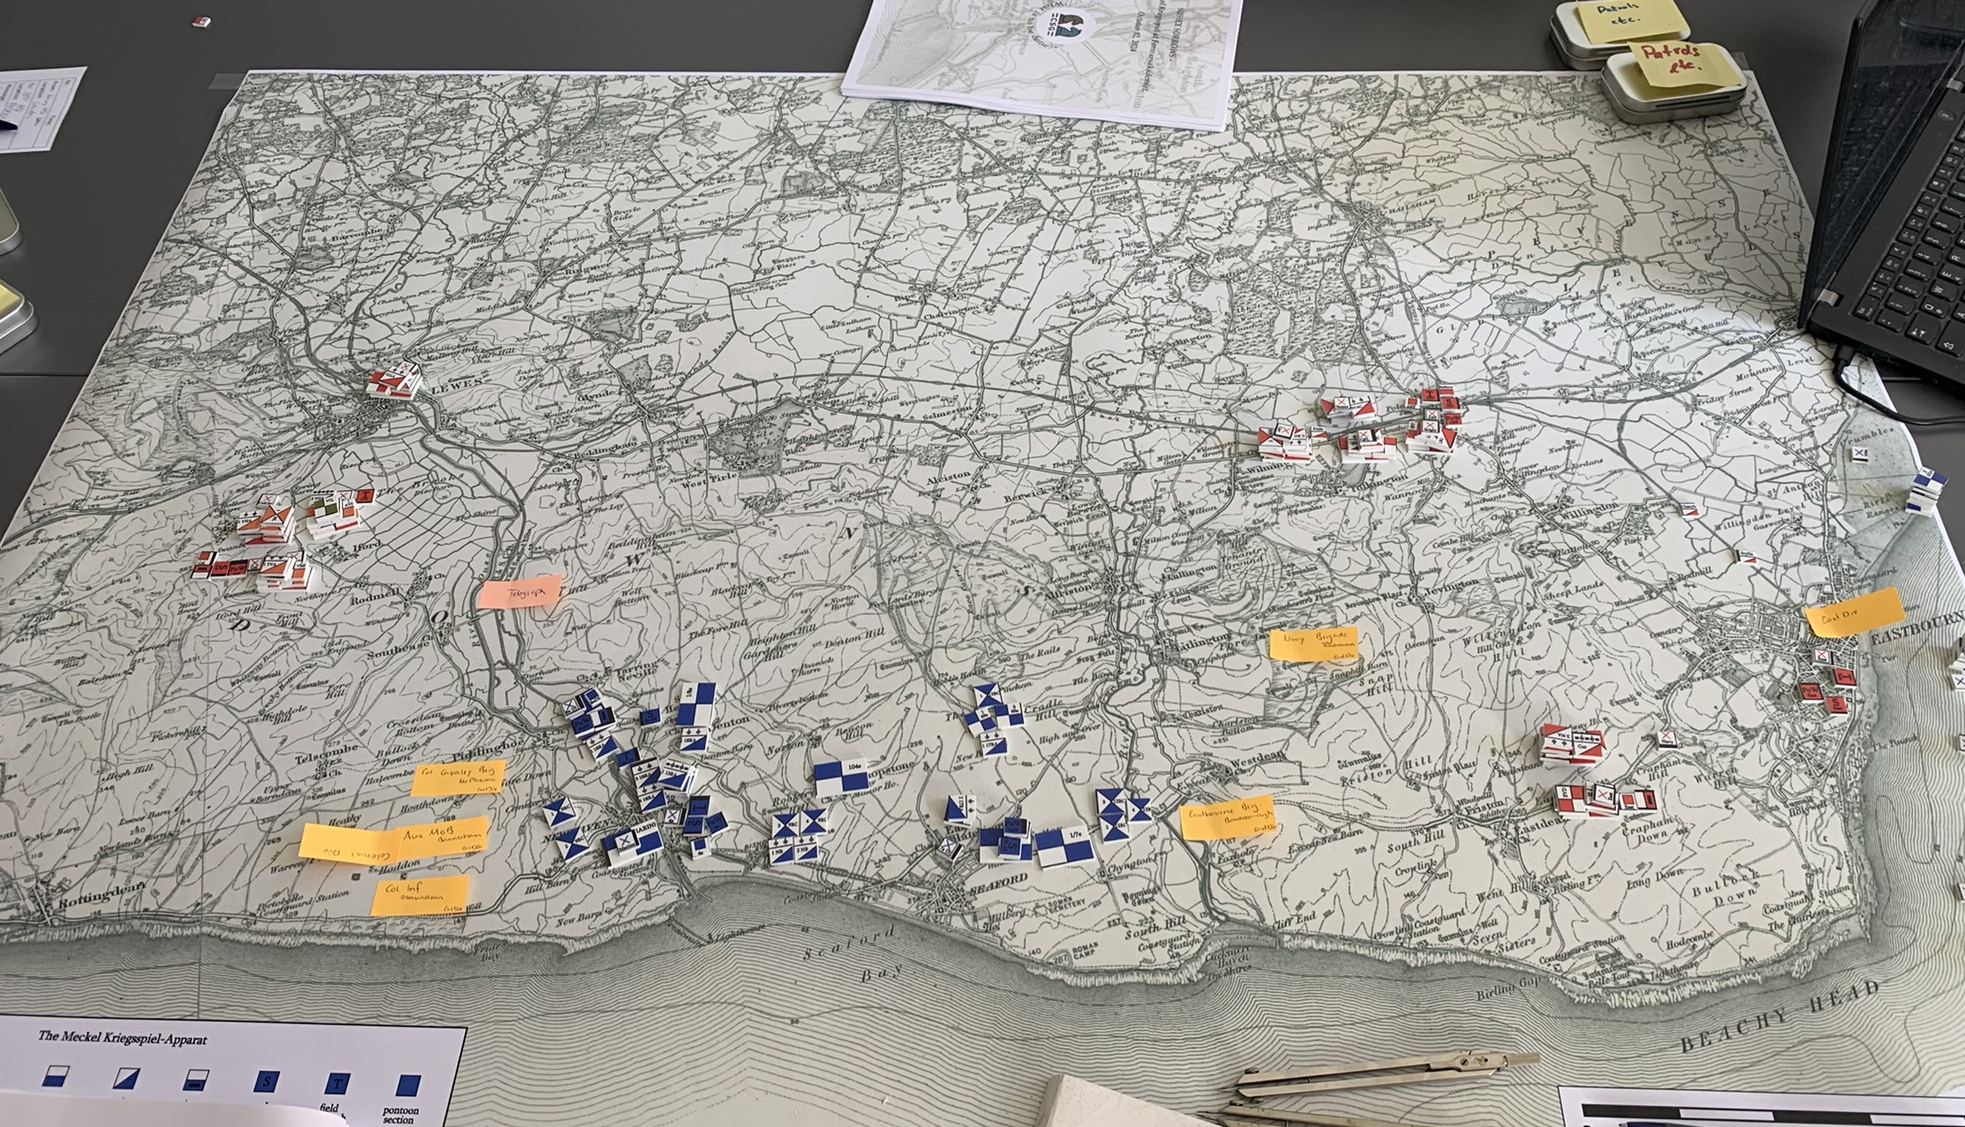 fig. 3: Initial dispositions.
Initial dispositions reflected the plans, as can be seen above. The two French divisions were concentrated on the starting points of their advance, while the British divisions started south of Lewes and west of Eastbourne, while the brigades under the control of the British corps HQ were concentrated near Polegate.
At first, the plans on both sides seemed to work. The divisions started to move, and on both sides of the Ouse river Colonial Division’s infantry brigade and one of 8e Division’s brigades moved towards each other. At the same time, the other brigade of 8e Division was moving northwards, where the British left Lewes almost unguarded; only a weak volunteer brigade was in the way of the French brigade.
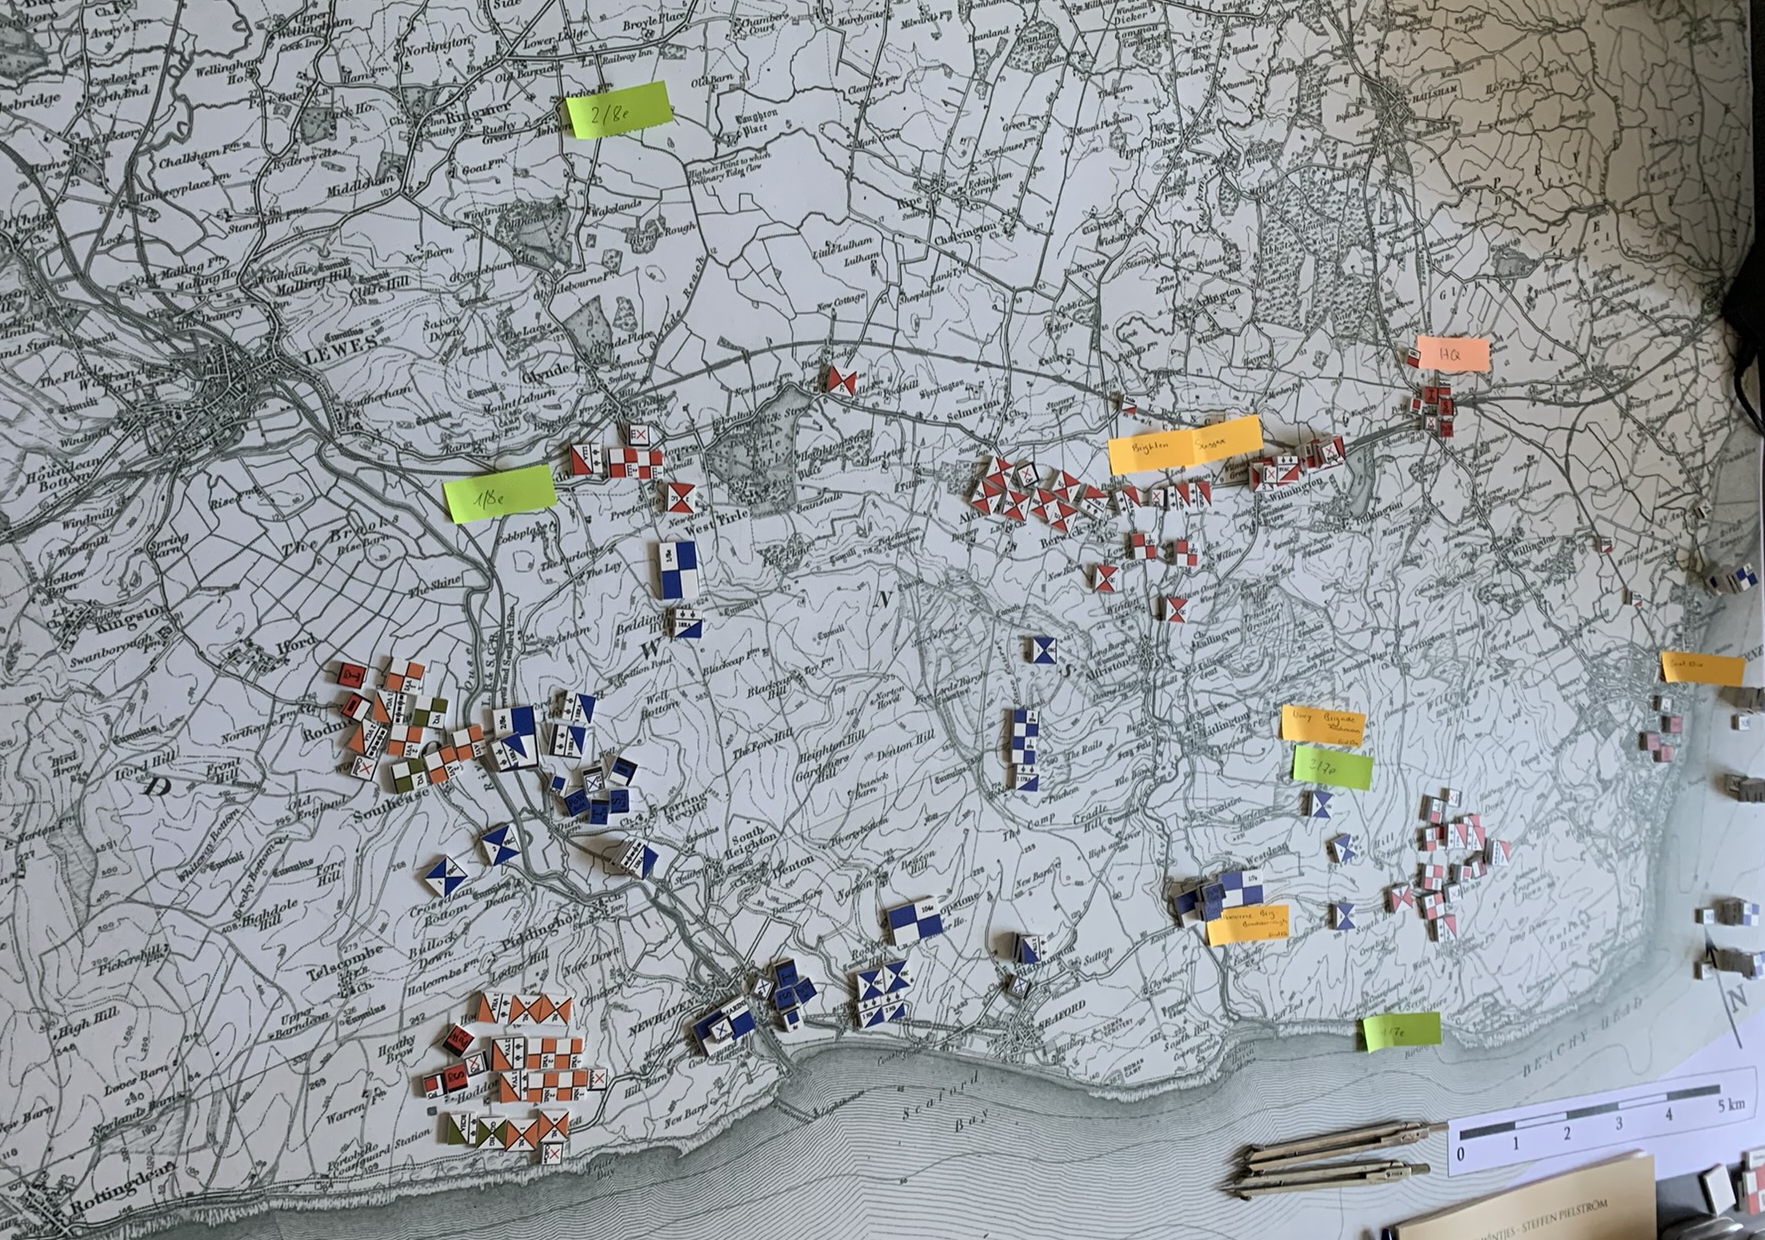 fig. 4: Initial fighting I.
After about 45 minutes, things started to go off the rails on both sides. As can be seen above, 7e Division made contact with Colonial Division’s infantry brigade near the only bridge across the Ouse between Newhaven and Lewes at Southease. An overzealous Australian brigade commander started a misguided attempt at forcing the crossing resulting in significant losses and the need to pull back into the direction of Lewes. This French success, however, drew French attention away from the mounted infantry brigade which, supported by the colonial cavalry, was at the same time pushing towards the sea before wheeling in eastwards. It found a key ridge immediately to the West of Newhaven unoccupied and prepared to take it.
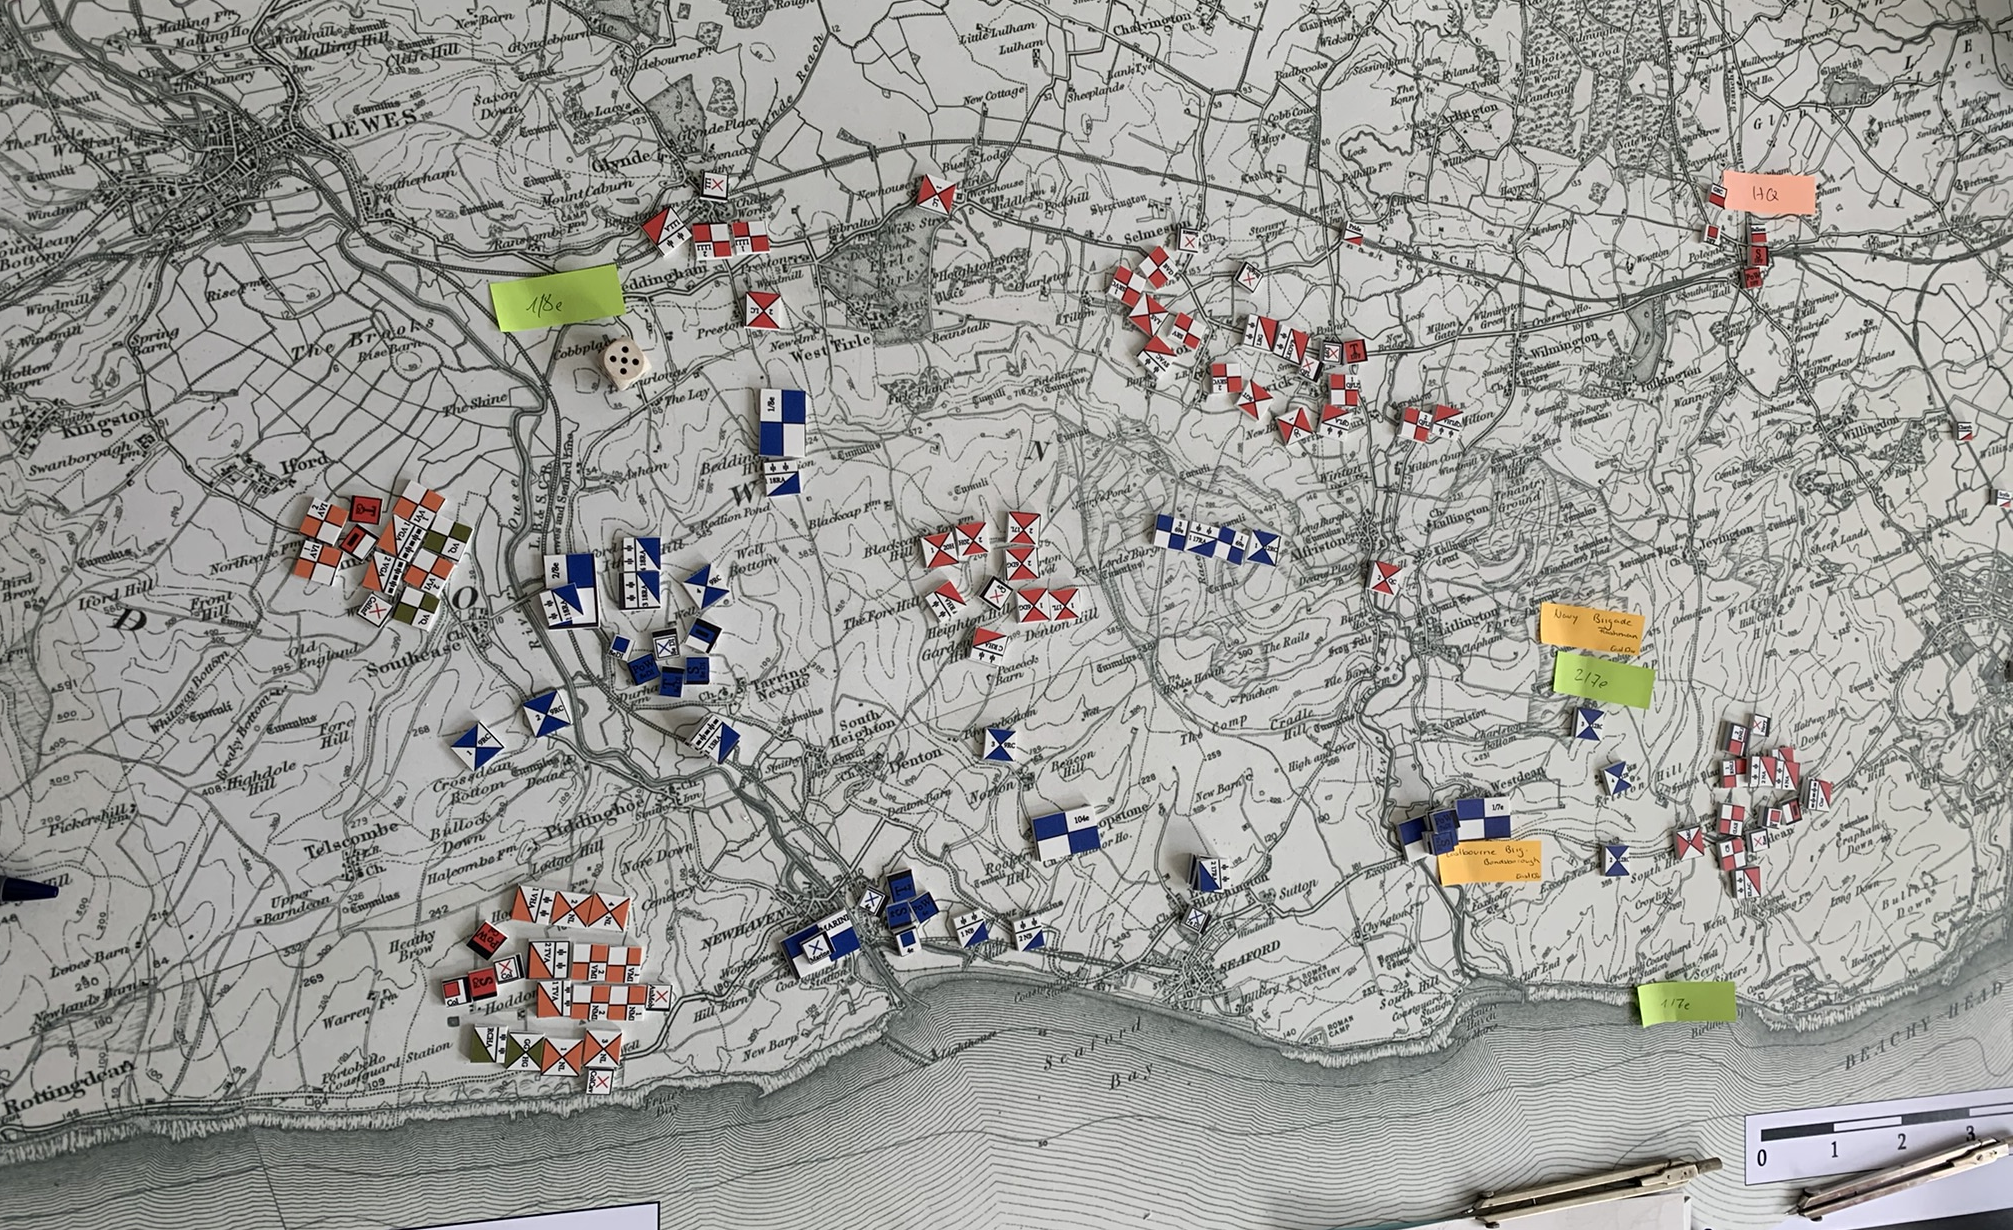 fig. 5: Initial fighting II.
About a quarter of an hour later the crack British cavalry brigade controlled by British corps HQ had made its way up the hills west of the Cuckmere river valley; evading a strong French infantry force it moved to a position atop Heighton Hill, from which its batteries started a desultory fire at targets inside the French bridgehead. French corps HQ reacted with admirable determination and started to set 104e brigade into motion. At the same time, having realized that not occupying the heights to the west of Newhaven was a serious ommission, French corps HQ ordered the naval brigade to occupy position atop these heights. The French arrived at about the same time as the British, and after some vicious close-range combat, the Battle of Cemetery Hill was won by the British.
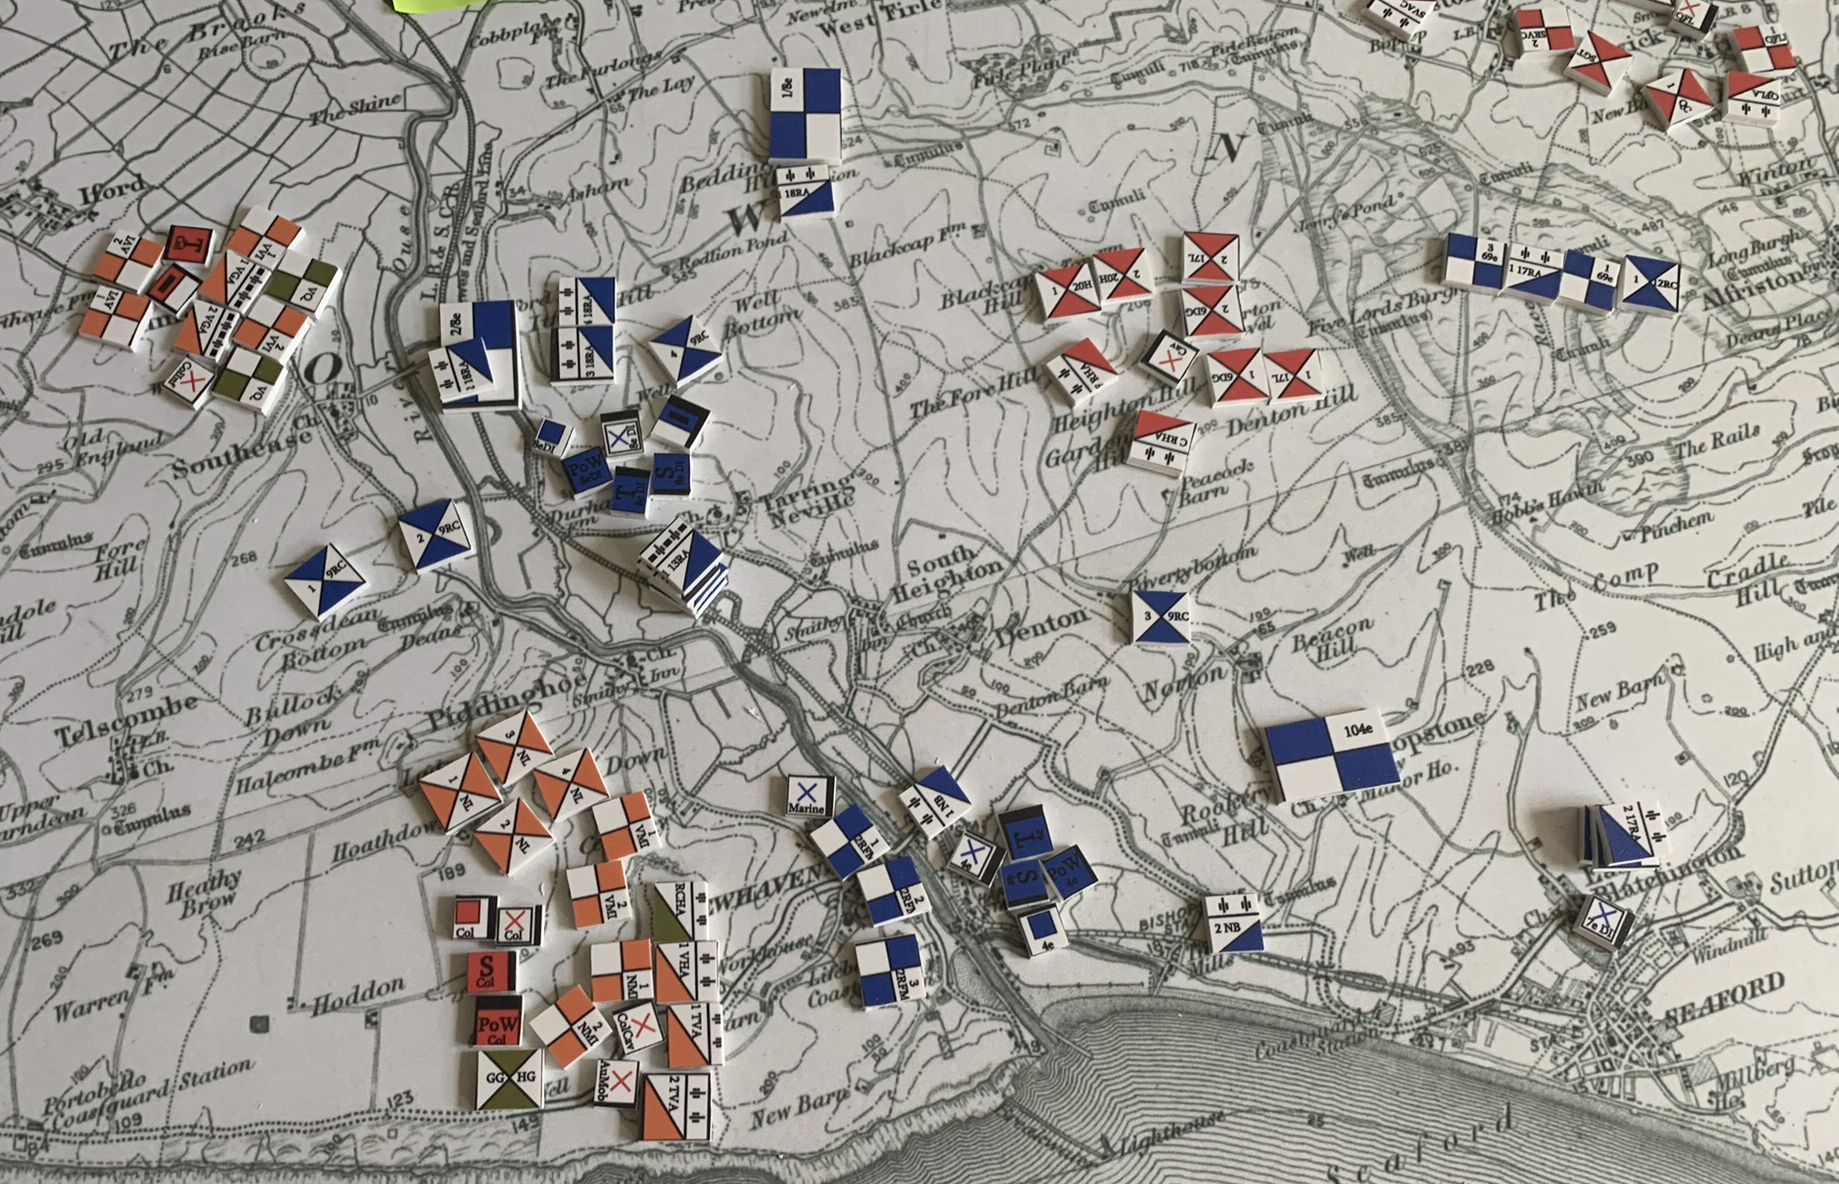 fig. 6: Situation after the fall of Cemetery Hill.
The French were facing a serious challenge now. With four British batteries atop the hill both the city of Newhaven and the harbour area were at the mercy of British artillery. French corps HQ quickly realized their predicament, relocated to Seaford and started to gather forces for a counterattack. But first the enemy cavalry on Heighton Hill had to go.
At about the same time, further to the northwest, the first brigade of 8e Division was making good progress towards Lewes. Only a weak volunteer brigade was between the French and their objective, and after putting their artillery support in place - the resulting grand batterie included 16 120mm pieces and 6 90mm pieces - the French infantry bulldozed its way through the British lines, causing significant casualties among the volunteers against few friendly losses. The Battle of Glynde was a great French success, in which French artillery had an important part.
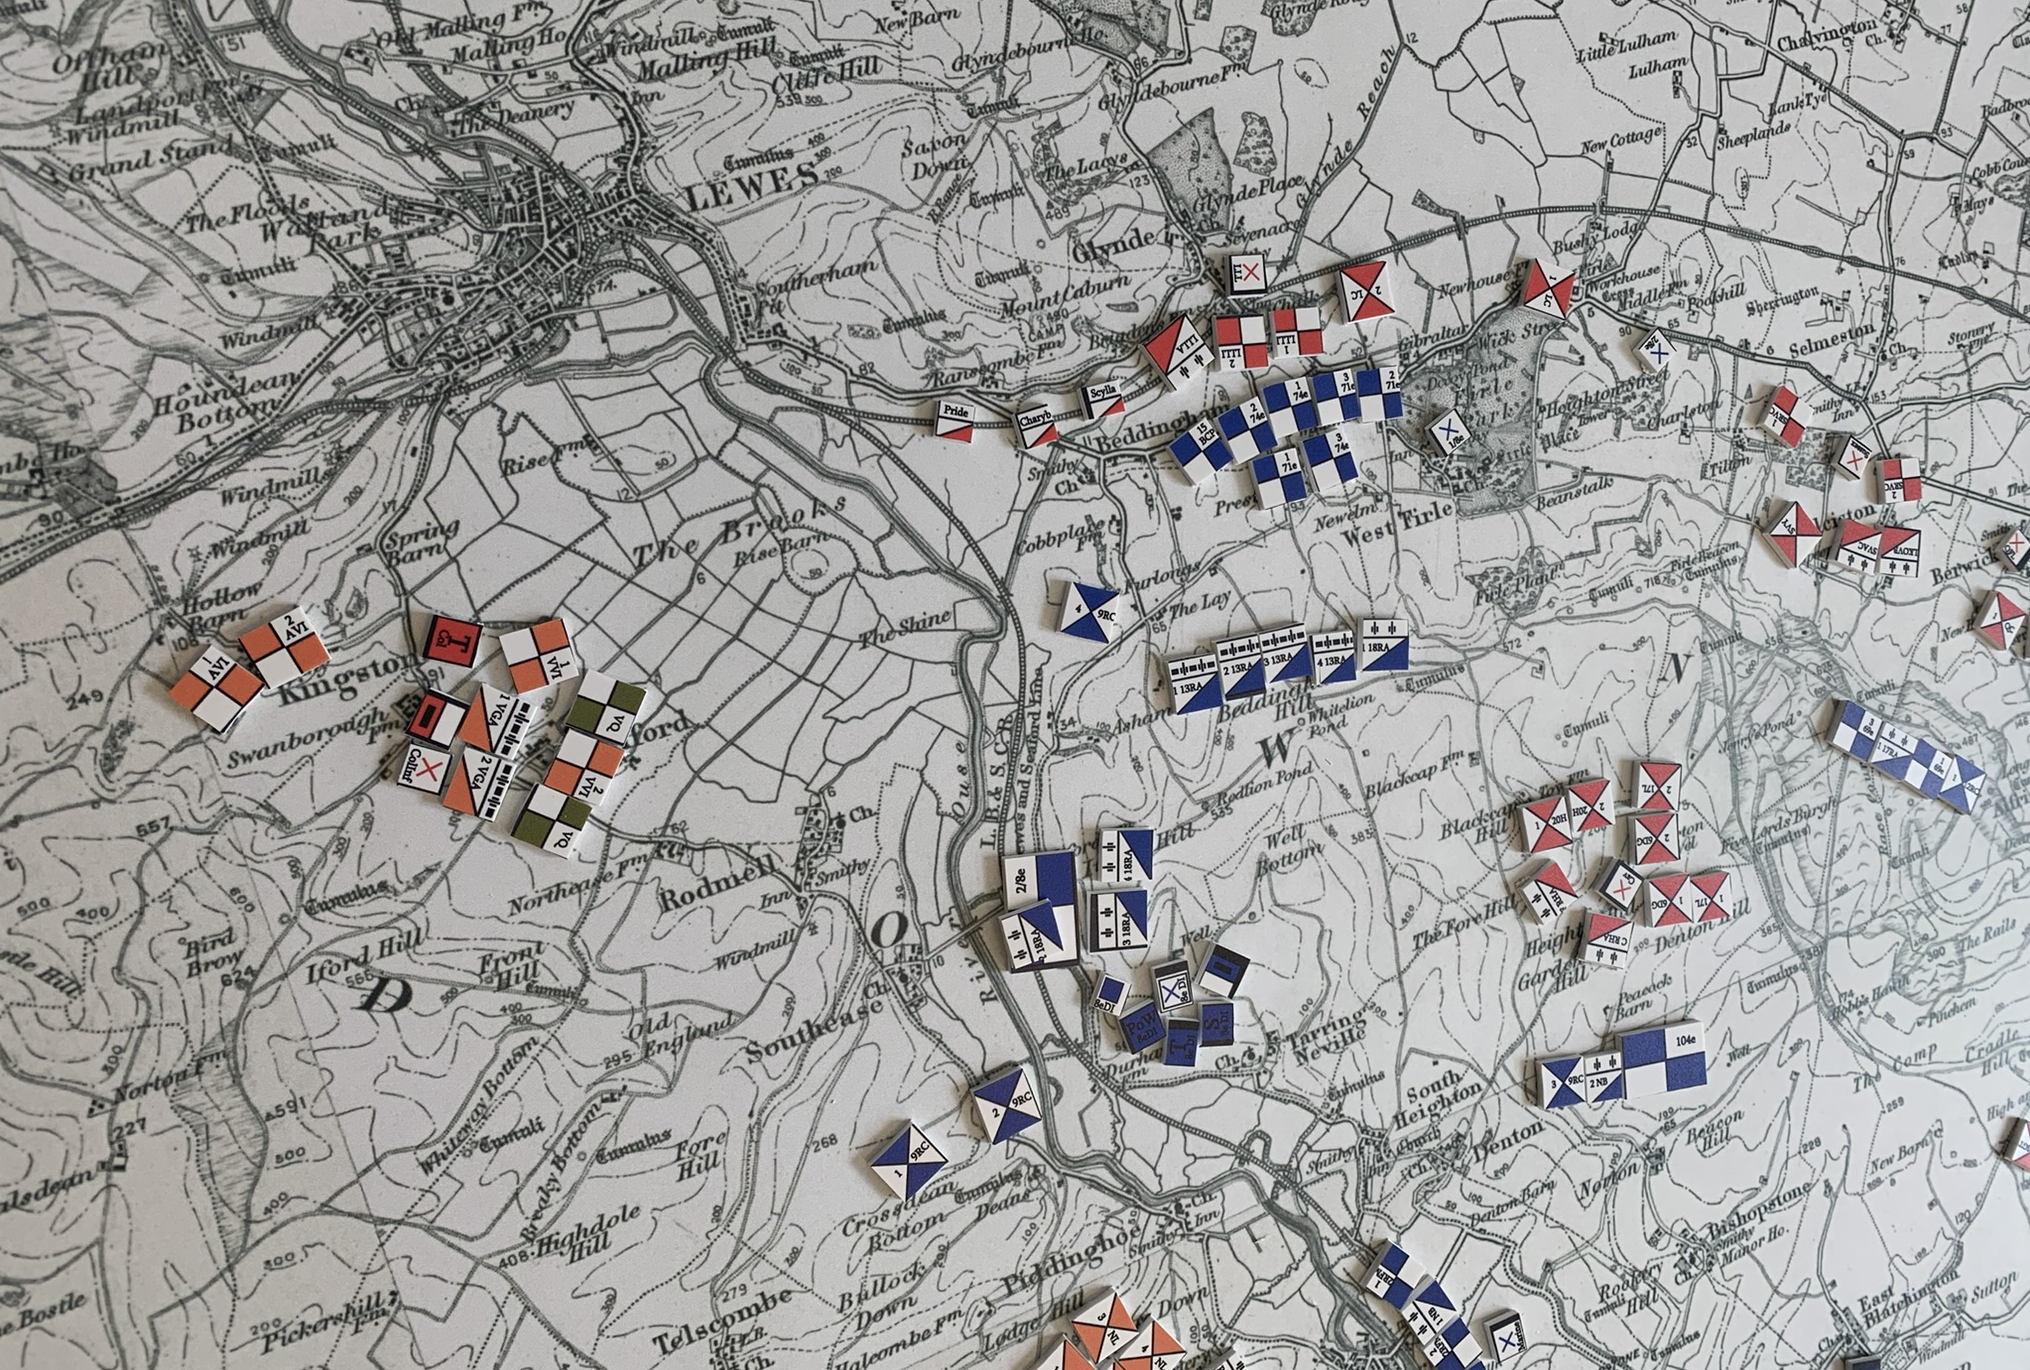 fig. 7: The battle of Glynde.
Unfortunately, for the French, elsewhere things were, while going to plan as well, having potentially disastrous effects. The British cavalry brigade at Heighton Hill pulled back as 104e Brigade began its assault - and as luck would have it, discovered the French batteries overlooking the Glynde battlefield. The French artillery stood no chance against 600 determined cavalrymen supported by two batteries of horse artillery attacking it from the rear, and it was wiped out as a result. All of a sudden, the victorious French brigade at Glynde now had enemy artillery overlooking the battlefield.
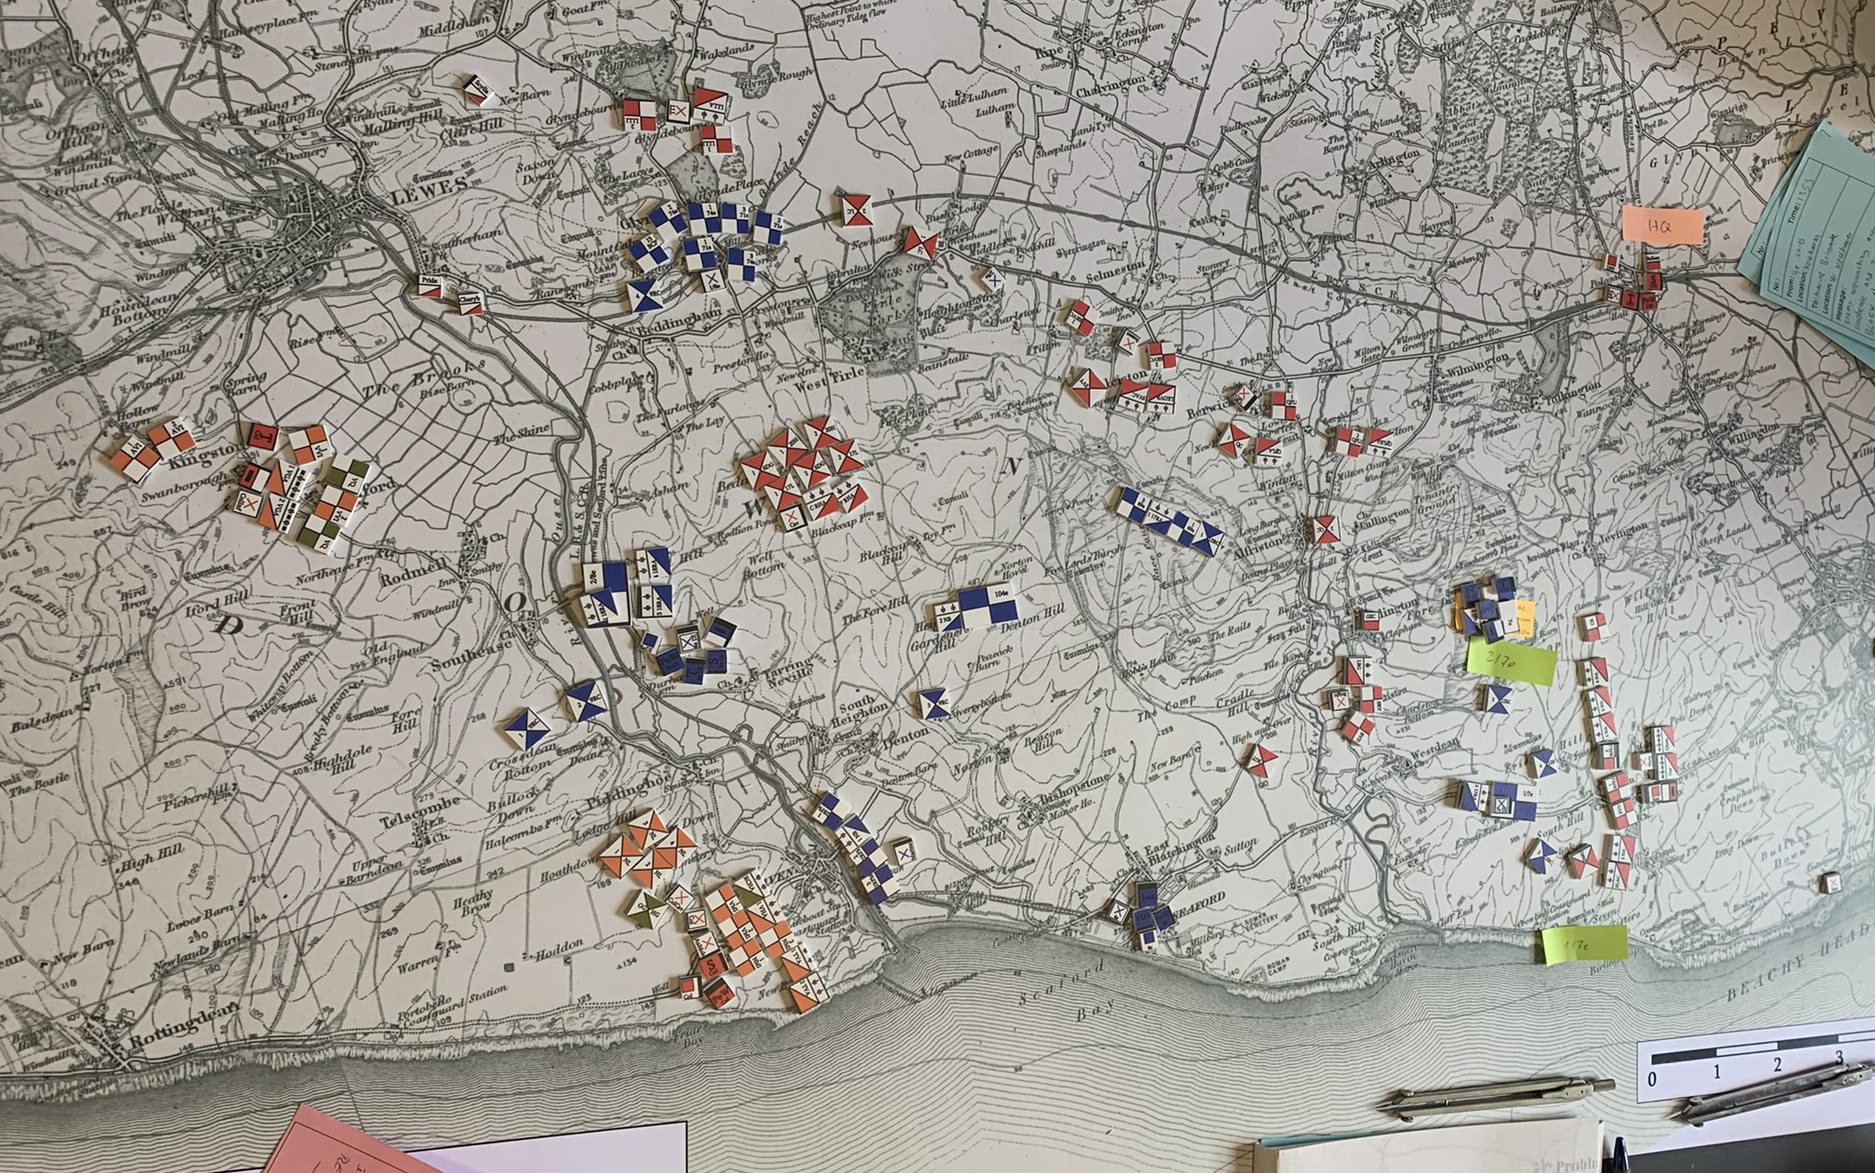 fig. 8: The situation after the Battle of Glynde and the destruction of the French artillery.
Further to the East, 7e Division had worked its way towards British positions, which were in some disarray due to the ineptitude of one brigade commander (note: both sides were provided with brief biographical notes on the brigade commanders introducing an interesting human factor to their decision making; unluckily for the British, one of Eastbourne Division’s brigade commanders was an incompetent coward). However, at the same time one of the British volunteer brigades had been ordered to push down the Cuckmere valley. This should have been noted by 104e Brigade - but that brigade was now on Heighton Hill. Thus, the British volunteer brigade effectively severed 8e Division’s link with French corps HQ.
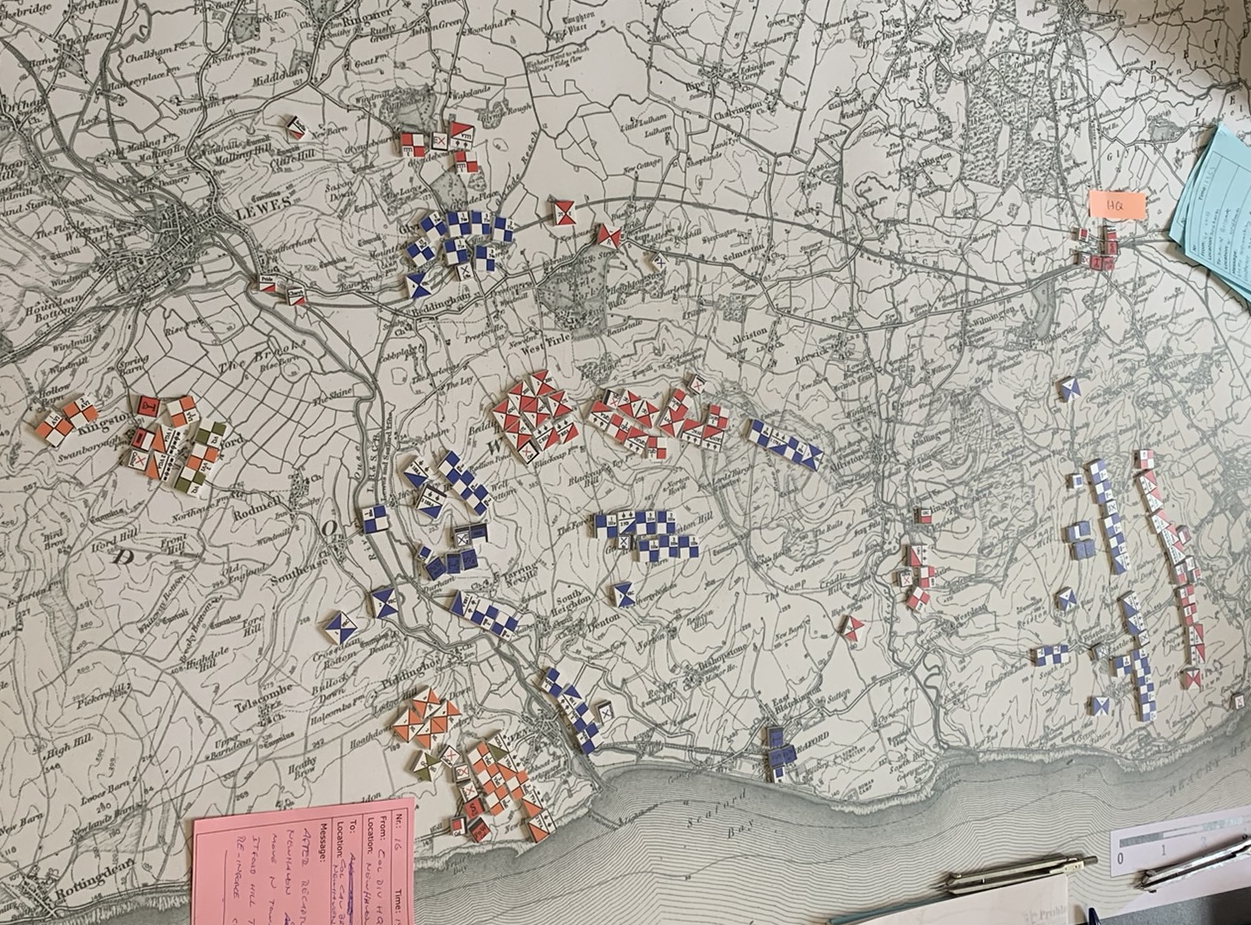 fig. 9: Overall situation when the wargame was halted.
After around 150 minutes, time was up. The situation was bad for the French, though not hopeless. In the east, 7e DI had managed to push Eastbourne Division further eastwards and was about to launch a new attack, with the odds clearly on its side. In Newhaven, French corps HQ had realized the grave danger it was in and was trying to organize a counterattack against Colonial Division. The British brigades now occupying the area north of Heighton Hill proved a major problem, but the French HQ still had considerable ressources at its disposal. On the other hand, the British had by now about 2,000 men entrenched on Cemetery Hill, supported by four batteries of artillery and a cavalry brigade; it would require a major effort to dislodge them, while at the same time covering the rear of the bridgehead and reestablishing contact with 8e Division. It was not impossible, but a daunting task nonetheless.
IV. A few final thoughts.
As is always the case with such Kriegsspiel-type wargames, their success depends to a great extent on the willingness of the participants to engage with the scenario and immerse themselves into the Kriegsspiel. In that respect, it was a great success. The teams kept the facilitators really busy, generating reports by the minute. It was also very impressive to see that on both sides commanders readily understood the necessity of keeping contact with their formations and of getting at least a semblance of situational awareness; at one point, the French corps commander decided to go on a reconnaissance mission himself, which yielded valuable results even if he was chased by British cavalry for some of his way. British Eastbourne division stoically tried to manage the antics of its incompetent brigade commander who at one point went so far as to request evacuation by torpedo boat.
In all, it was great to see CoSimG’s version of the Meckel Kriegsspiel come alive with such great commitment. Due to time contraints the scenario couldn’t be fought to the end, but hopefully there will be a future opportunity when the fate of both France’s invasion and the British realm lies in capable and committed hands again.