Liverpool - once again! Another large game of Pluie de Balles.
by Jorit Wintjes
I. Introduction
In Mai 2023 the Conflict Simulation Group ran yet another big game of Pluie de Balles at a German service university. As usual, a two-day scenario covering a French landing in Liverpool was used which differed only in detail from those from February and November last year, reports of which can be found elsewhere on this page.
The overall setup closely matched that of February this year: a French army corps of two infantry divisions and one cavalry division, supported by a naval brigade and several batteries of heavy artillery faced a British field force of three division-sized units. The French infantry divisions each had two infantry brigades and four batteries of field artillery on strength, the cavalry division two cavalry brigades and four batteries of horse artillery. Two experienced infantry brigades and a brigade of heavy cavalry were available as reinforcements on day two. The three British formations included an infantry division consisting of three infantry brigades, a mobile division including a cavalry brigade and a brigade of mobile infantry, and an ad-hoc division formed around a powerful naval brigade to which a number of smaller volunteer formations were attached. A powerful cavalry brigade and several smaller infantry brigades were scheduled to arrive on the second day. In addition, the French had an immobilised ironclad providing fire support, while British command had several armoured trains and railway guns mounting various heavy artillery pieces at its disposal.
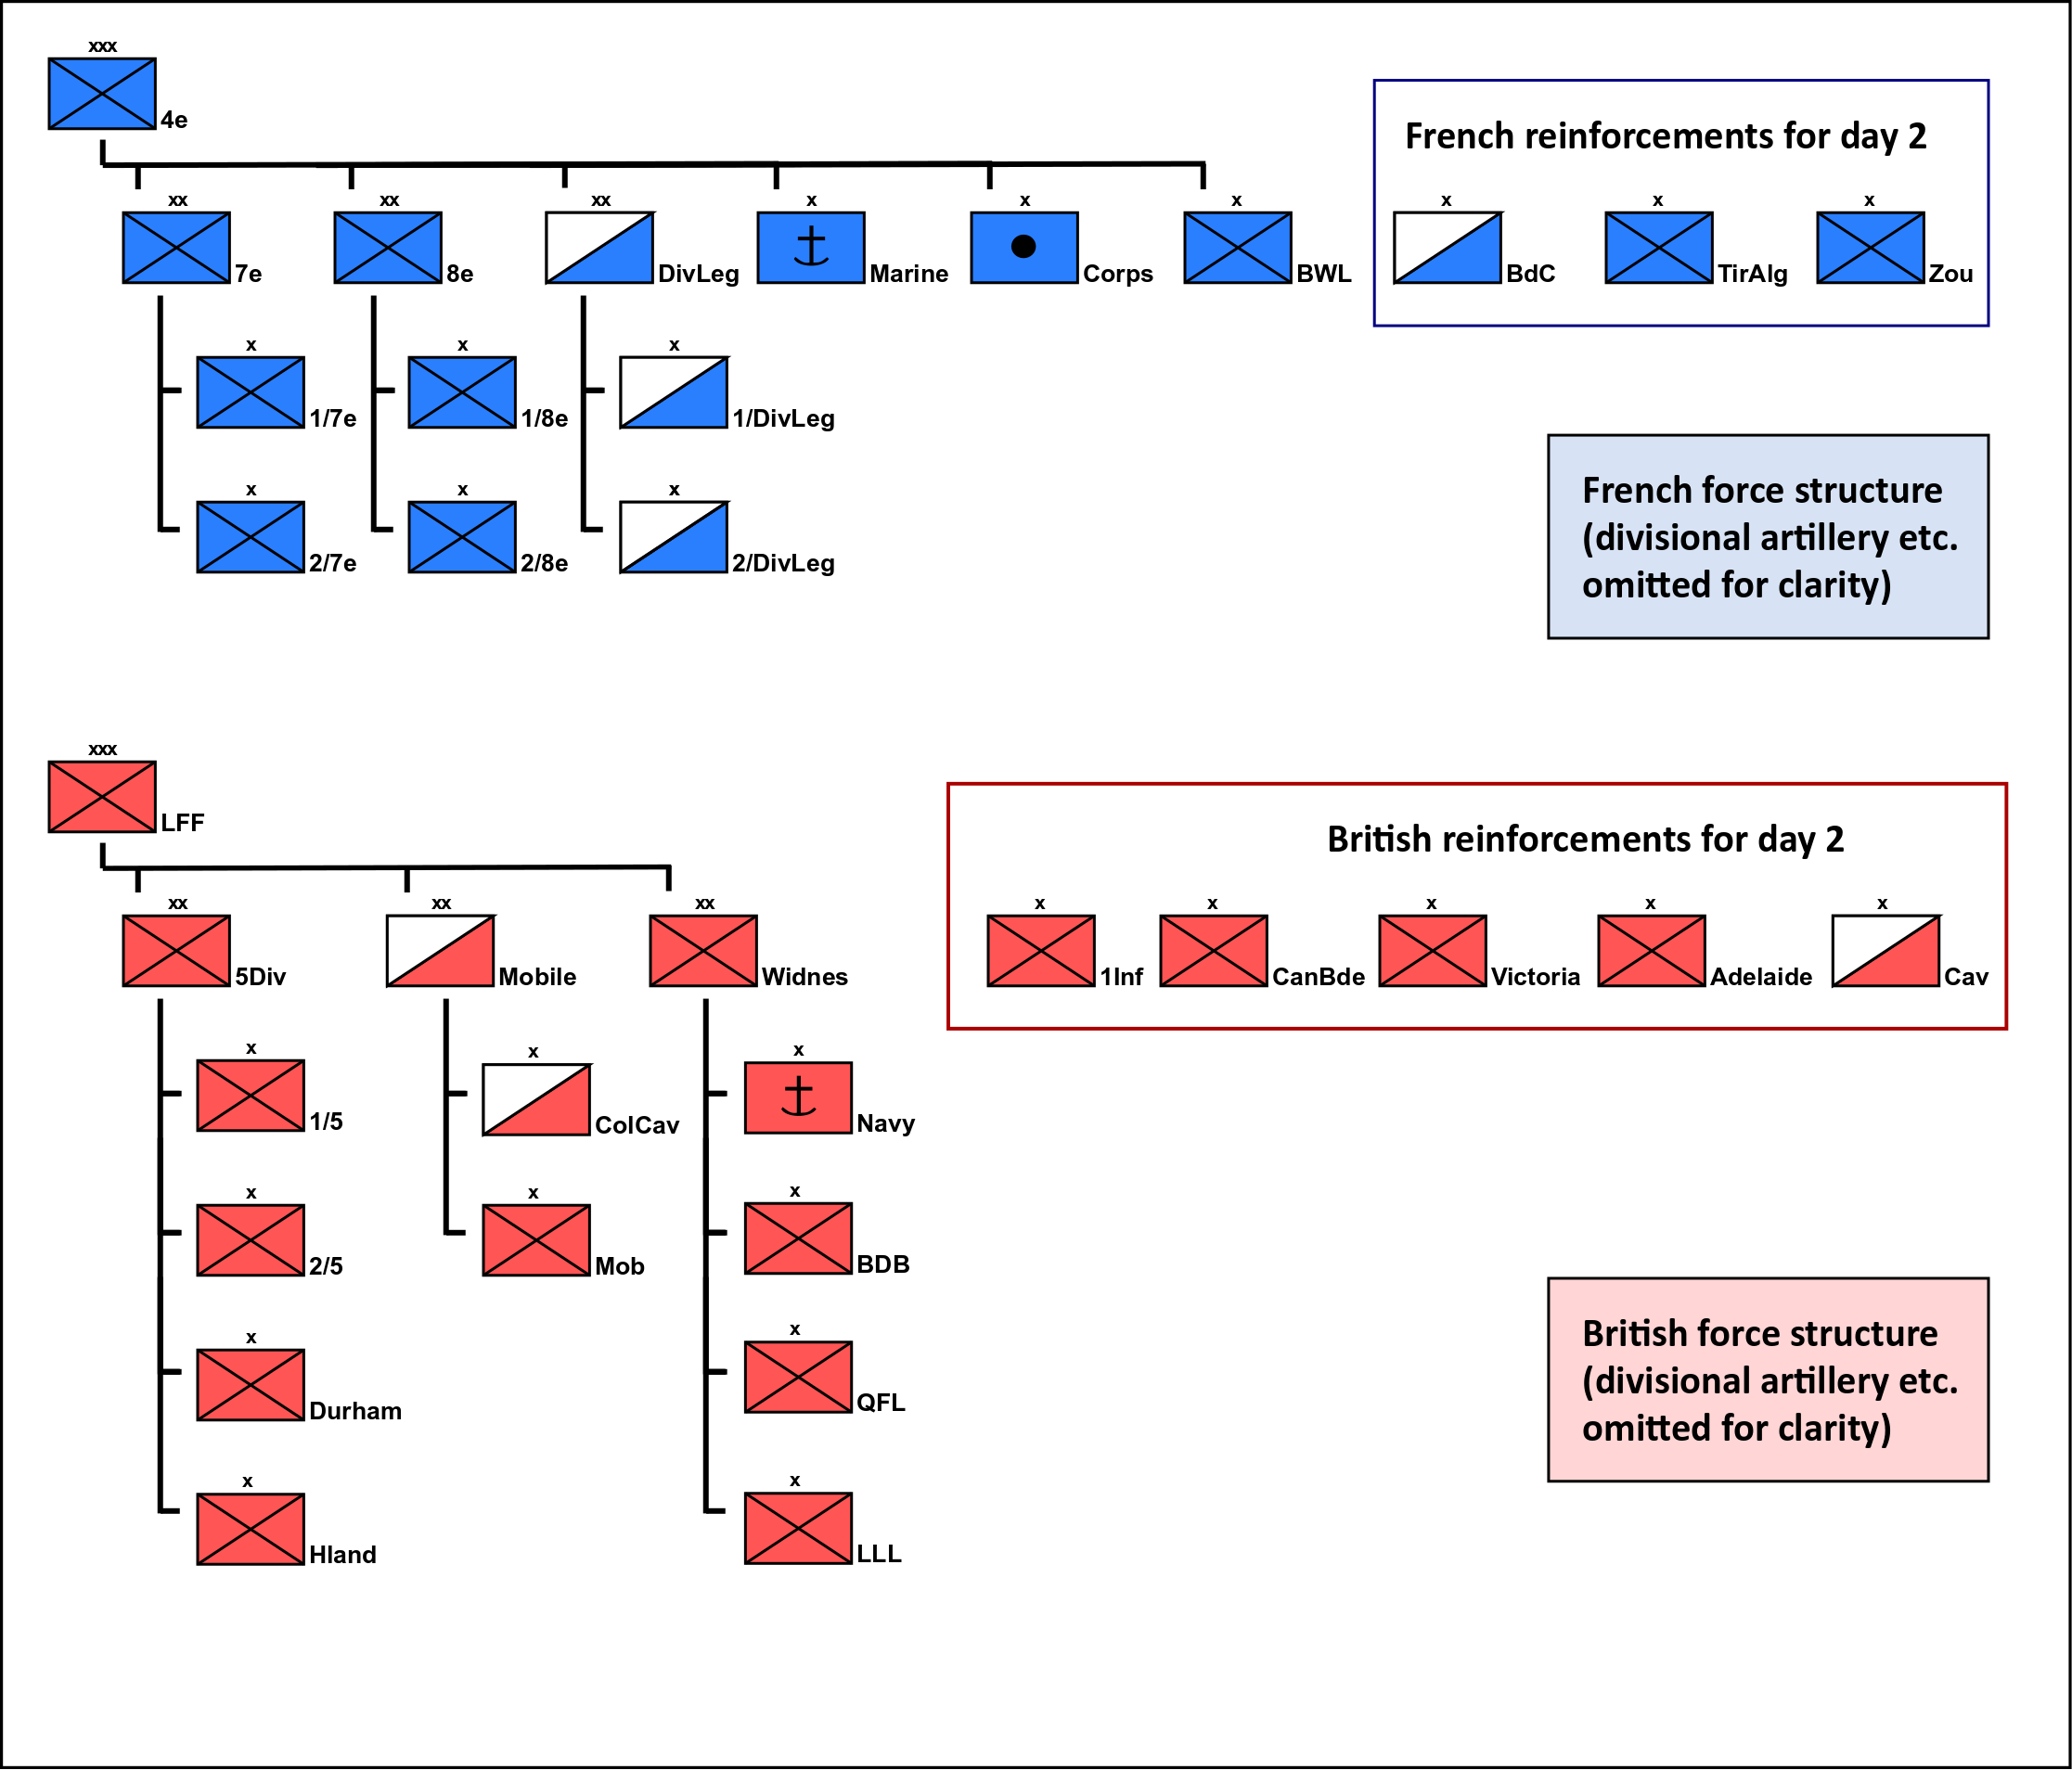
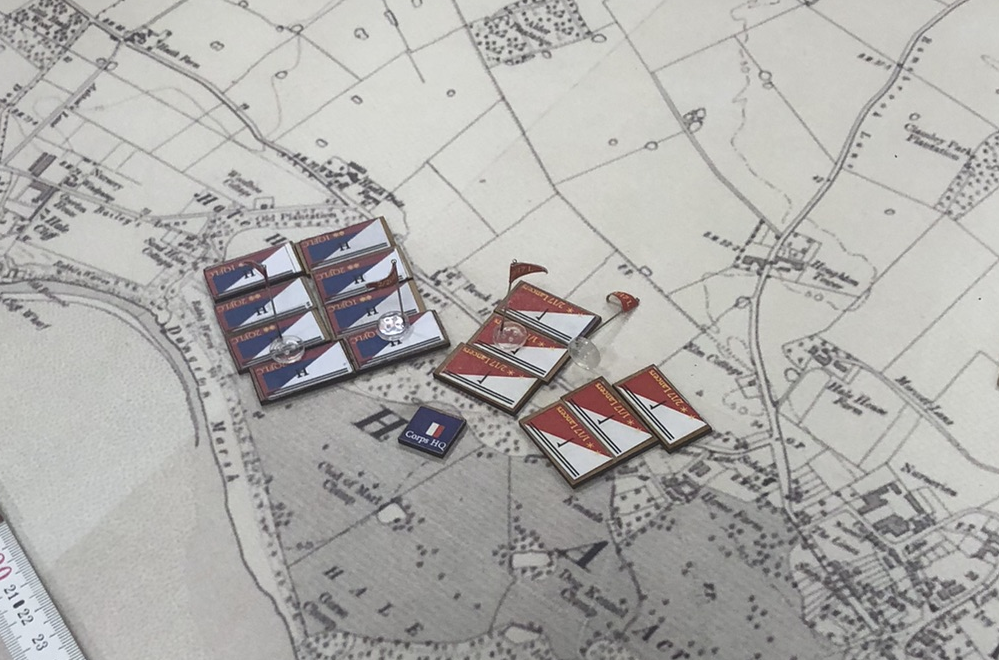
An overview over French and British force structures.
As usual with this scenario the arrival of the French reinforcements was tied to the French not only controlling the harbour of Liverpool itself but also the Wirral peninsula’s coastline opposite the harbour. While the French had failed to hold this key ground in November, thus losing their reinforcements, they had stuck to it in February - only to lose again, and badly. The question everybody - well, not everybody, but certainly the Conflict Simulation Group - was asking itself was whether the French would manage to defeat the British or whether the latter would score the third victory in a row. Well, observers were in for a surprise, or rather several of them…
II. Everybody has a plan until they get punched in the face!
Again the British plan was fairly simple. On the Wirral Peninsula, 5 Division was supposed to ram straight into Birkenhead regardless of casualties in order to tie down the defenders, while the mobile division was to wheel around Birkenhead and to seize the crucial ground near New Brighton as quickly as possible. East of Liverpool, holding a line from Runcorn to Rainhill was the main objective of the ragtag British force which was badly outnummbered, with less than 4,000 infantry facing a force of more than 20,000 infantry.
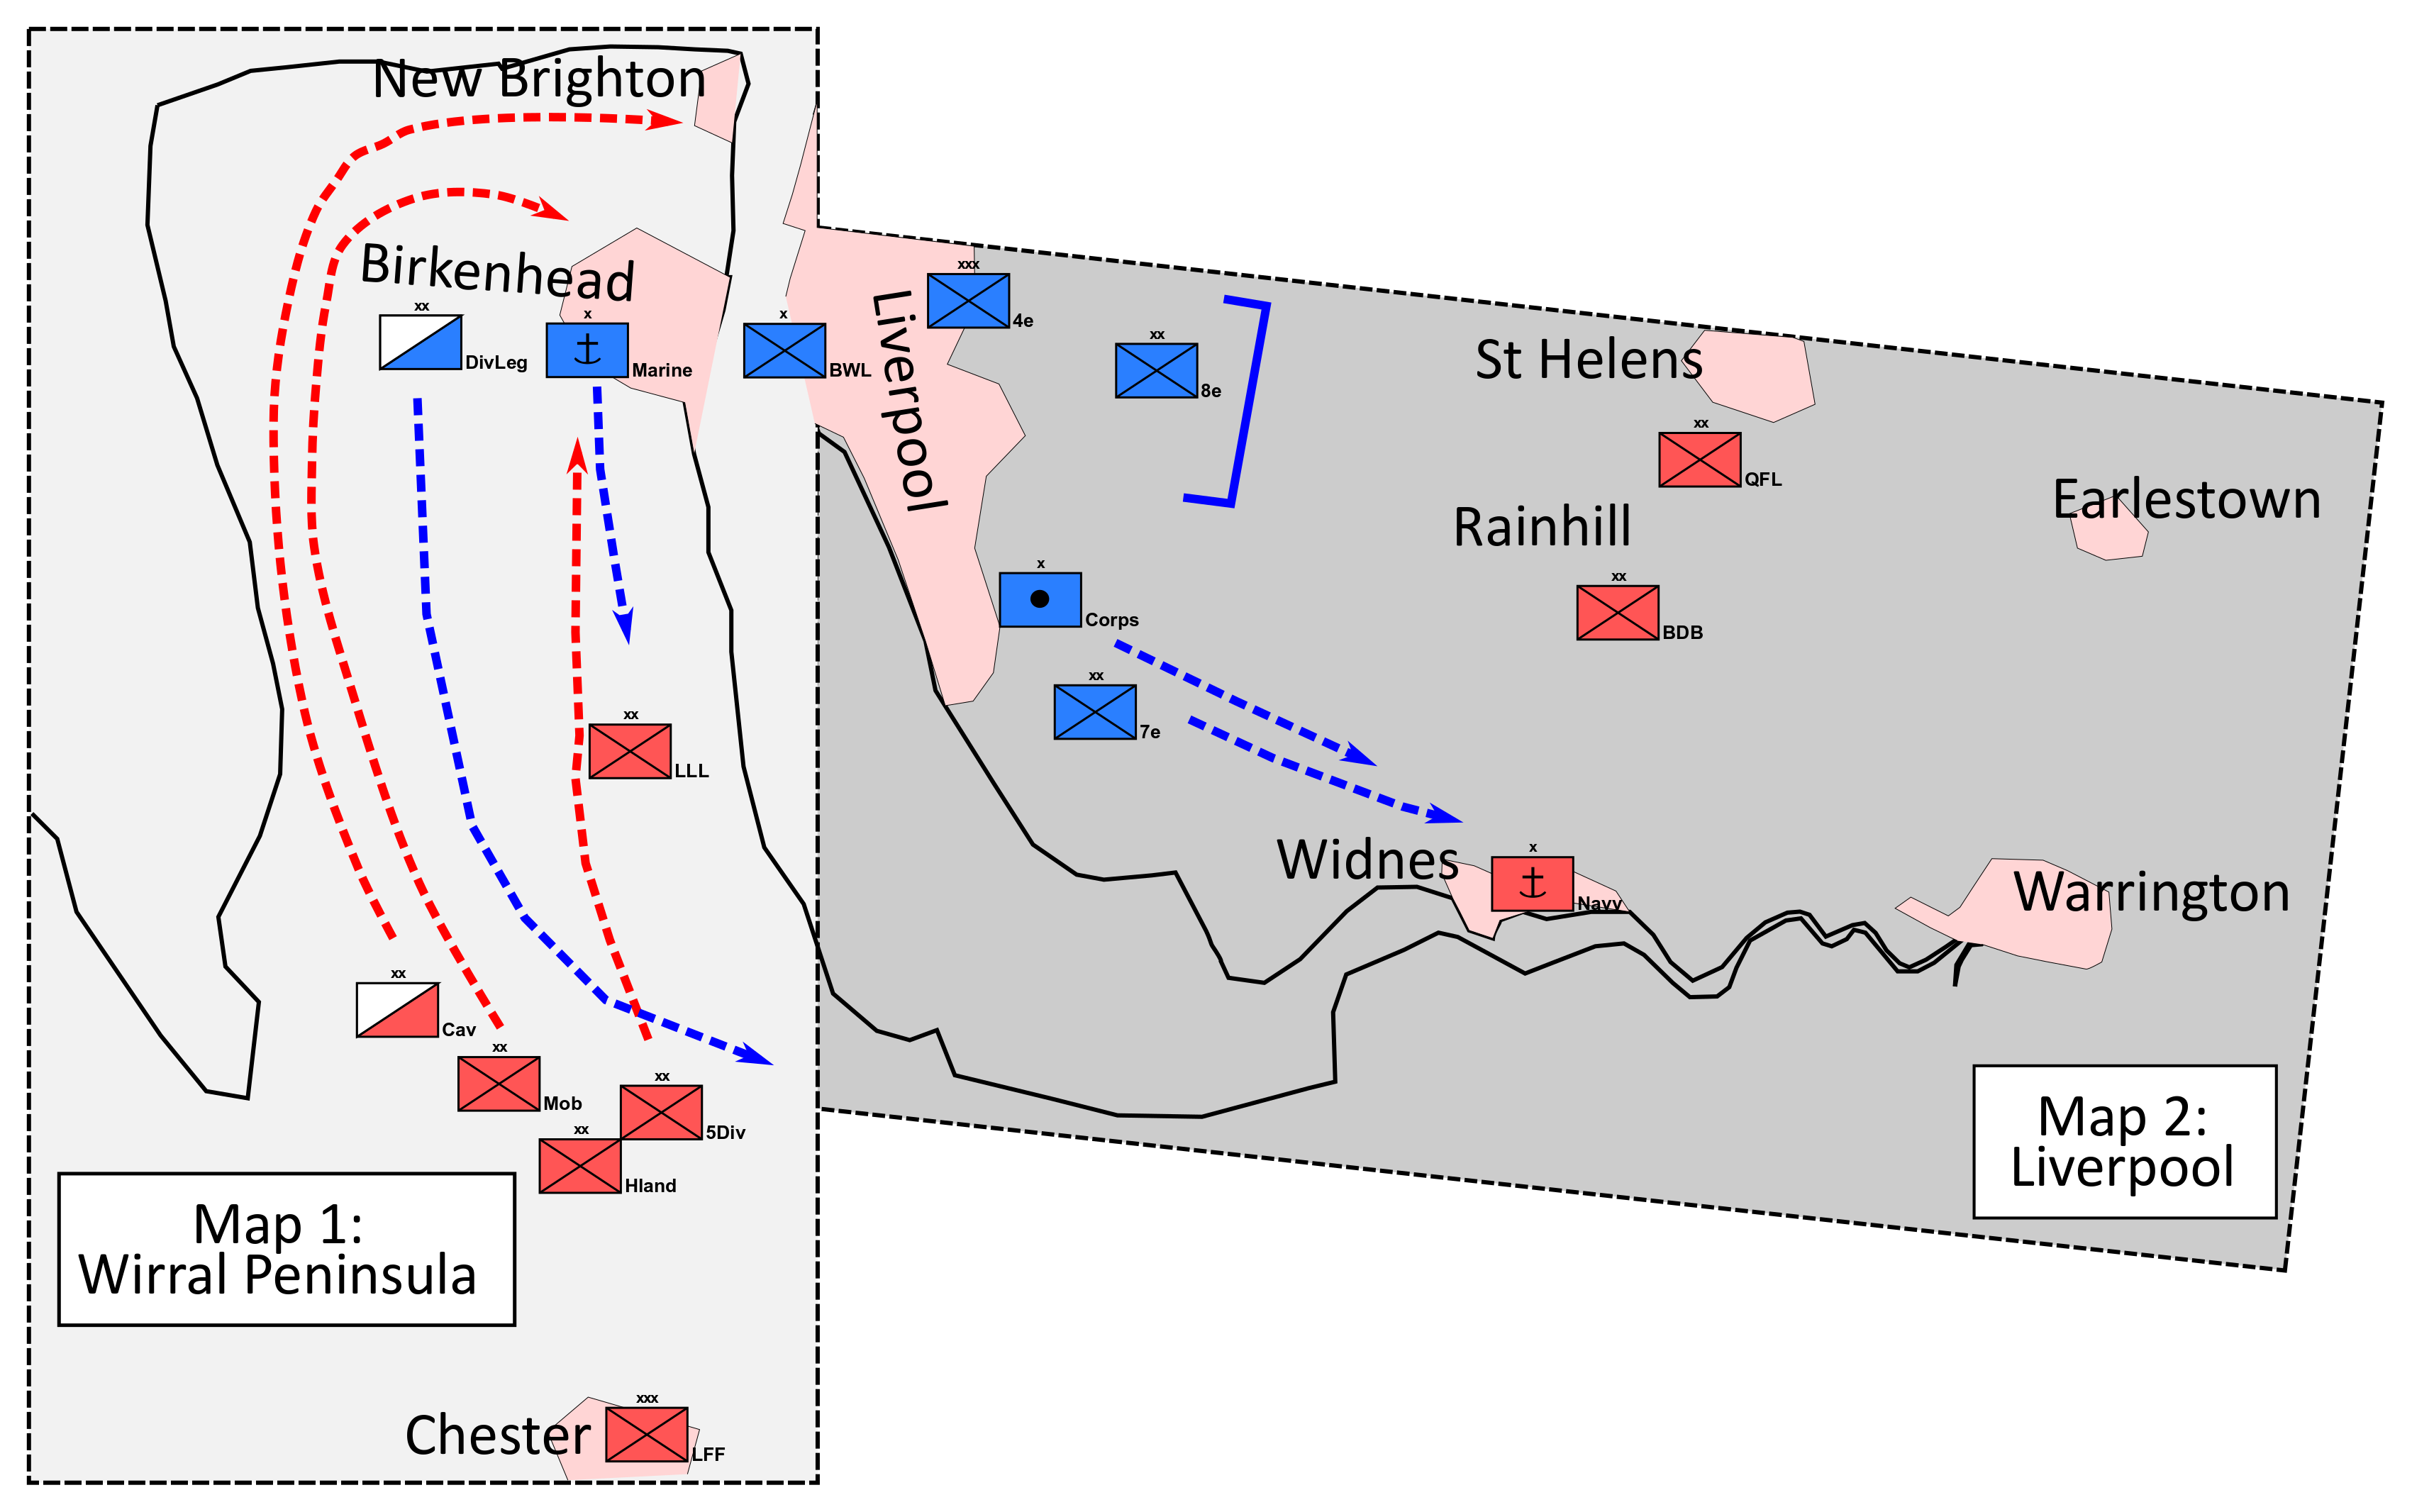
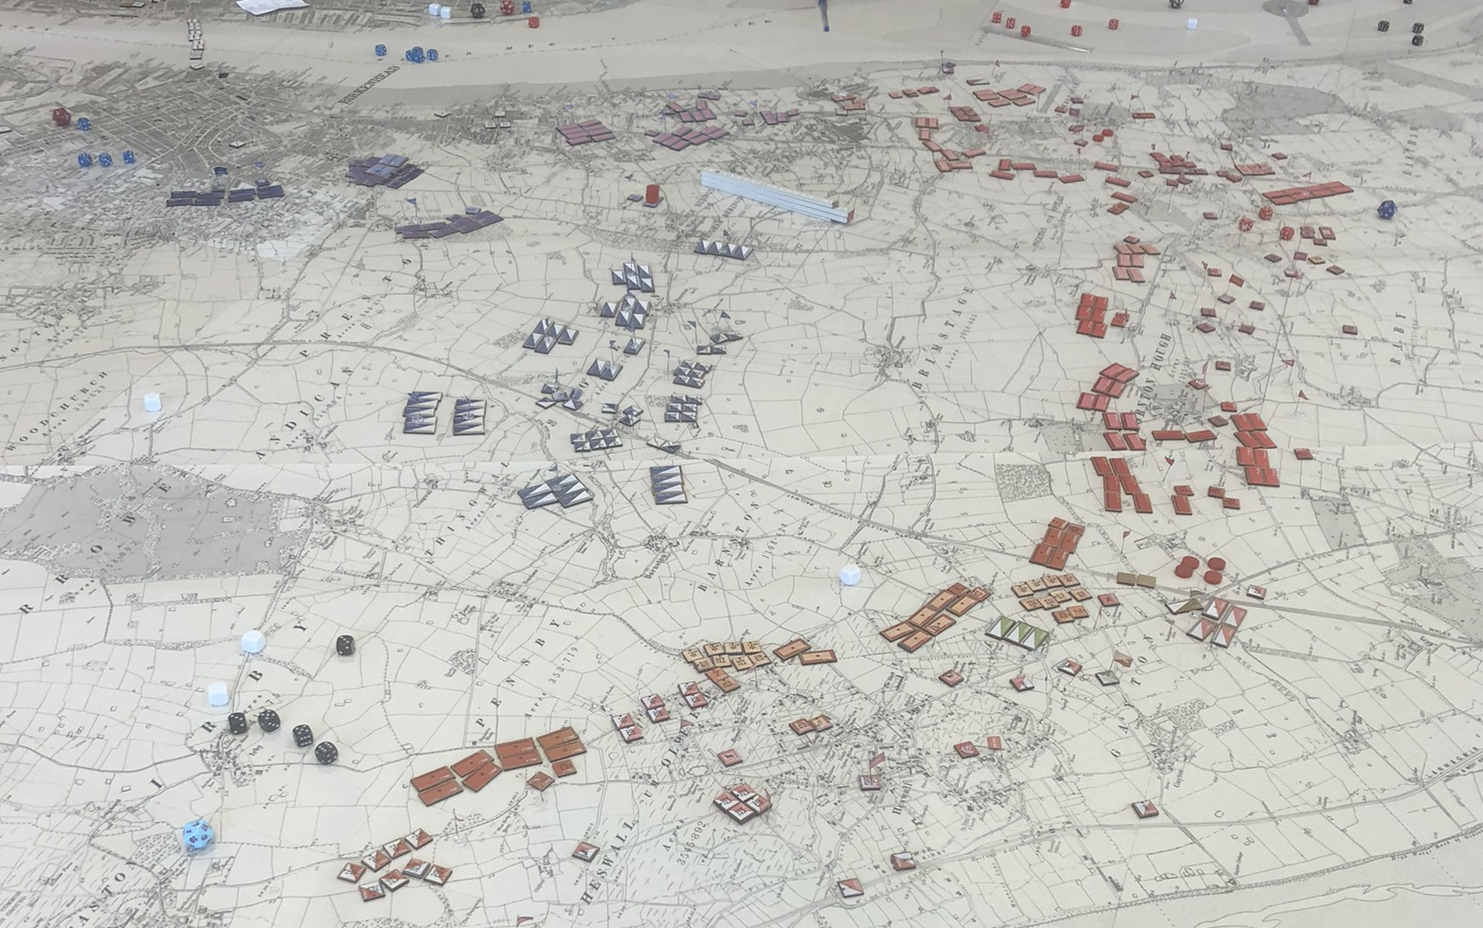
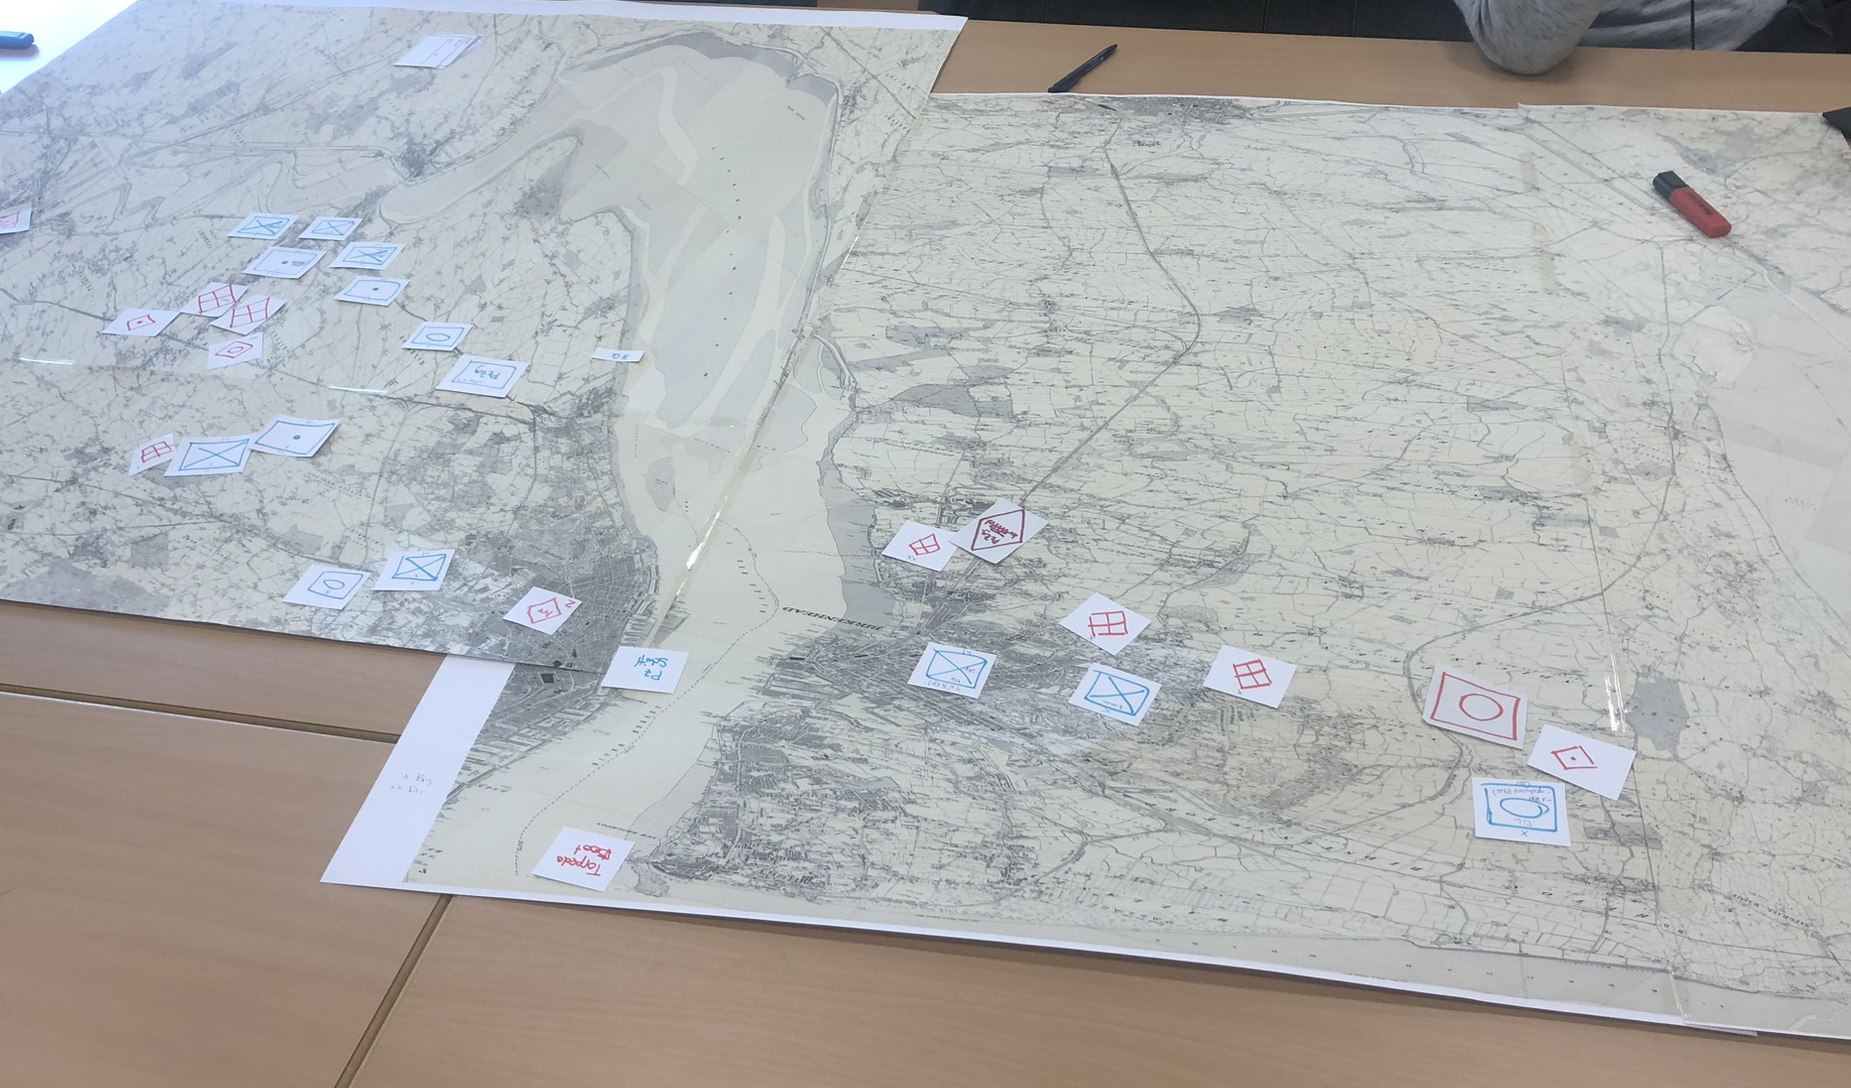
British and French starting positions and plans for day 1.
Of course, as things happen, the French had plans as well, and these soon made life difficult for British forces on the Wirral peninsula. With two infantry divisions and the heavy artillery support committed East of Liverpool, the French staff ordered the cavalry division to push southwards from Birkenhead and to make for Runcorn gap from the south, convinced that they were facing only light opposition. The French naval brigade was to support this attack by pushing along the Birkenhead - Chester railway line and capture the railhead at Chester. While the French were in for a nasty surprise, finding out that they faced what amounted to two division’s worth of British forces, supported by large numbers of field guns as well as heavy pieces, the surprise for the British was about as unpleasant - their mobile element was now facing a powerful and dangerous opponent that was capably led and led to the British division concentrating on covering the flanks of the infantry pushing into Birkenhead. The Wirral Peninsula was about to see extremely heavy fighting.
The British Mobile Division.
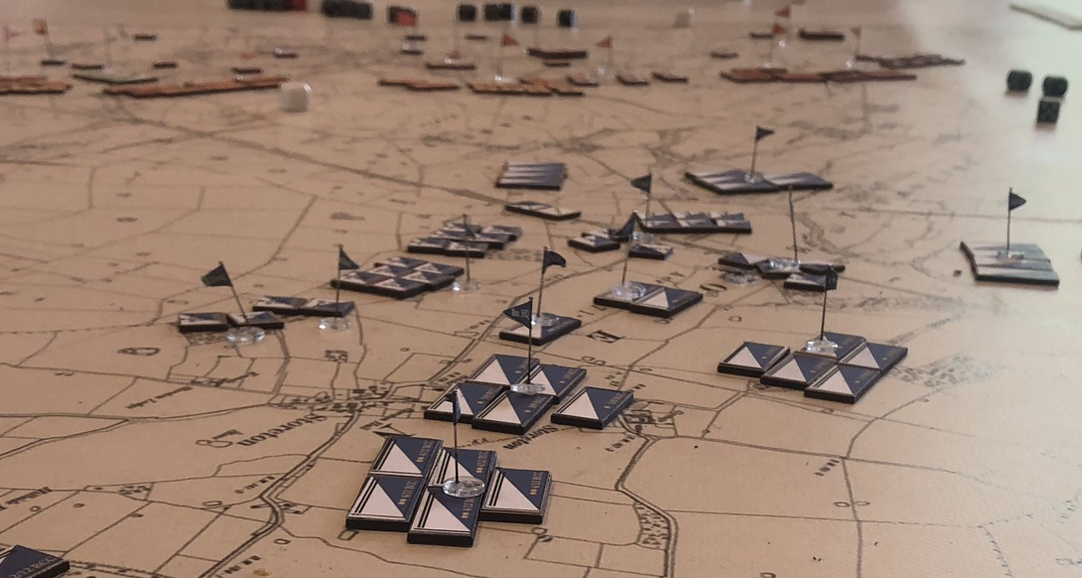
5 Division in its starting positions.
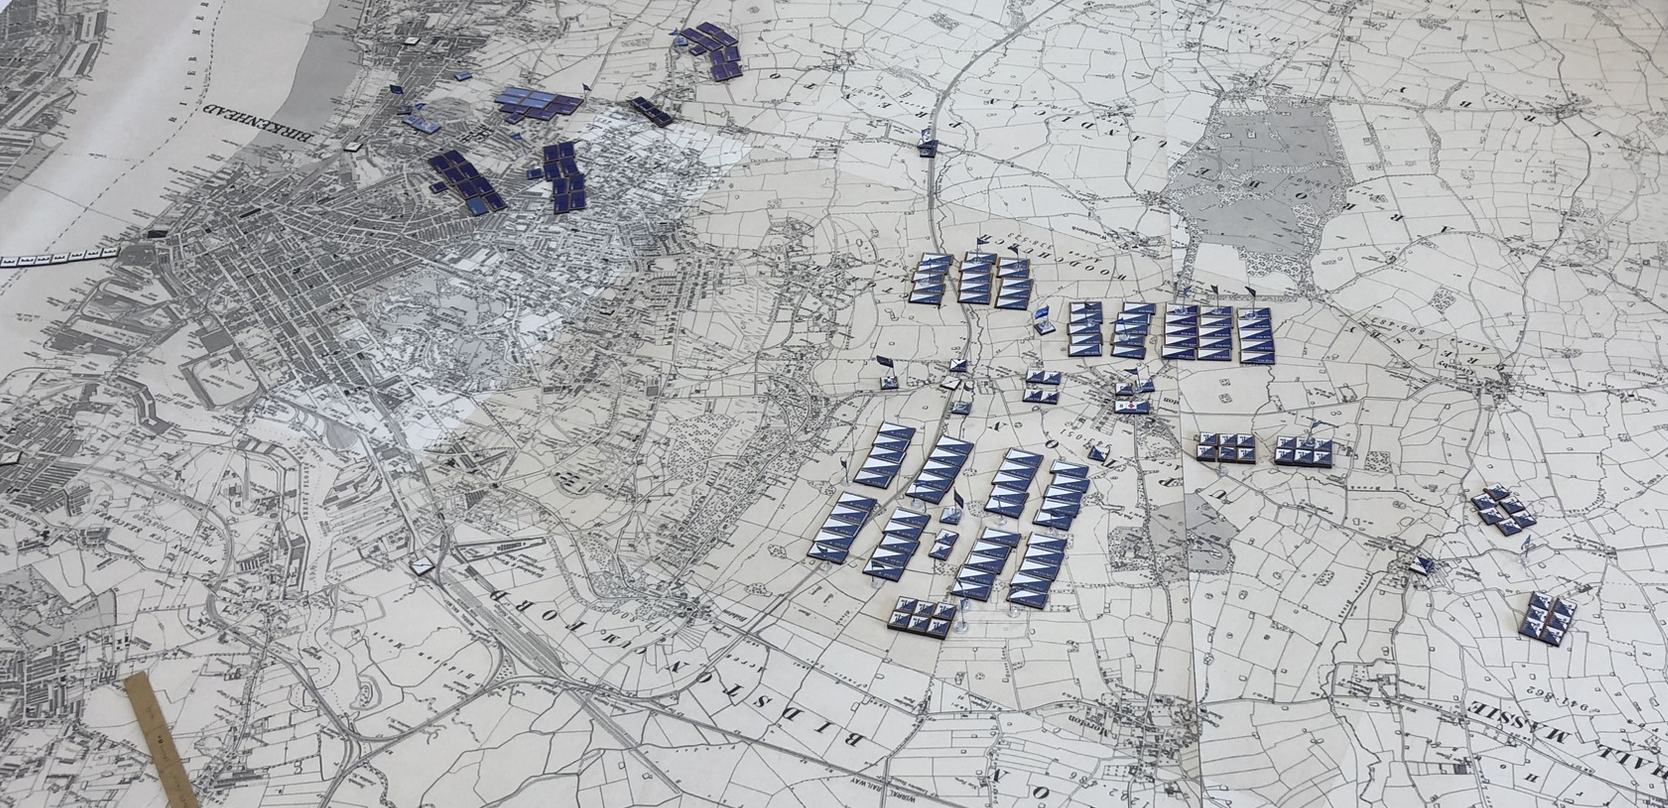
French positions south of Birkenhead.
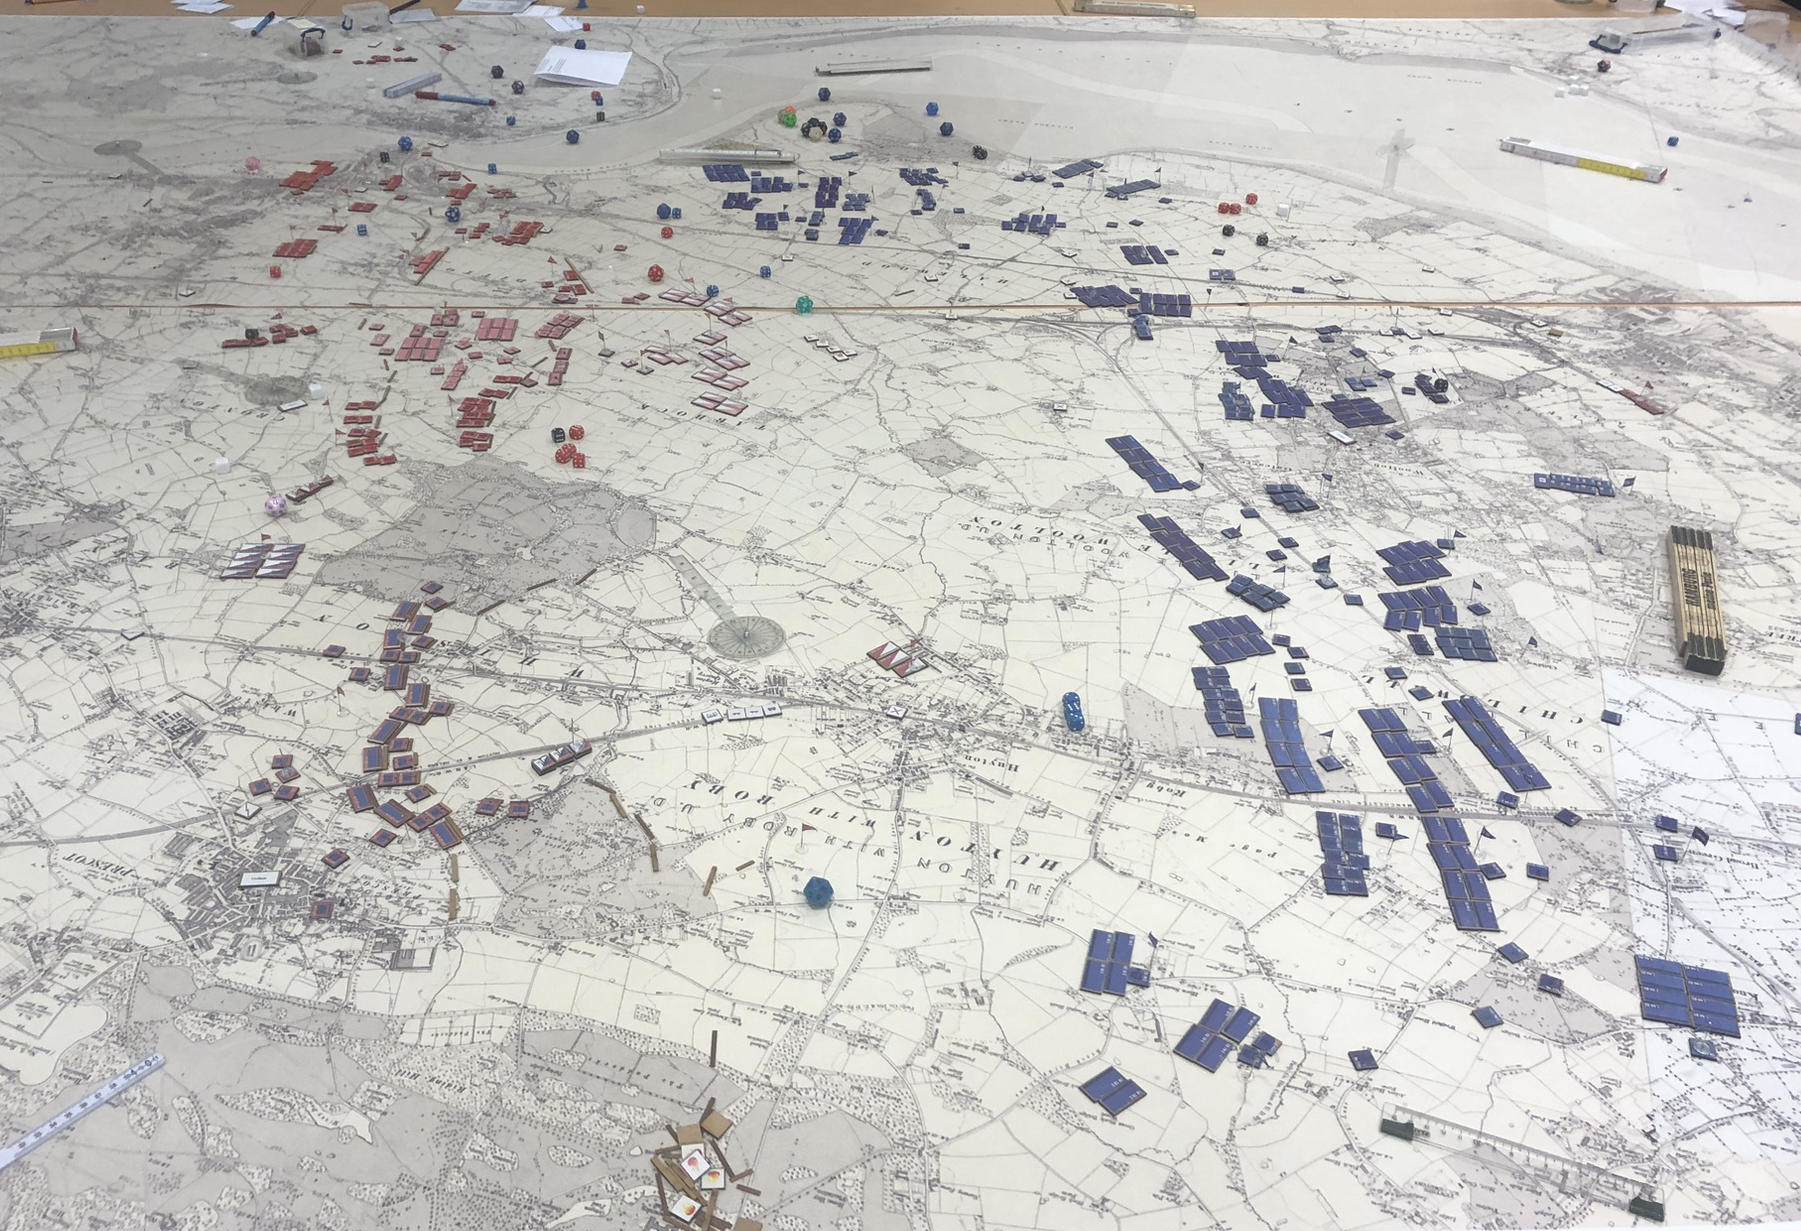
East of Liverpool, the French expected a major British attack and ordered their divisions to hold their positions. Supported by all the heavy artillery the French staff had at its disposal, doing so was certainly within their capabilities. Unfortunately, the expected attack never materialized, and it took the French staff too long to realize that British weakness east of Liverpool presented an opportunity of achieving a quick victory there which could then be followed by reinforcing Birkenhead; such a course of action would probably have won the day for the French.
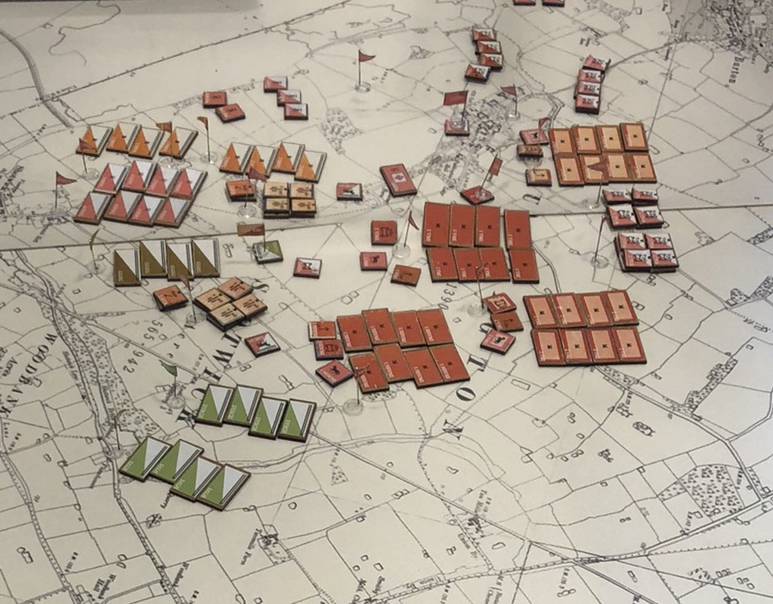
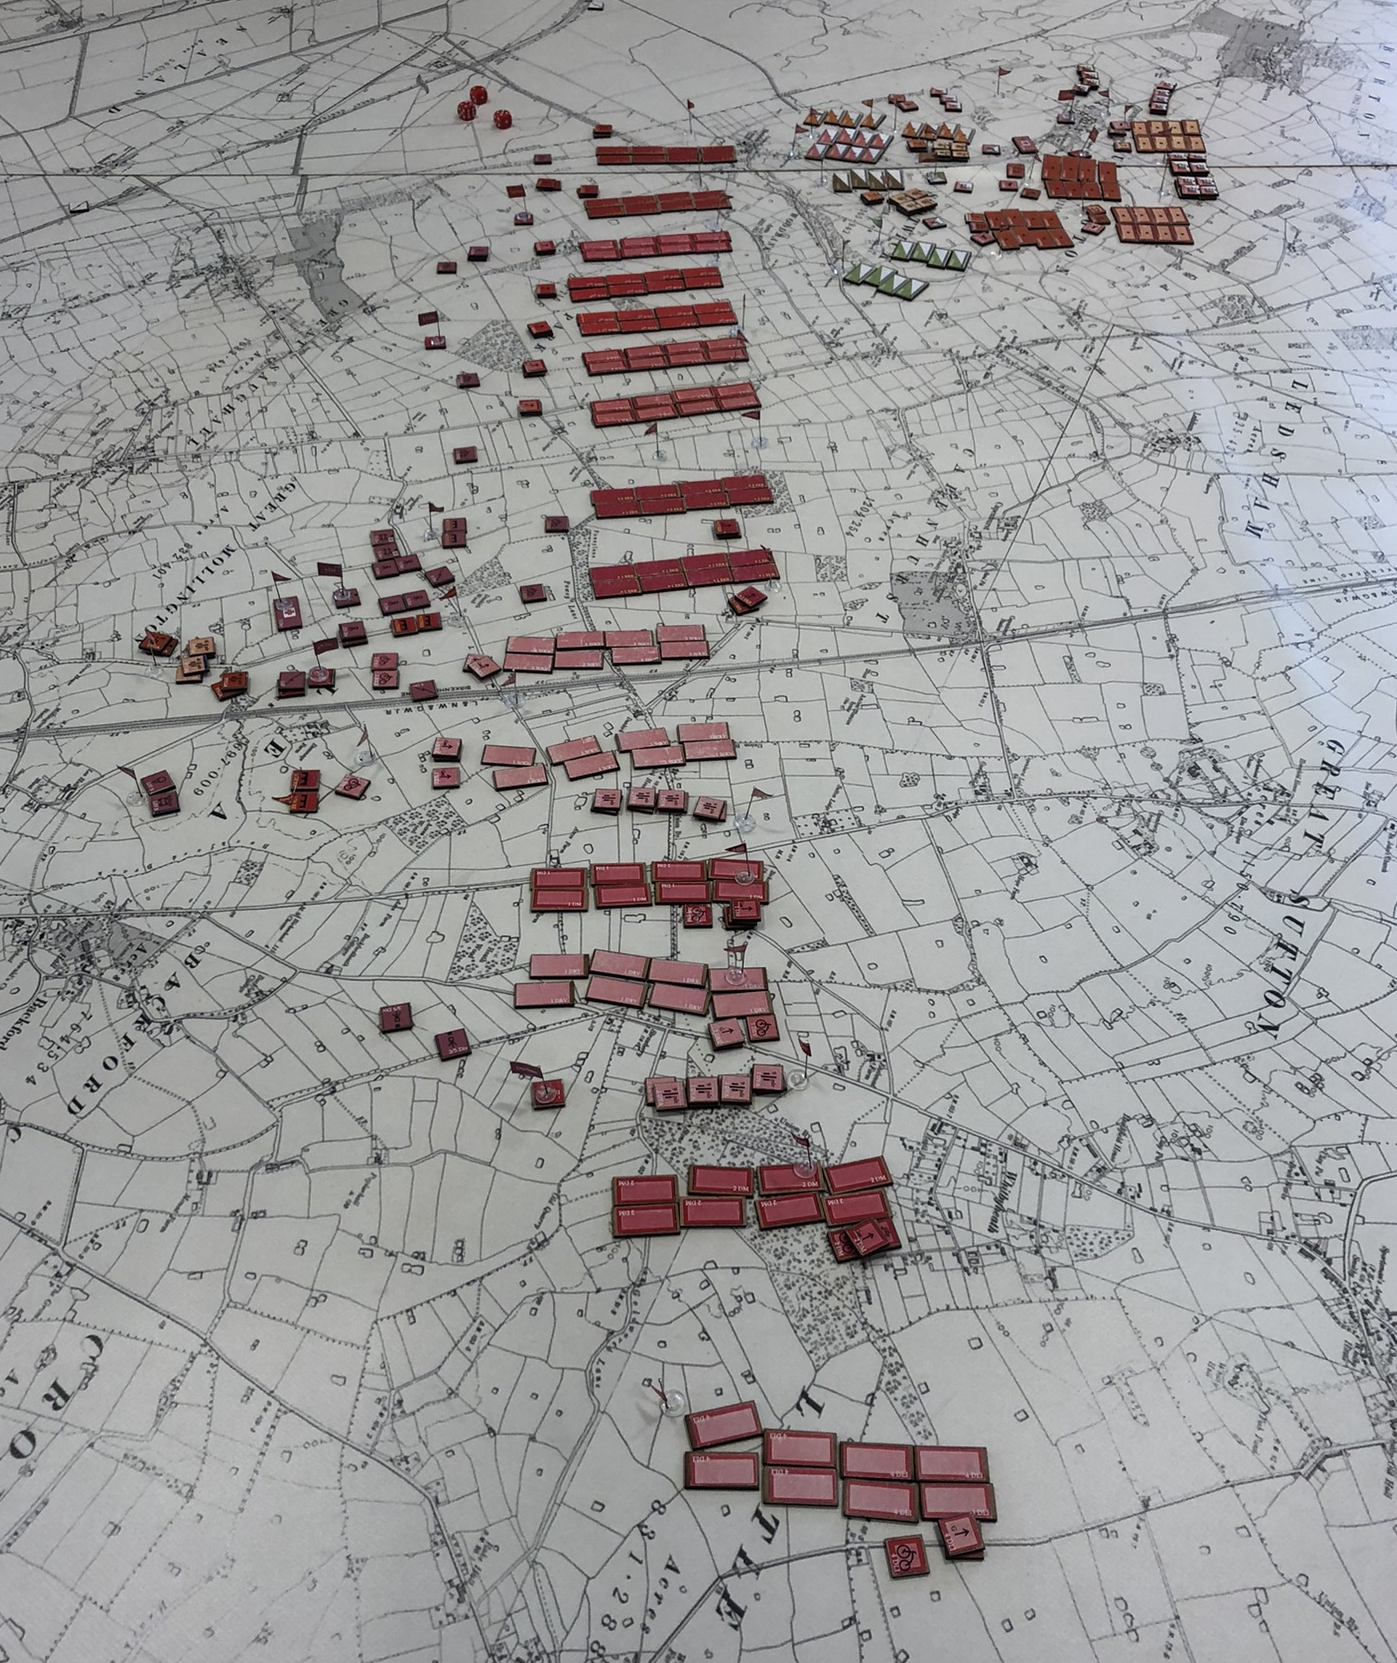
The French Line east of Liverpool.
British positions east of Liverpool.
III. The course of the battle.
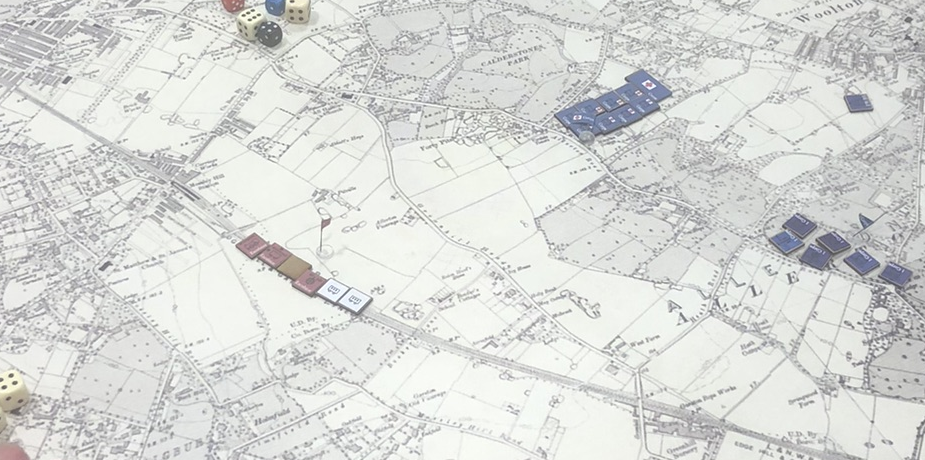
The plans on both sides resulted in comparatively little fighting east of Liverpool. While the French moved slowly towards Widnes and bombarded British positions with some success, the was no large-scale attempt at attacking British lines, which would inevitably have faltered. French positions were fairly foward beyond the eastern edge of the city, and as a consequence had long - though well-orgnized - lines of communication towards the rear. Despite initial reports (in the briefing package) about some unrest emerging among Liverpool’s population the French staff did not detach one or two battalions to secure their rear. While this was of little consequence on the first day, it would provide an important opening for the British on the second day, allowing them to cause significant damage to the French.
French slow advance east of Liverpool.
British successes on that day were few and far between east of Liverpool. Perhaps most significantly, a superheavy railway gun lobbing 12in shells from the Wirral Peninsula into the southern suburbs of Liverpool managed to hit French infantry brigade HQs not once, but twice, resulting in significant difficulties for 7e Division controlling its units; over on the British side, the naval brigade’s HQ took a direct hit by a 240mm shell, resulting in similar problems of command and control for the British.
Although it significantly increased the workload for the umpires who had to move from one room to the other, having individual superheavy pieces fire on pre-registered targets into another room proved to be a very interesting experience for everybody involved - it certainly kept force commanders on such an edge that they started moaning the moment an umpire entered the room!
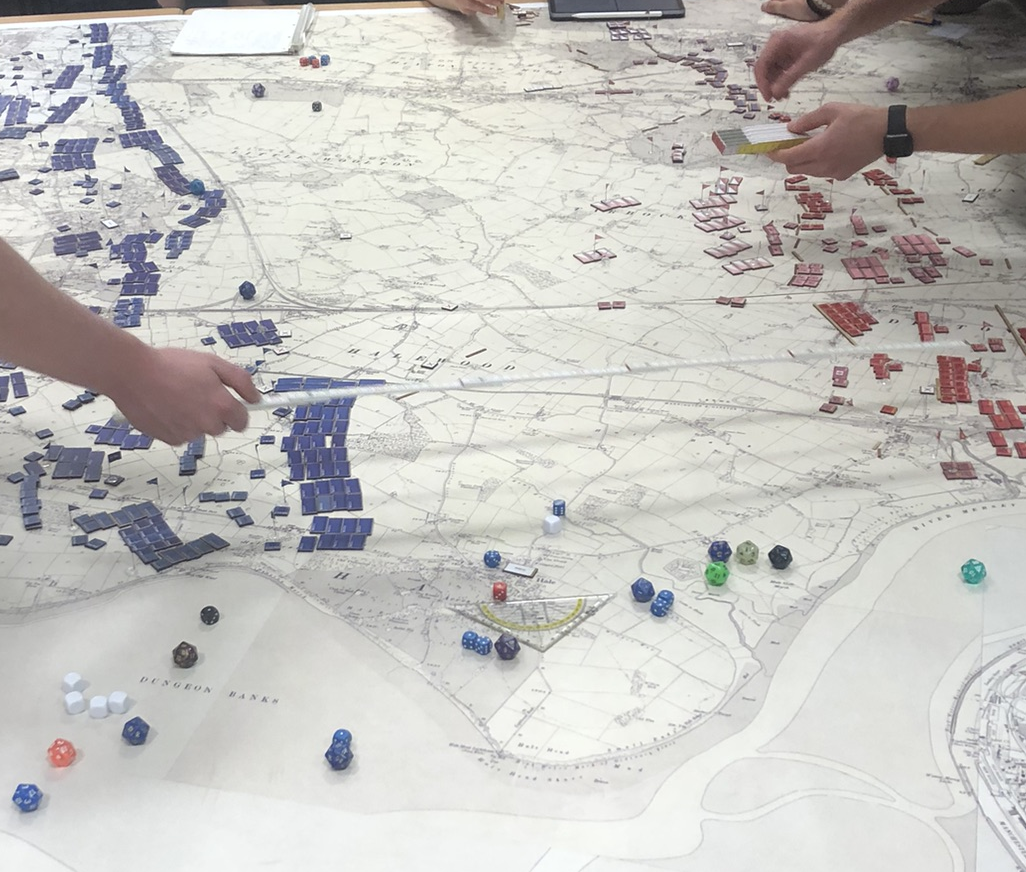
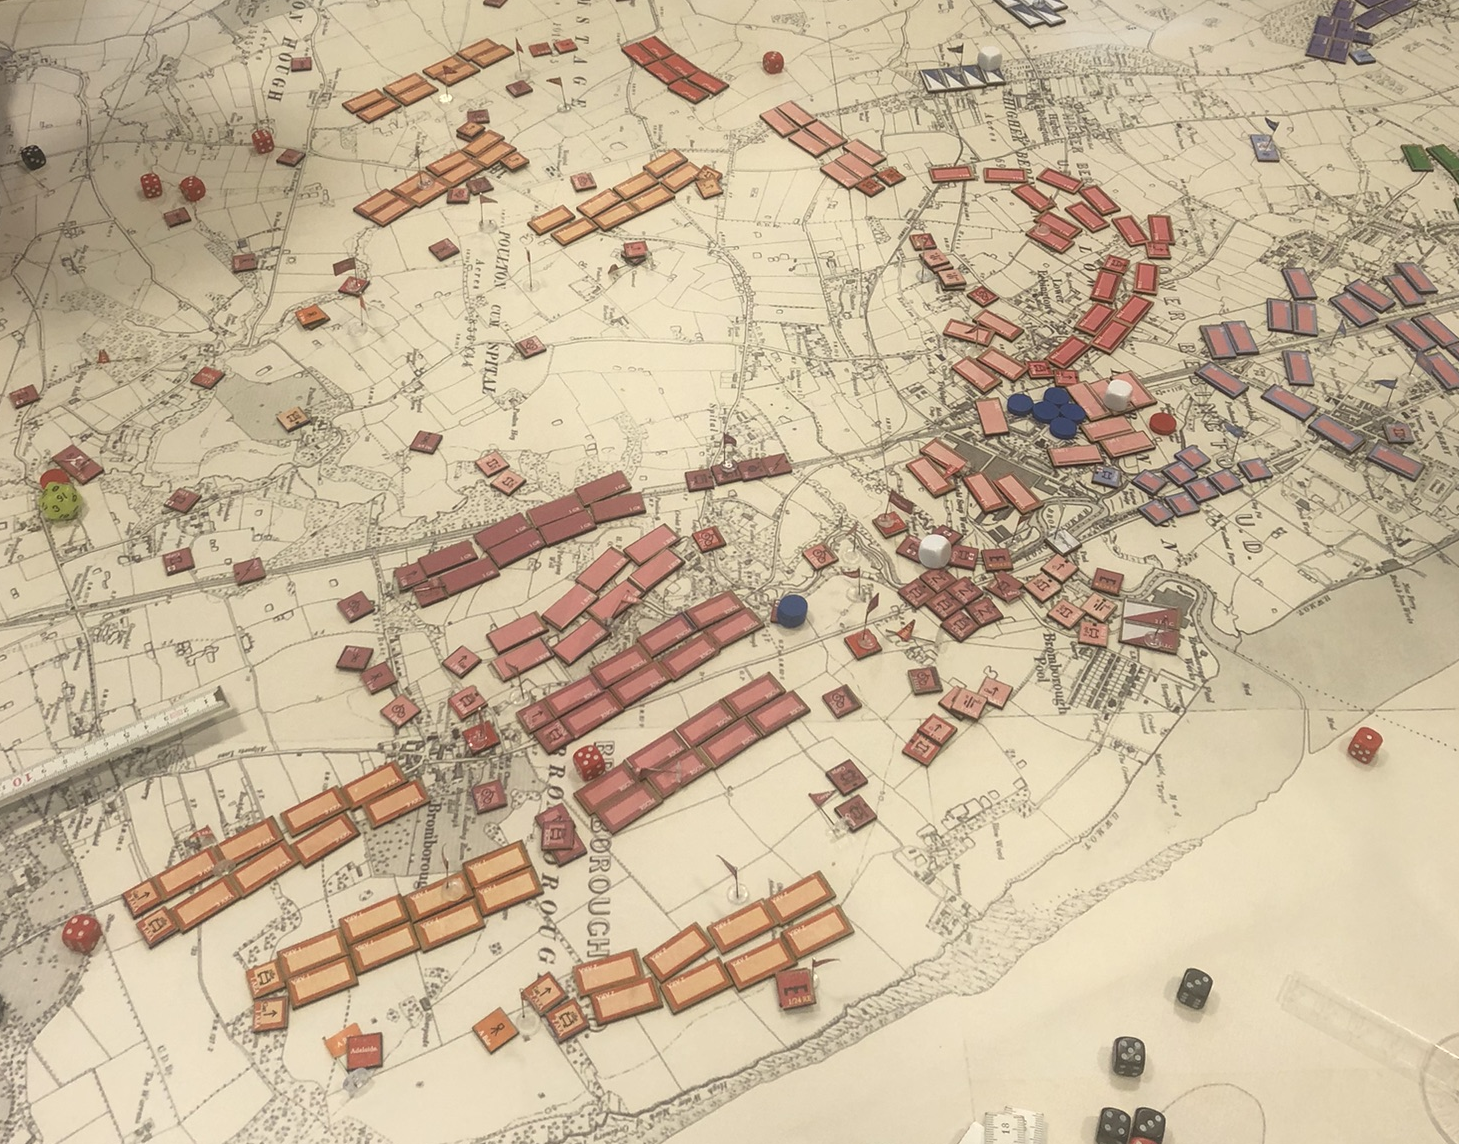
While French forces were slowly probying British defences east of Liverpool, all hell broke loose on the Wirral Peninsula. Here, the French cavalry division, aggressively and competently led, threw itself against the British mobile division, trying to ramrod its way through British lines towards the British rear.
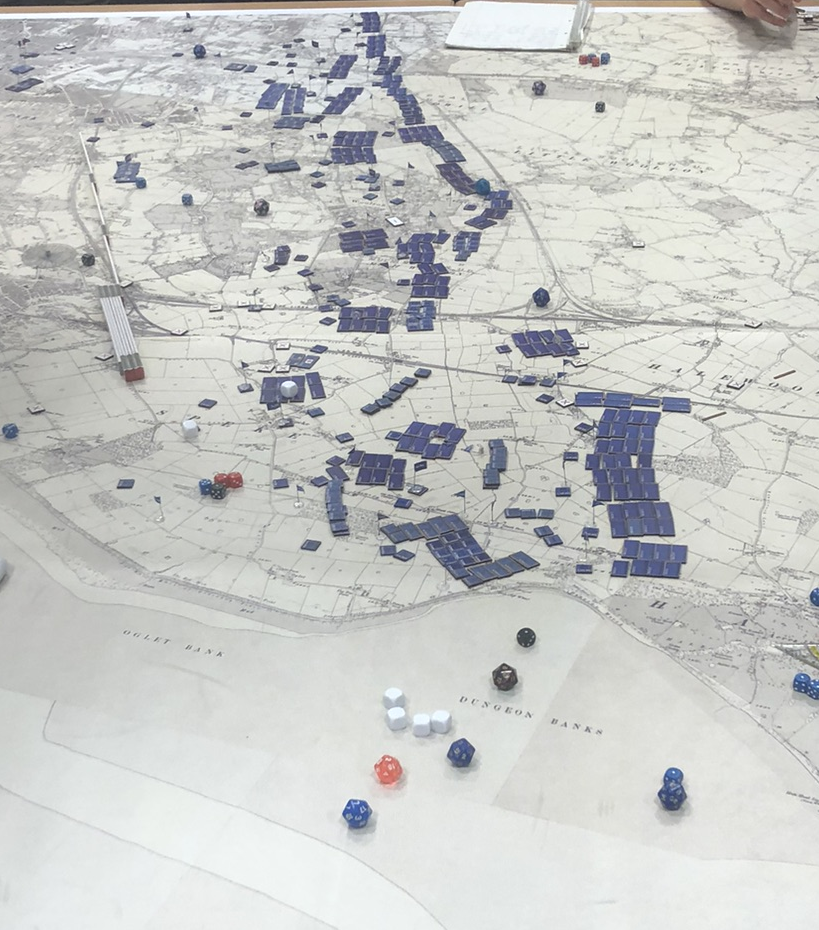
French cavalry division surging forward.

French cavalry advancing to contact.
French cavalry attacking.
Several hours of intensive combat saw the Mobile Division’s cavalry brigade all but annihilated, while the flanks of the advancing 5 Division was seriously threatened. Even more crucially, French cavalry elements had actually managed to break into the British rear and were cutting telegraph lines all along the peninsula. Confronted with the news that contact to all friendly units on the Wirral Peninsula was lost, British HQ took the eyebrow-raising step of moving its command post northwards to link up with 5 Division - and thus directly into the path of the marauding French cavalry. A single squadron of militia cavalry tried to disperse the French in a desperate attack but was scattered, and then French cavalry overran the command post.

Intense fighting on Wirral Peninsula.
At this point the umpires decided to allow the staff team members to escape, but the French force commander was allowed to go into the British staff room, take pictures of all maps and stuff all messages, intel reports, OOBs and other admin in his pocket; at the end of day 1 he then handed this wealth of intelligence over to the French staff. Apart from this material advantage seeing the French force commander leaving their staff room grinning from ear to ear with his arms and pockets full of paper put a serious dent into British morale.
French cavalry overruns British HQ.
Situation on Wirral Peninsula at the end of day 1.
Indeed, when day 1 came to a close there was little confidence left among the British. While their line held east of Liverpool, the attack on Birkenhead made little progress, with the cavalry division effectively blocking the mobile division’s attempts at wheeling around Birkenhead, while 5 Division incurred heavy losses fighting against a determined French naval brigade intent on making their opponents pay dearly for every inch of terrain. While the British managed to take out the pontoon bridge connecting Liverpool and Birkenhead with a lucky hit by long-range artillery fire, French defences did not look like they were going to fall anytime soon, particularly not with French reinforcements scheduled to arrrive during the night.
Situation east of Liverpool at the end of day 1.
The second day began with reinforcements arriving - and a surprise. During the night, British torpedo boats had attacked French transports and managed to sink one, causing the loss of three battalions of experienced infantry. Still, this left the French with nine battalions, two regular batteries, one heavy battery and a crack brigade of cuirassiers as reinforcements; in all, that was more than enough to turn Birkenhead into a nigh-impregnable fortress and still have enough offensive power to push towards Widnes. Yet instead of sending substantial reinforcements to Birkenhead all the beleaguered naval brigade got was three battalions of infantry, all the remaining reinforcements being committed east of Liverpool.

In the foreground French reinforcements in Birkenhead can be seen.
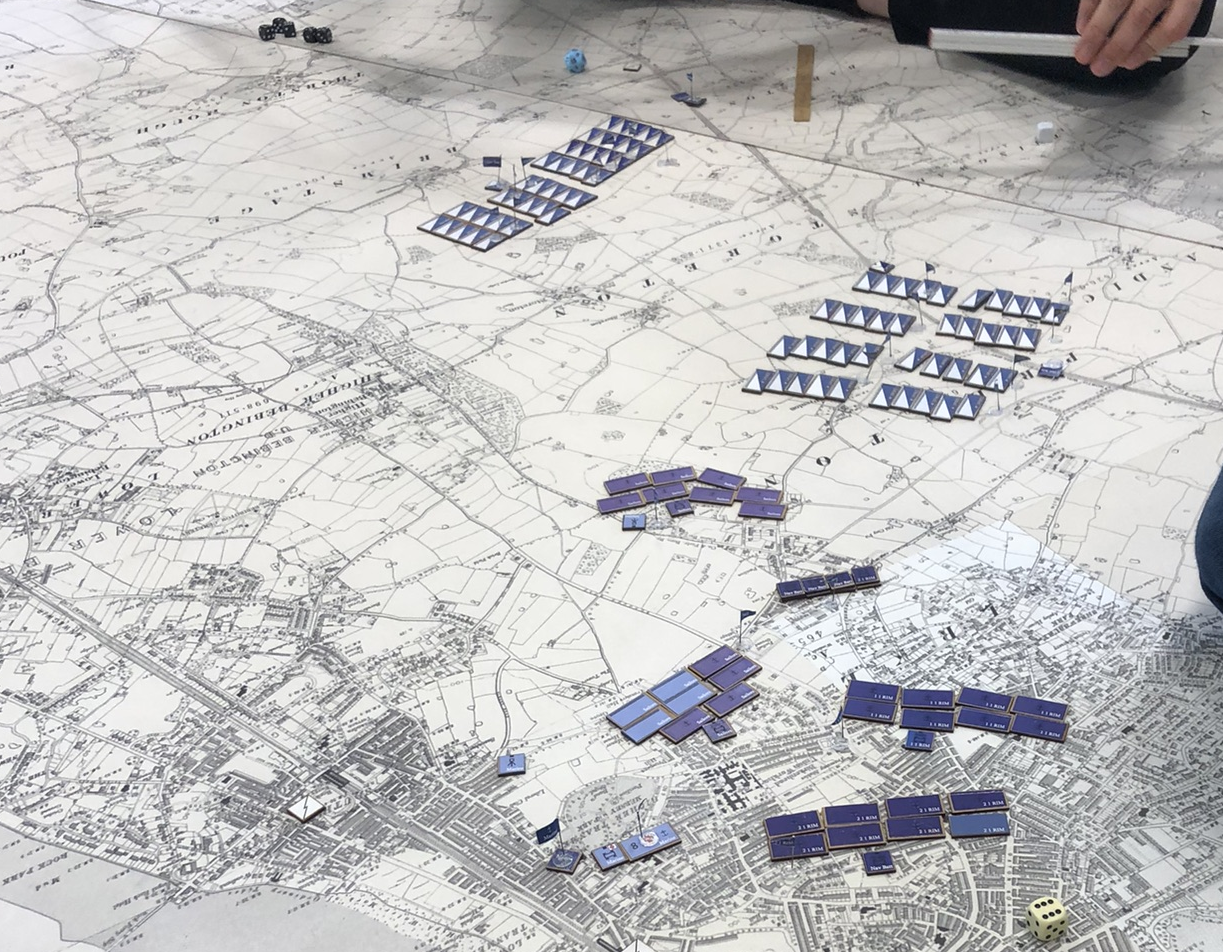
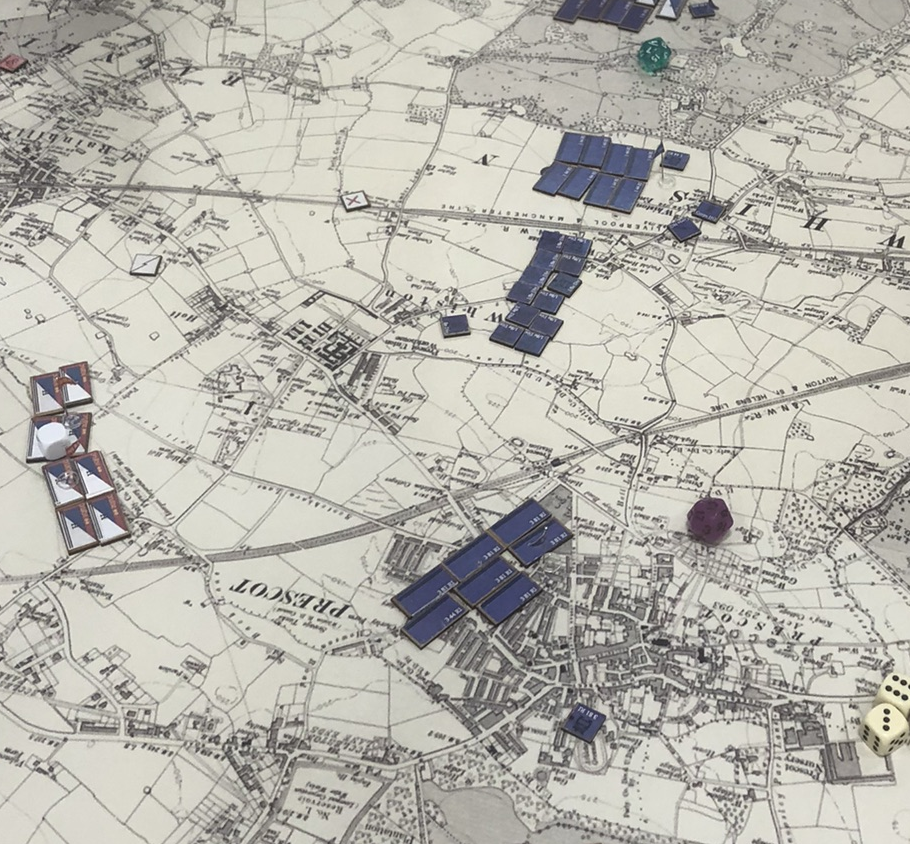
On the British side, on the other hand, significant reinforcements had arrived, too. Three infantry brigades were attached to 5 Division for a renewed push towards Birkenhead, while another infantry brigade and a powerful cavalry brigade reinforced the British line between Rainhill and Widnes.
British reinforcements moving towards Birkenhead.
Everybody now expected heavy fighting on both maps, and so it came. On the Wirral Peninsula British forces renewed their attacks against Birkenhead, relentlessly pushing forward into the city, while the remaining elements of the mobile division, including crucially much of its artillery, where trying to bypass Birkenhead on the west. The French cavalry division tried to offer resistance, but was eventually overwhelmed by sheer numbers and weight of artillery fire. The attack by 5 Division was costly, not the least so because the French ironclad was incessantly firing into the southern suburbs of Birkenhead, taking out unit after unit (and occasionally hitting friendly units as well).
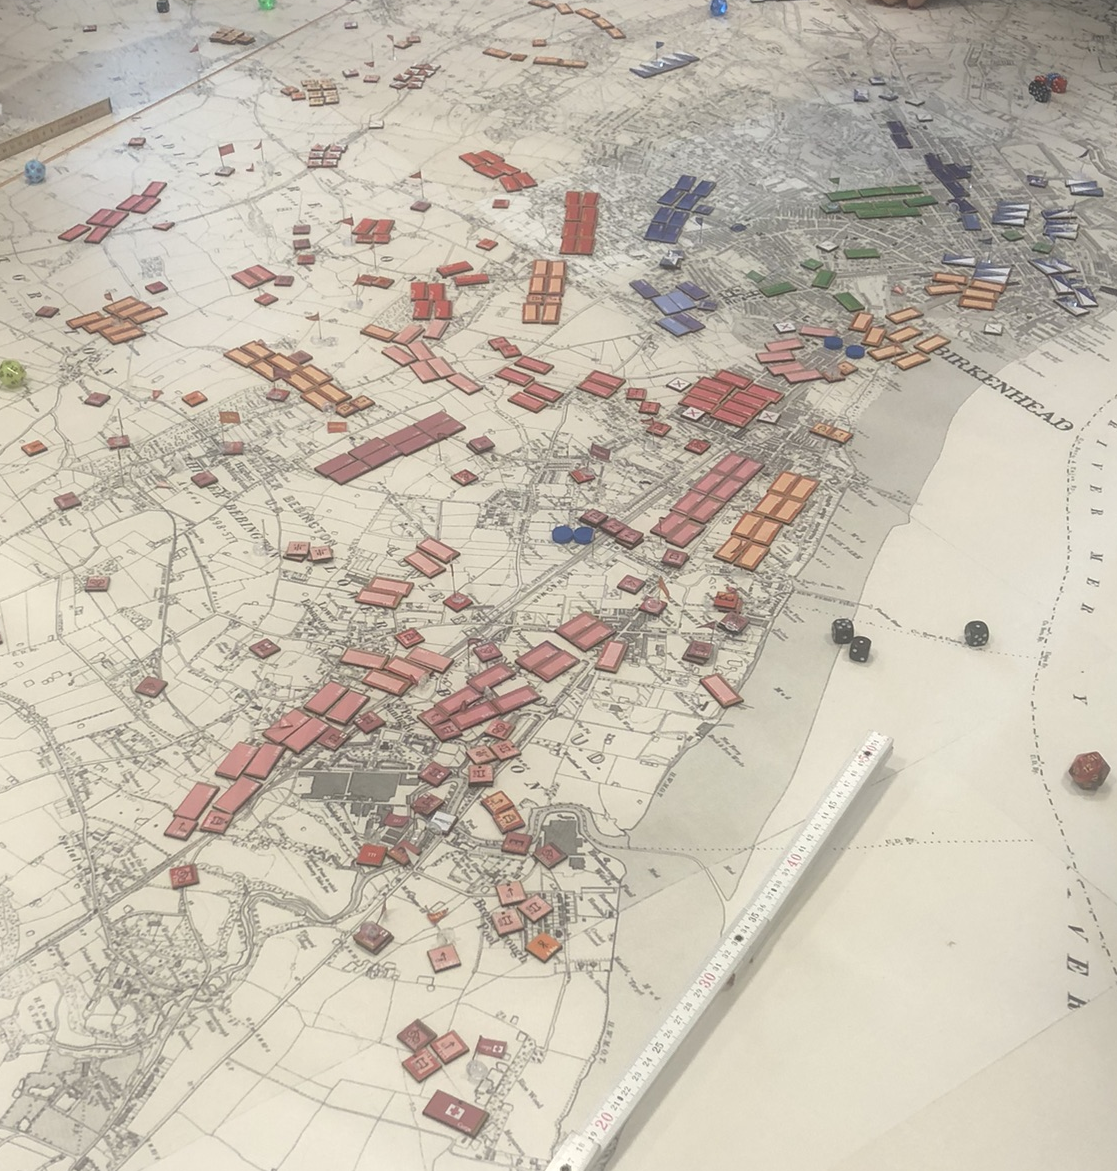
British attack on Birkenhead.
Eventually, British pressure proved to be too much. Robbed of another battalion due to developments in Liverpool, French forces were one last time reinforced by several cavalry squadrons, which proved to be too few in numbers to stem the tide. After several hours of heavy fighting, 5 Division managed to dislodge the remnants of the French naval brigade from the site of the pontoon bridge and push them into the city; 5 Division engineers then repaired the bridge and made preparations for entering Liverpool.
British attack on Birkenhead.
At about that time the French irondclad met its fate; the British mobile division, having gained the key ground near New Brighton, had brought all its remaining artillery to bear, and after a brief artillery duel, during which the mobile division’s guns were supported by a heavy railway gun, the French ironclad fell silent.
Situation at Birkenhead at the end of day 2, note the British gun line at New Brighton.
Meanwhile, east of Liverpool, things had gone off the rails in the wildest possible fashion. In the morning, the French finally launched their - long overdue - attack, which initially was very successful. In a few hours of extremely heavy fighting, the French cavalry brigade cut the British cavalry to pieces, broke clean through British lines and was on the verge of rolling up the whole British line, when they were called back to support the failing French defence on the Wirral Peninsula. Further south, the French attack towards Widnes proved to be unstoppable, the British naval brigade getting all but destroyed by a combination of French heavy artillery and frontal infantry assaults. After a few hours, the French had captured Widnes, with the road to Warrington and into the British rear basically open.
French attack on Widnes in progress.
Yet while French forces were pushing the British defenders further eastwards, trouble began to brew up in their rear. There had already been signs for unrest, and some heavy-handed measures by the French staff resulted in several resistance cells taking to arms about an hour after the fighting had started. They cut telegraph lines in the French rear, attacked various command posts and, crucially, once overran the French corps HQ - whose turn it now was to watch an enemy force commander make off with arms full of paperwork.
British resistance cell popping up in the city.
Perhaps even more important, the British restistance made good use of a British armoured train that had broken through the French lines on the first day and was stranded behind enemy lines after French engineers had blown the tracks at two points. Inexplicably, however, the French had not tried to hunt it down with field artillery, and while during the first day it could make no use of its armament (a single heavy gun) for lack of spotters, the British uprising suddenly provided these, and soon 40pdr shells were raining down on pioneers, pontoons and any other rear-echelon unit unfortunate enough to be in range.
British armoured train “Excelsior”, armed with, among other things, a 40pdr gun on a turntable.
While the French eventually managed to destroy the armoured train, the French corps HQ was hit not once but twice by heavy artillery; while during the first time the umpires simply threw the map into disarray, the second time the French staff actually had to dive down under the table for cover. This exercise proved to be not exactly popular, but by that time the participants were so immersed into the wargame that they blamed their force commanders for not taking out the - expletive-laden - armoured train rather than the umpires for doing strange things.
Inside the French HQ - the map before the umpires unleashed the furor of the 40pdr…
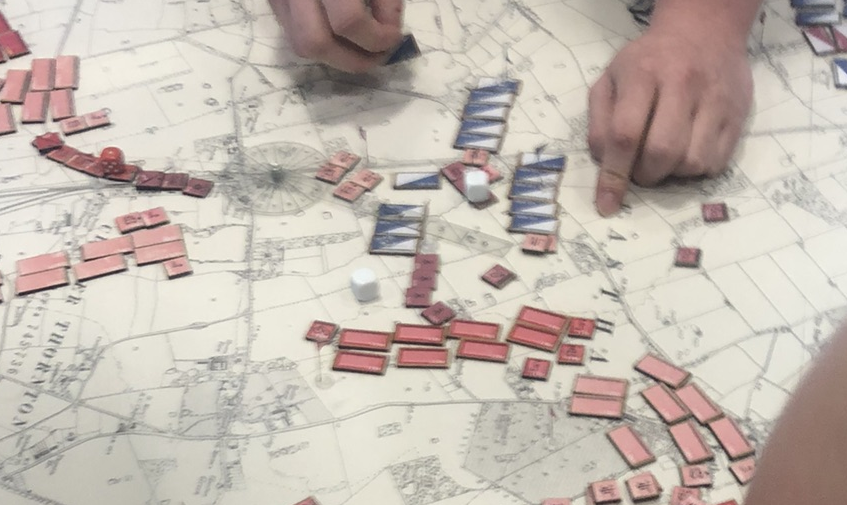
With the sitation in Birkenhead further deteriorating, the French staff tried to organize a withdrawal into Liverpool and Birkenhead. However, due to the difficulties caused by the British resistance and the armoured train, the organisation of that withdrawal was somewhat chaotic, and unfortunately for the French it was at exactly that point that the British had managed to cobble together various surviving cavalry elements into one last makeshift brigade. When the leading elements of 8e Division turned around to move back to Liverpool, British cavalry suddenly was above them, cutting several battalions’ worth of infantry to pieces and, crucially, breaking through the French lines. During the following hour or so 8e Division was basically destroyed, and British cavalry eventually located the French corps HQ.
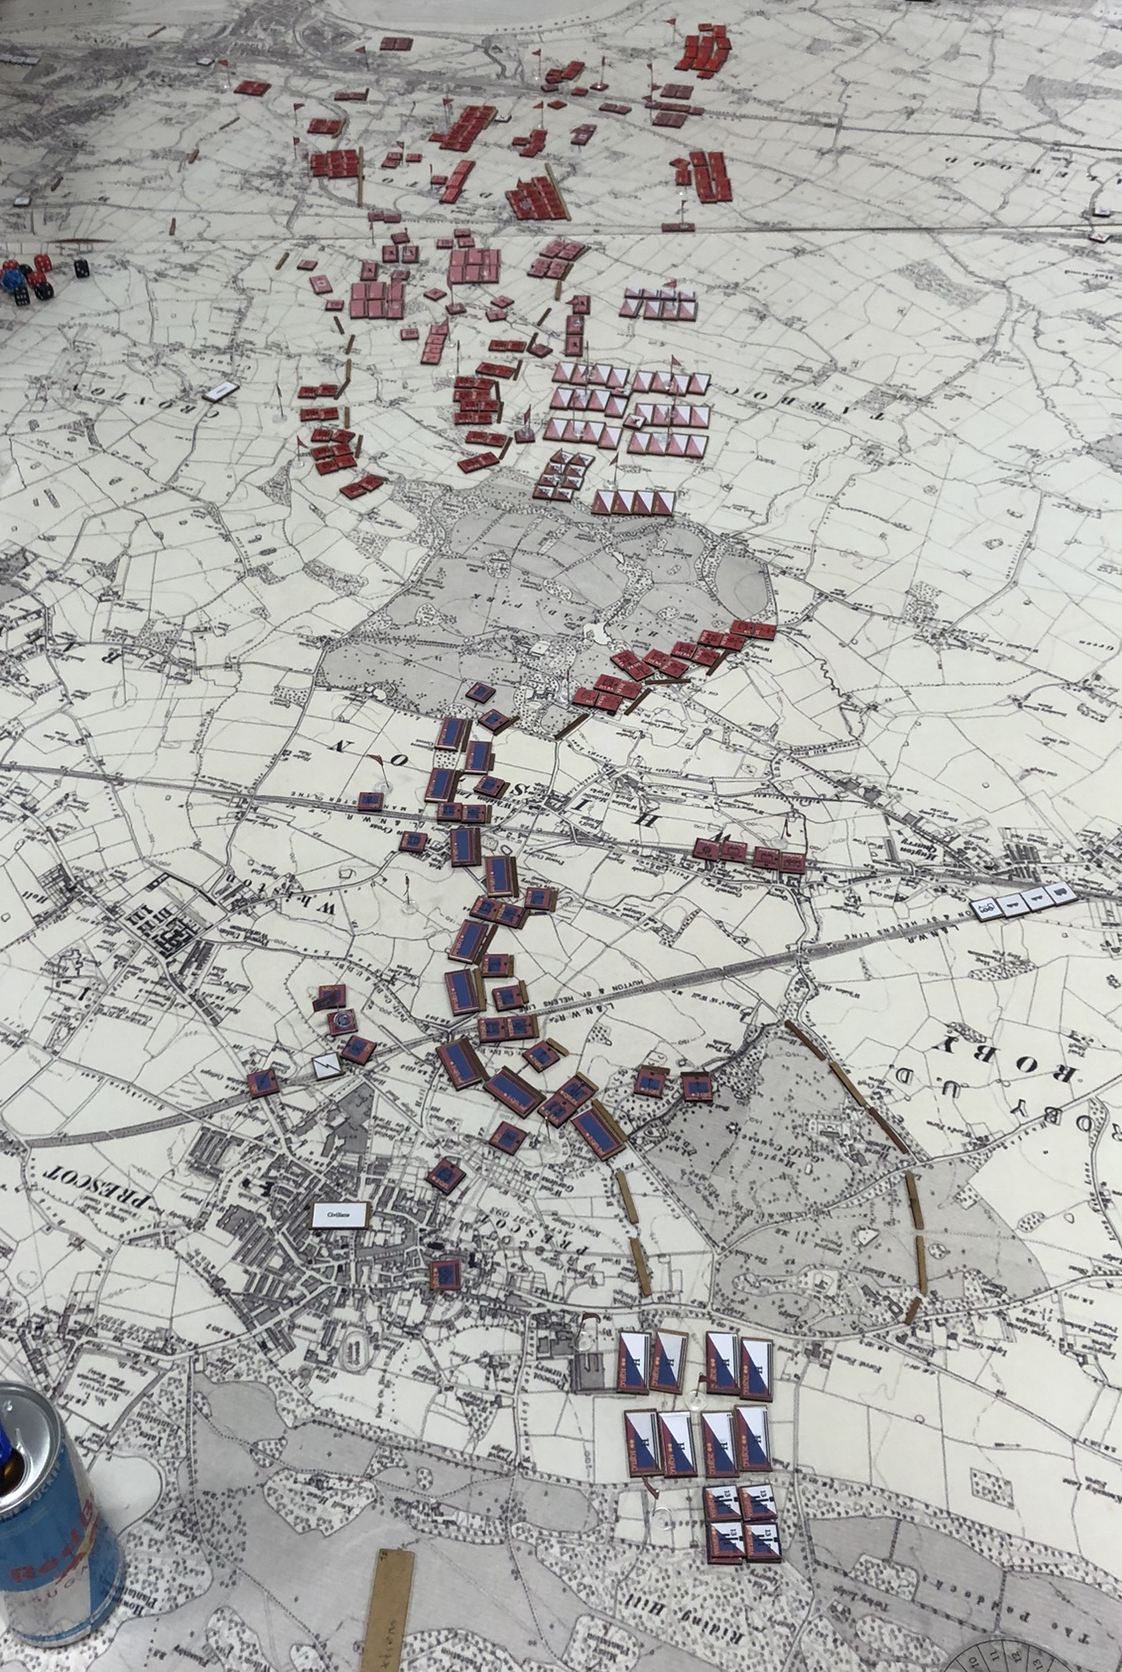
British cavalry preparing for the attack.
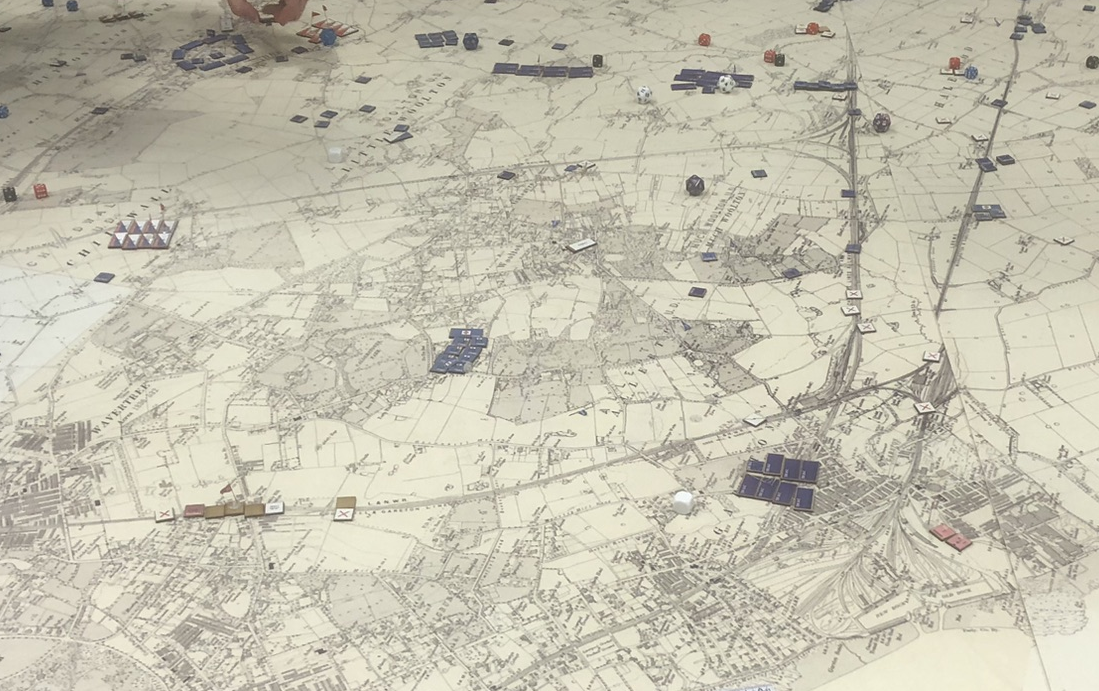
British cavalry (upper left hand side) having broken through the French line near Rainhill now wheeling towards the South.
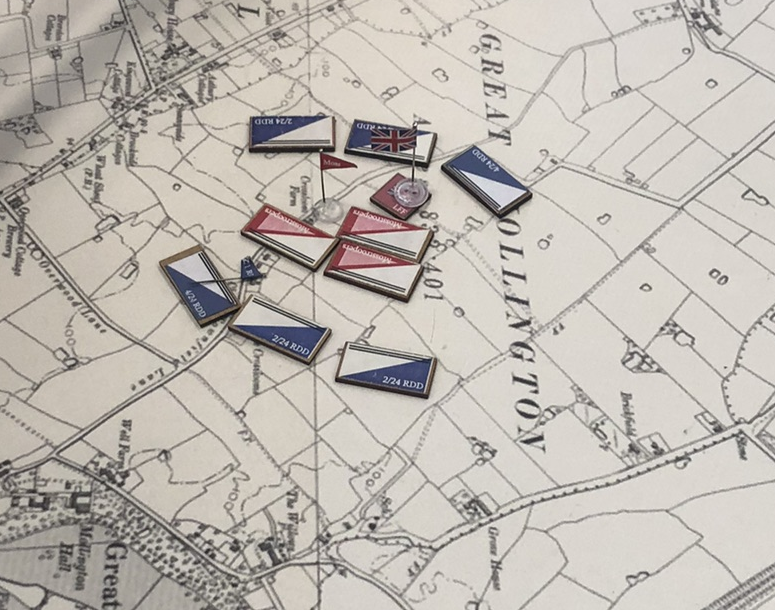
British cavalry overrunning the French HQ.
It was at that point that the umpires decided to halt the wargame, but not before allowing the French staff to answer the offer of surrender by the British cavalry commanders - which they did in a manner not suitable for quotation, and decided to go down fighting.
IV. Some final thoughts.
So the British won again, and it was basically a wipeout. While British forces suffered heavily, losing well over half of their numbers, with some units getting destroyed completely, the French corps was destroyed as a fighting force. Although elements of 7e Division managed to enter Widnes, British forces not only controlled the key ground on the Wirral Peninsula but were also in possession of a bridge link to Liverpool and in the process of moving units into the city; also, the British had managed to cut off what was left of the French forces from the harbour and taken out the French corps command. Down to less than 20% fighting strength, with little artillery and no cavalry support left, French forces were facing total destruction on the second day.
With the British scoring a victory for the third time in a row one invariably has to ask oneself whether the scenario is at fault. Interestingly however that seems not to be the case. The French successfully operated against reinforced British forces on the second day, something they could already have done on the first day; this in turn would have freed reserves to bolster their defences on the Wirral Peninsula, making a successful defence of Birkenhead and the coastline around New Brighton possible if not likely. Even without a determined push towards the East on the first day, sending more reinforcements to Birkenhead on the morning of the second day might still have prevented the British from wheeling around the city and capturing the key ground at New Brighton; with the harbour in their possession, victory would have eluded the British even if they had managed to hold Widnes. Around noon on the second day French problems were seriously aggravated by a total disregard for rearward security; by leaving communication lines, division HQs and even their corps command totally unguarded they created additional vulnerabilities at a crucial moment, vulnerabilities which the British Restistance then exploited with cruel precision.
A few final thoughts. First of all, again all sides showed great determination and willingness to endure the hardships of a two-day wargame during which the staff teams were essentially locked up in their staff rooms while the force commanders spent literally hours on their knees on the huge maps, living essentially in two-minute-terms. As both staff teams made direct contact with enemy forces, they also had to endure the consequences, which included a French cavalry commander looting a huge cache of message, OOBs and other material from the British staff room and the French staff spending time under their staff table to simulate the staff being under artillery fire - only to see the umpires then throw their map with tokens carefully placed on it into total disarray as the result of a “direct hit”. As noted above, the French did not lose because of any imbalances in the scenario but rather due to a combination of less-than-optimal decisions and a certain lack of flexibility when facing a situation that was very different from that they had initially planned for.
As usual, observing the staff teams was an interesting experience as well. Here, the French staff team deserves particular mention as they continued to stay focussed on their work of processing information even though on the second day they were exposed to several not-at-all pleasant interactions with enemy forces and by noon effectively staring defeat in the face; yet undaunted by these challenges - and unfazed by occasional remarks by the umpires about the “need to drain the chalice of bitter defeat”… - they continued to work right up to the bitter end, when, asked by a British cavalry commander to surrender as the command post was surrounded, they sent out a final message of defiance (which was worded in a rather, uhm, graphic way…). Down the French staff went, but they did so fighting and with panache.
All in all the wargame once again showed what Pluie de Balles really excels at: Generating a lot of stress for everybody involved - excluding perhaps the umpires, though this time, with the French ironclad hammering Birkenhead from the other map, there was a lot of running involved - and allowing for large numbers of participants.