When the French descended on Liverpool - A large game of Pluie de Balles.
by Jorit Wintjes
I. Introduction
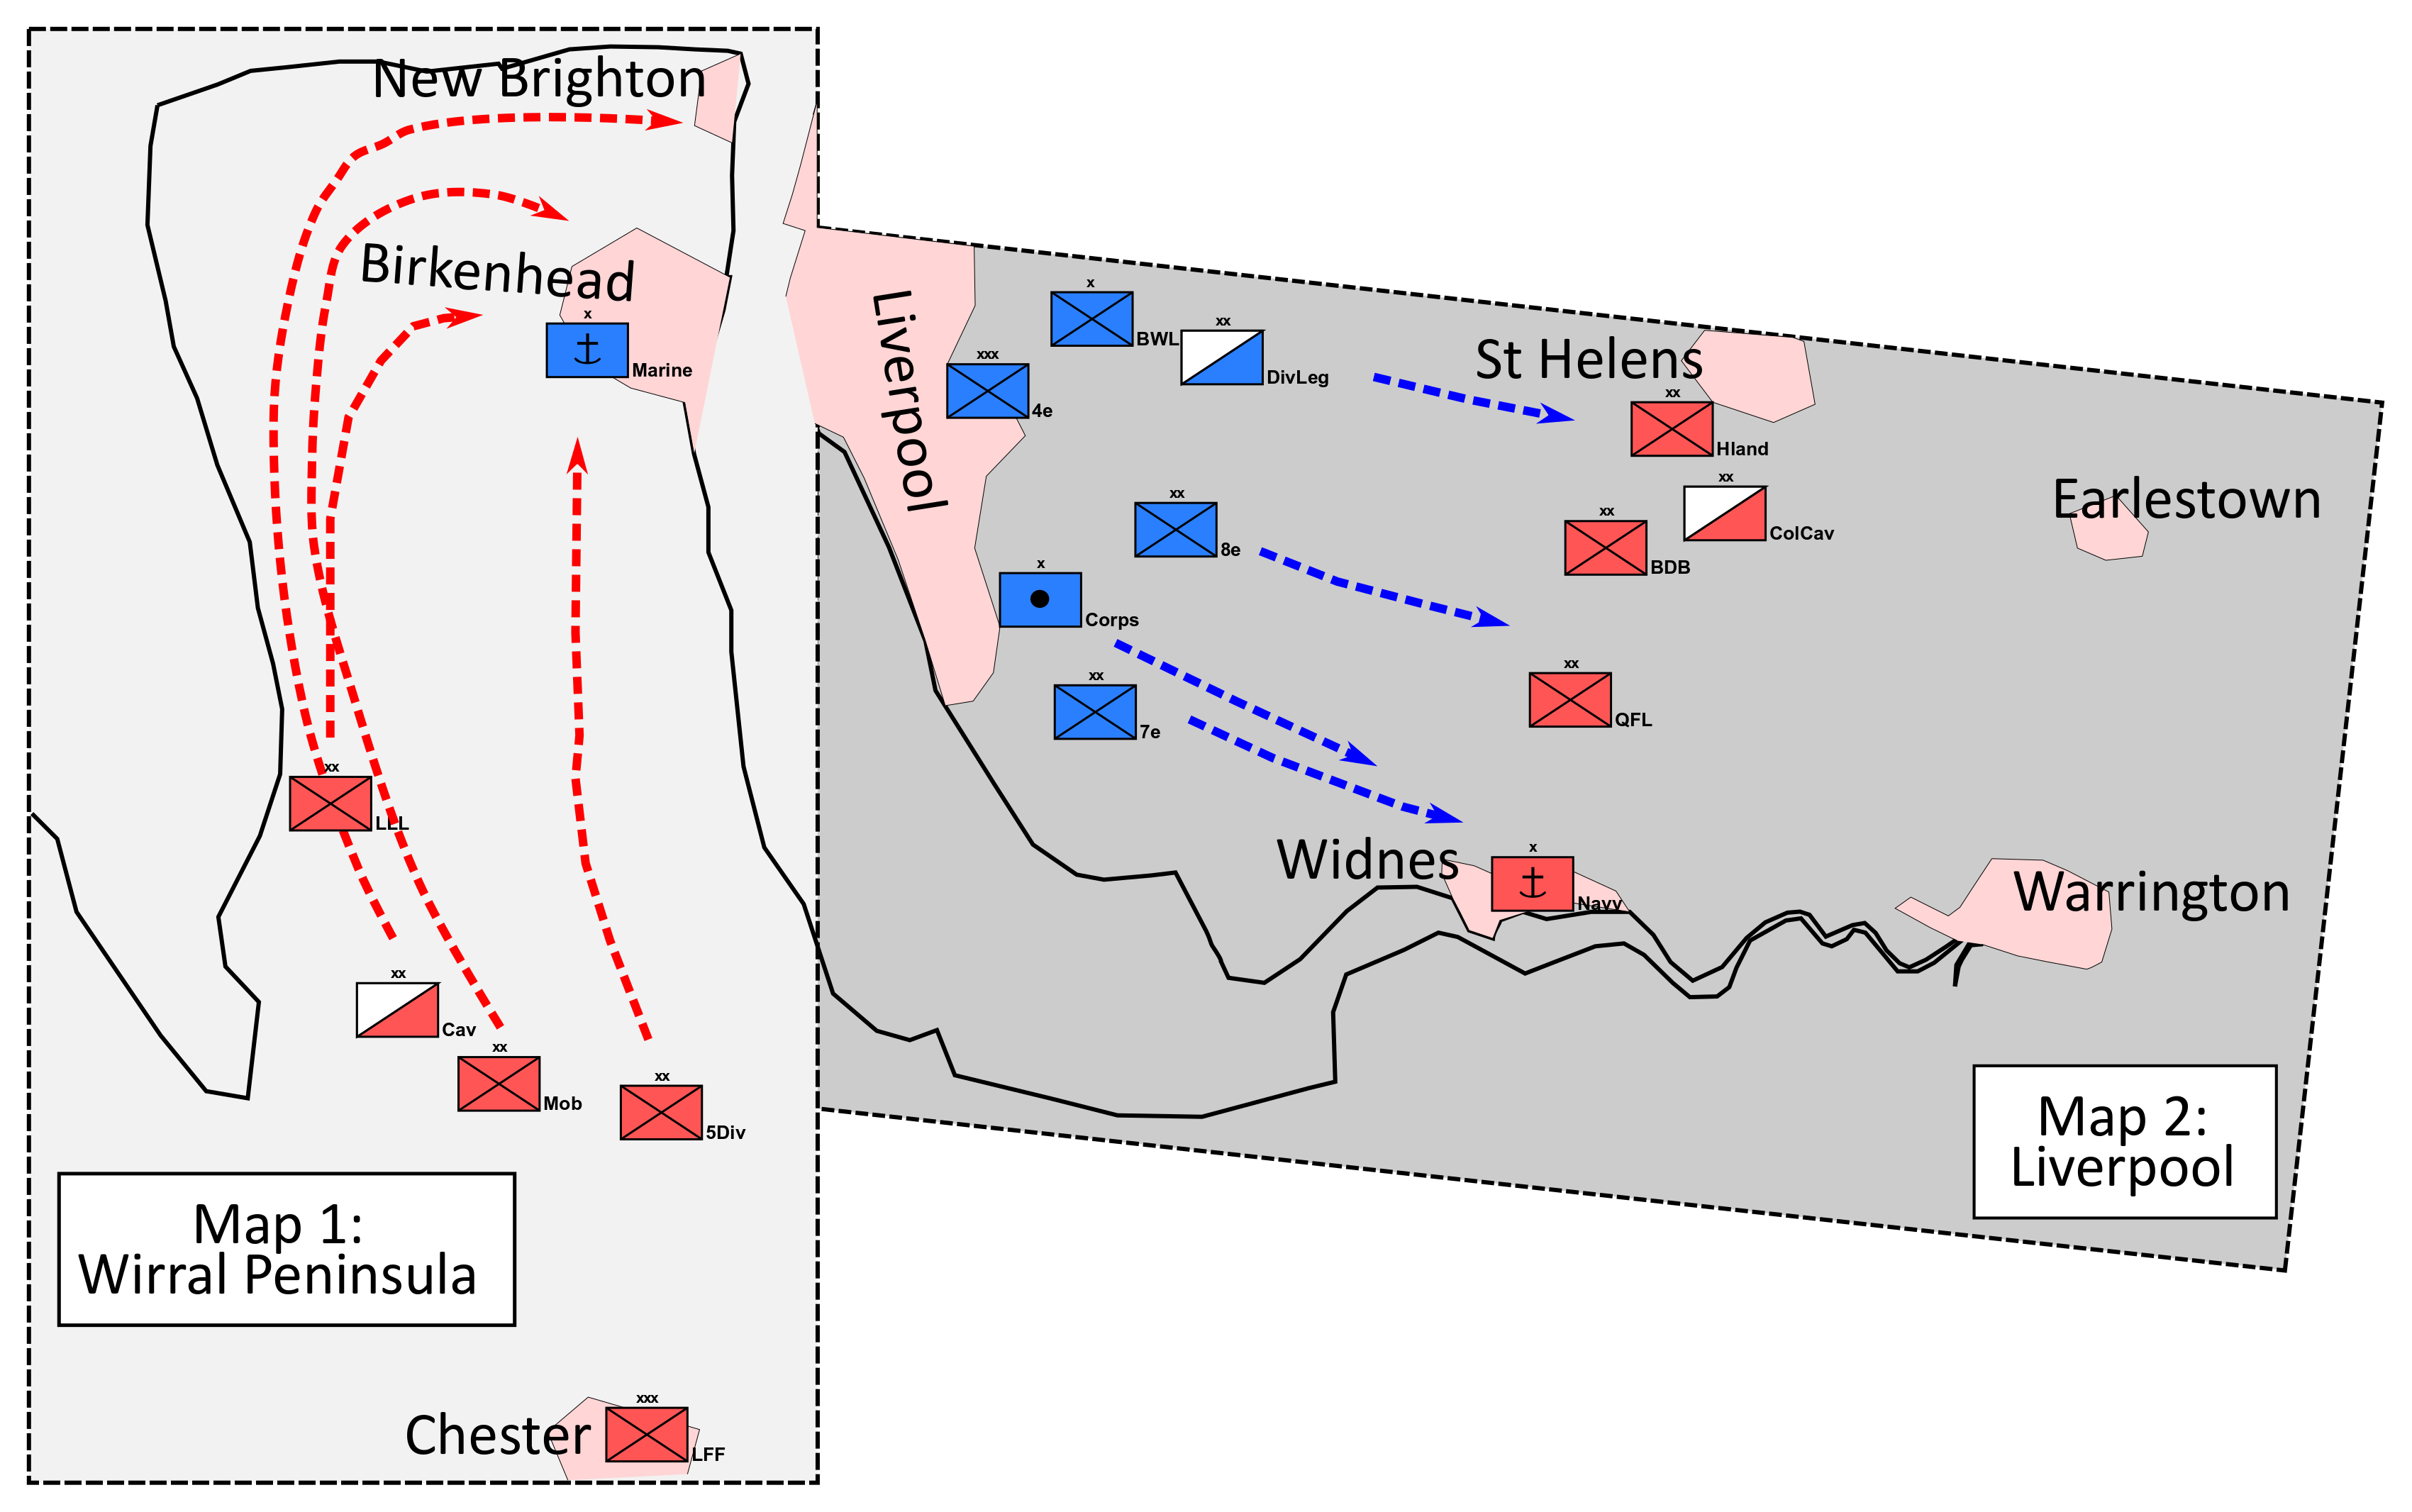
In November 2022, the Conflict Simulation Group ran a big, two day Pluie de Balles wargame with 38 participant at a service university. Two maps of about 2.30m by 4m were used covering the Wirral Peninsula and the area immediately to the East of Liverpool up to and including Warrington. On these, a blue team of 25 students representing a French invasion force was pitted against a red team of 13 students representing a British force. Both sides faced rather complex problems. The French team had a reinforced army corps at its disposal (4e corps) consisting of two infantry divisions (7e and 8e Division d’Infanterie), one cavalry divisions (Division Legere), several batteries of heavy artillery as well as a naval brigade and a brigade of British republican volunteers (British Workers’ Legion); reinforcements expected on day two included two further infantry brigades (Brigade de Tirailleurs Algeriens, Brigade de Zouaves) and a crack cavalry brigade (Brigade de Cuirassiers). British forces could not match French numerical strength and firepower; in addition to an infantry division (5 Division consisting of 1/5 Infantry Brigade, 2/5 Infantry Brigade and Durham Brigade) they included a powerful naval brigade, two cavalry brigades (a regular cavalry brigade and a colonial cavalry brigade) and four volunteer brigades (Birkenhead Defence Brigade, Liverpool Loyal Legion, Australian Mobile Brigade, Queen’s French Legion); the British staff also had two large railway guns (9.2in and 12in) at his disposal.
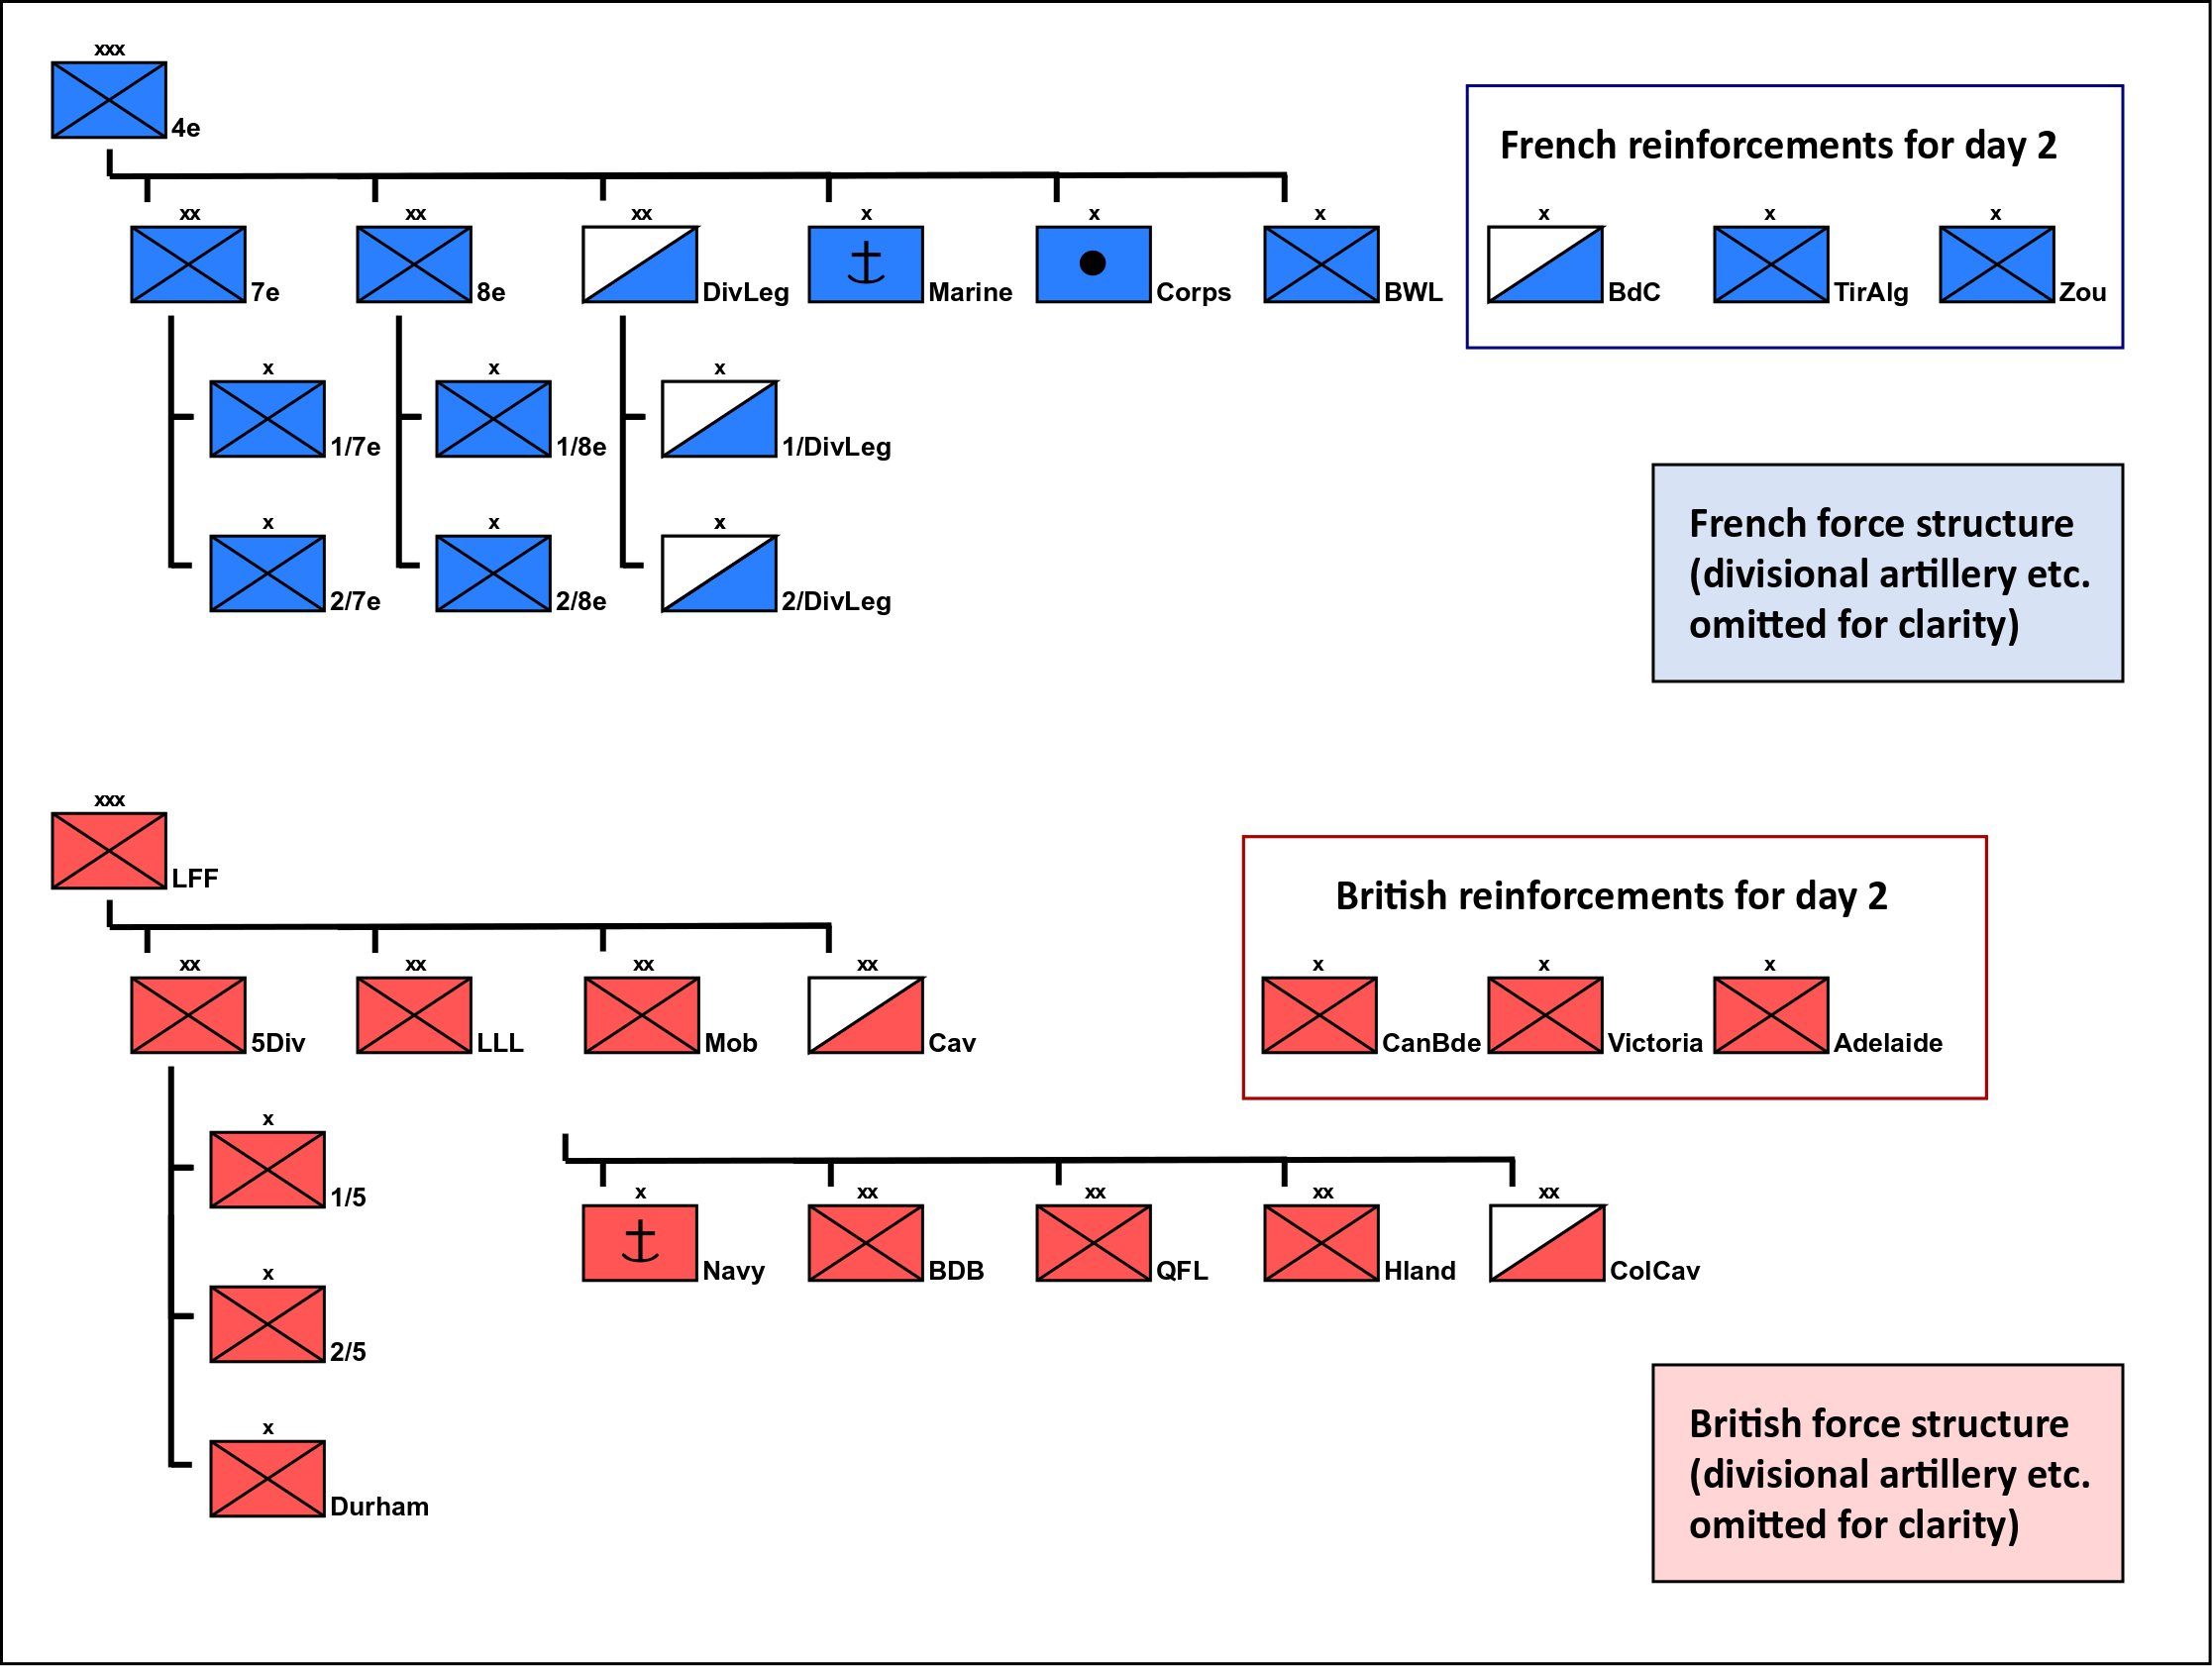
A schematic of French and British force structures; note that most of the British brigades were independent from divisional command.
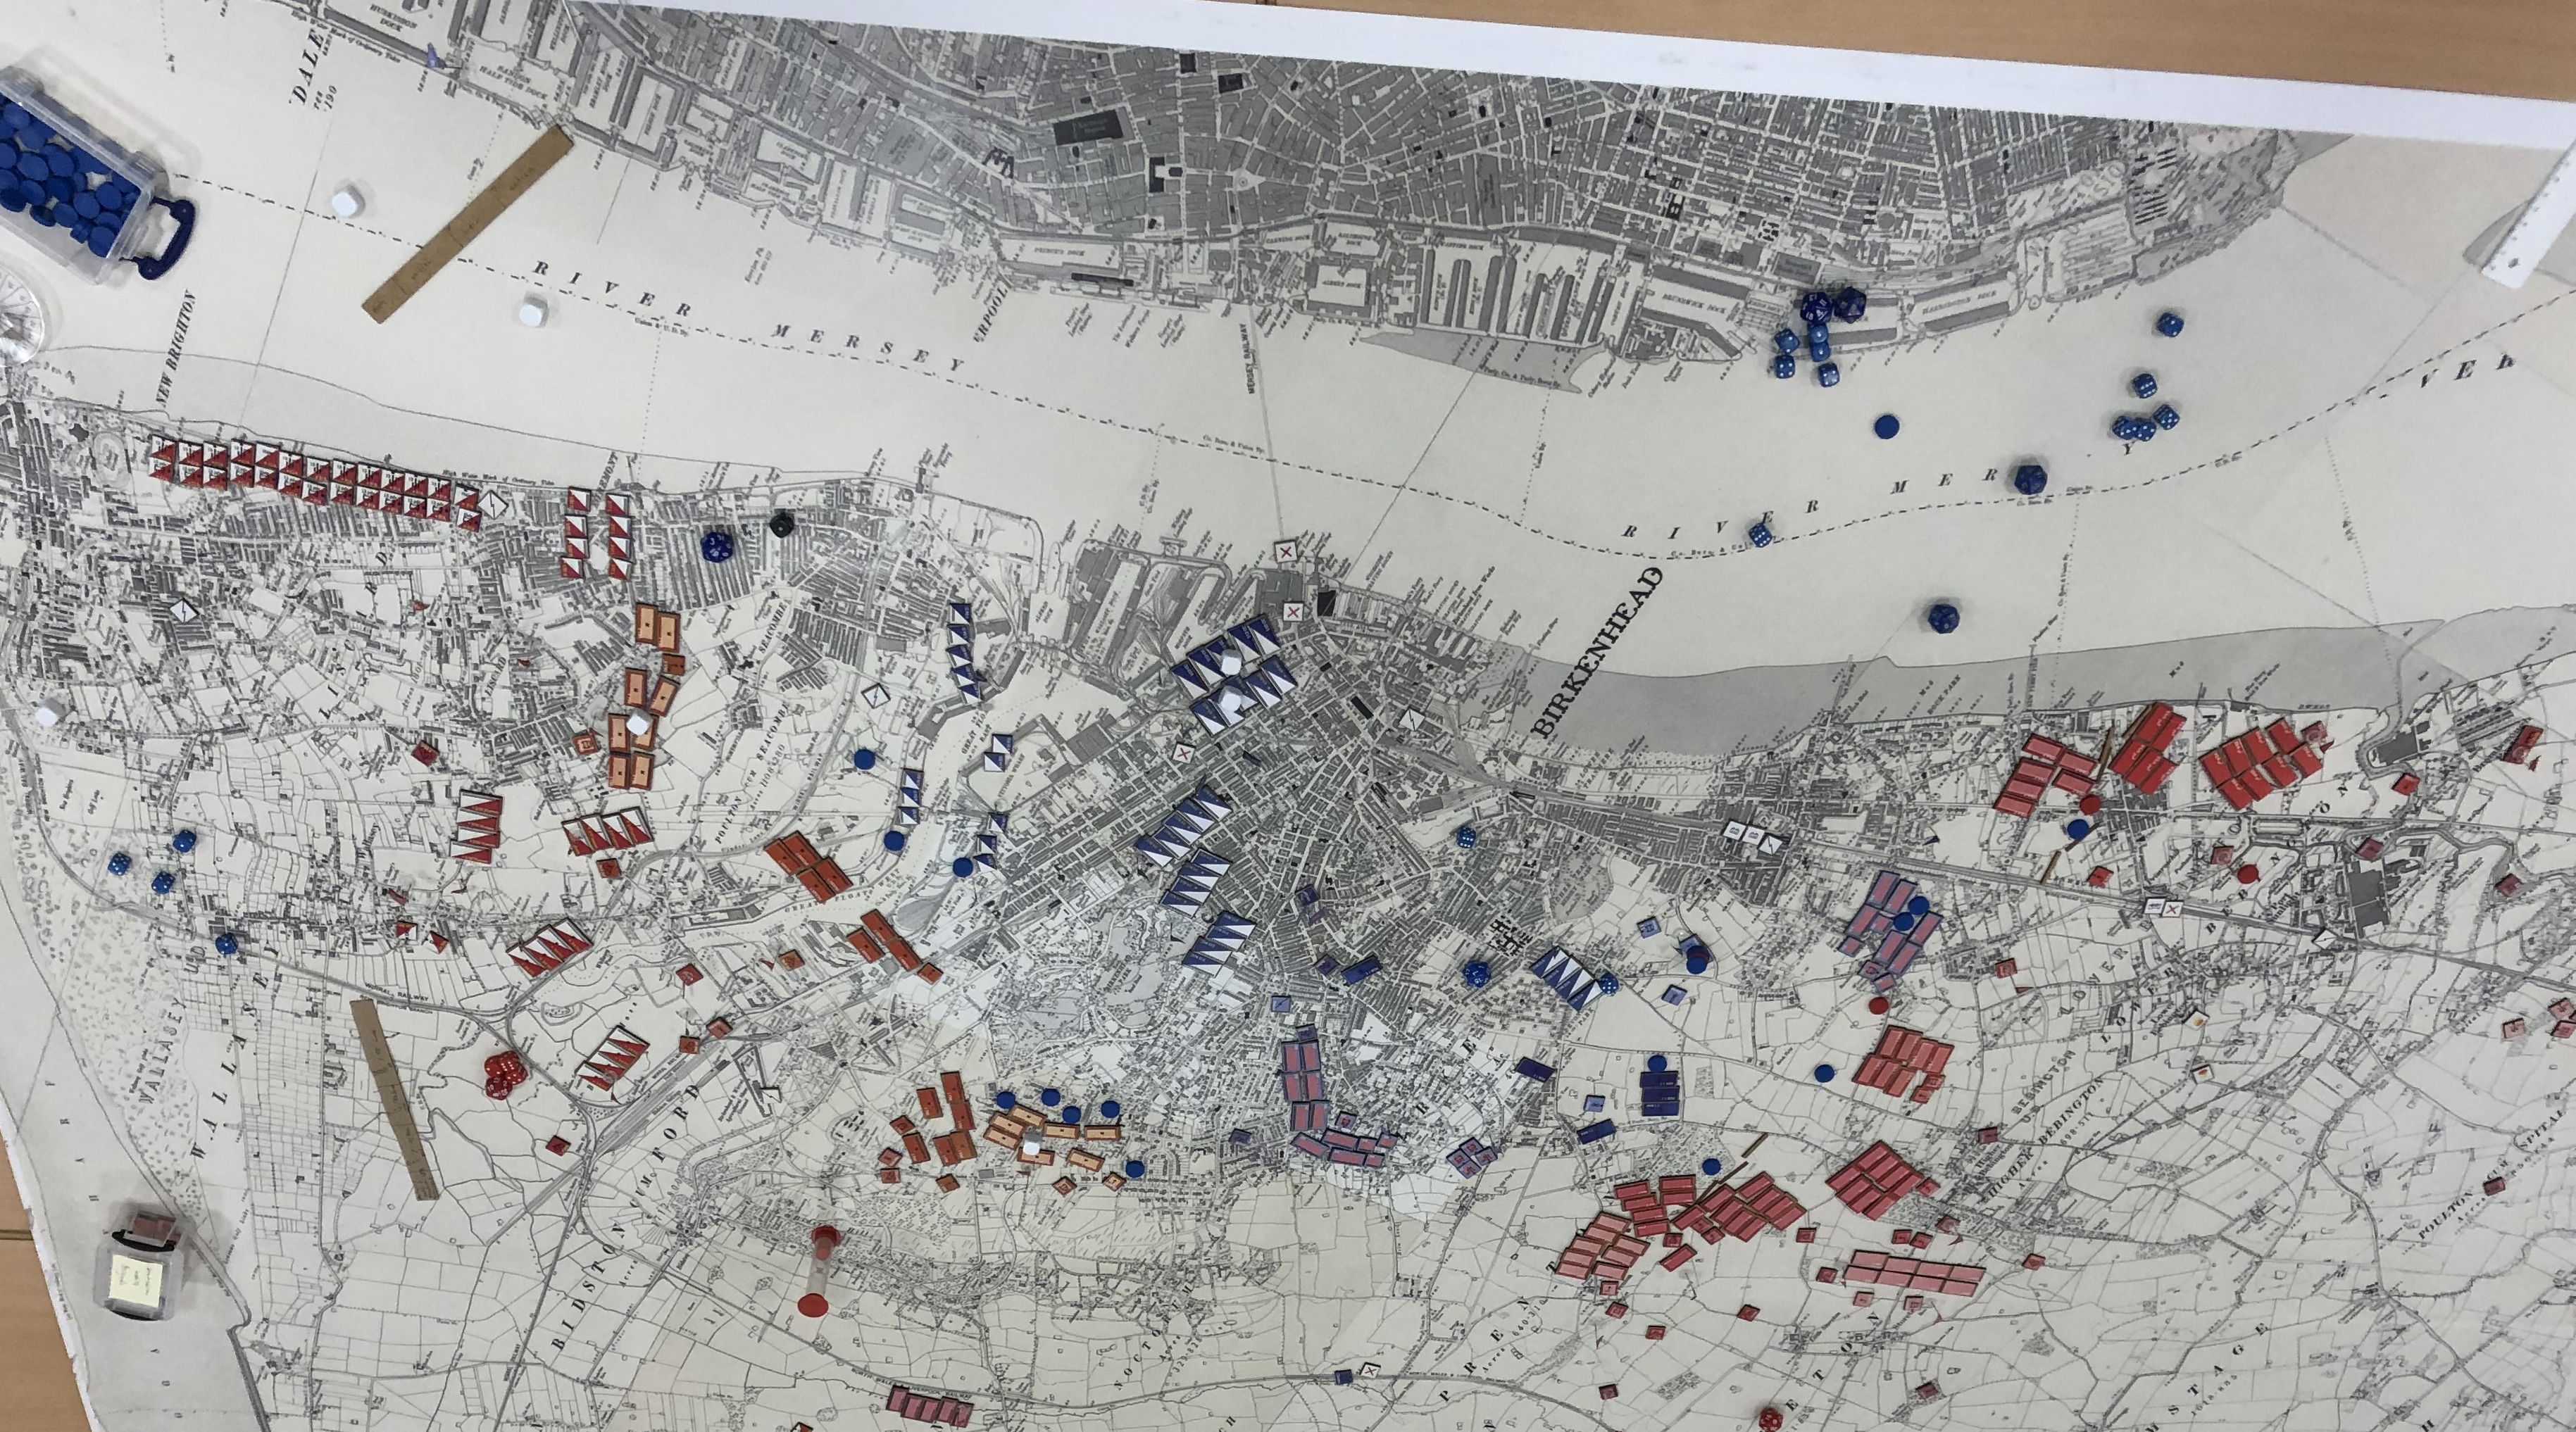
While the force structure of both teams would have suggested a simple French attack vs British defence scenario, both sides actually had missions that were fairly similar - only on different maps. The French army corps started with only its naval brigade on the Wirral Peninsula map, while the bulk of the French forces was concentrated in the eastern outskirts of Liverpool. The French had to hold the harbour and attack eastwards, with Widnes and Runcorn Bridge their main objective and Warrington as a secondary objective if possible. Conversely, the British forces were spread fairly thin on the Liverpool map, with only the naval brigade, two volunteer and one cavalry brigades available, while the remainder of their forces was concentrated north of Chester and preparing to attack up the Wirral Peninsula to take Birkenhead and, crucially, the key stretch of coastline near New Brighton from which the harbour could be controlled. Losing control over the harbour would mean that French reinforcements could not disembark on the morning of day 2.
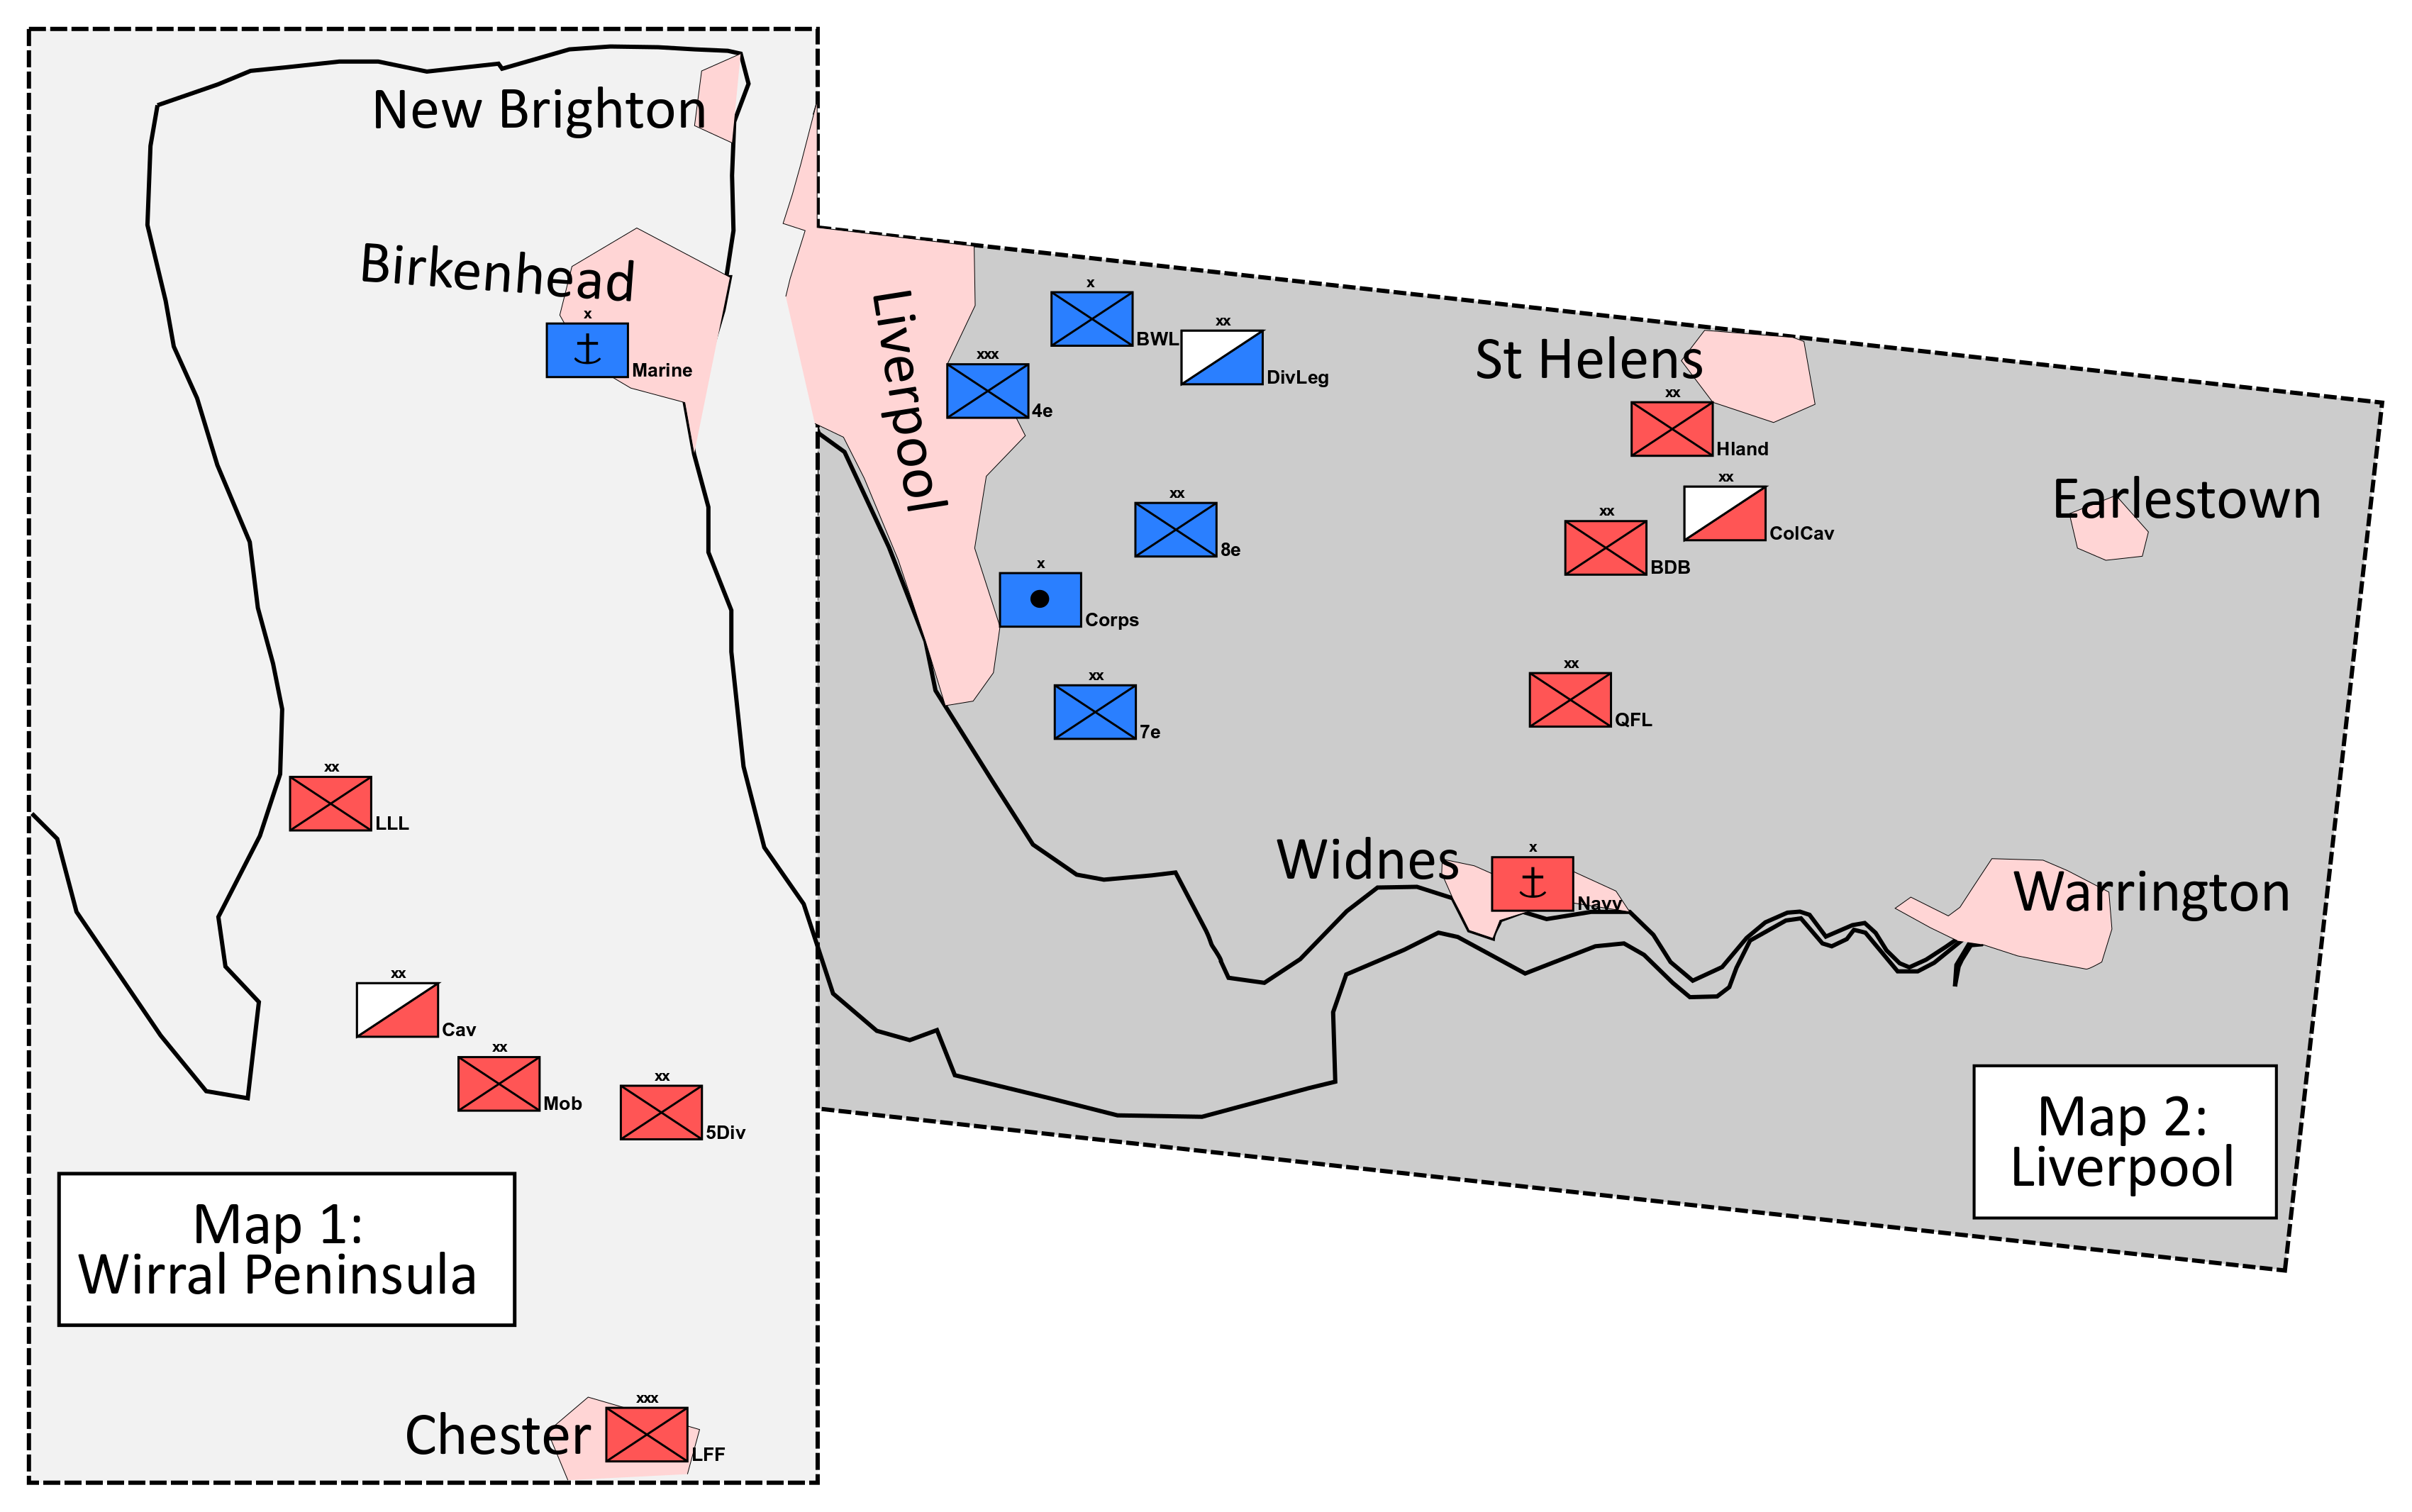
Initial starting positions.
Information packs were provided two weeks in advance to both teams who then had to prepare plans for the two days. The information packages included detailed OOBs, general scenario information and a large envelope full of patrol reports, intelligence assessments, intercepted enemy communication and the like; for both sides about 50 individual pieces of information were prepared. Unfortunately, due to the malice of the scenario designer (or so the author was told…), the quality of information with regard to precision as well as, uhem, veracity, varied considerable, so the teams not only had to puzzle together the individual pieces but actually assess whether they were reliable or not. To take but two examples, the British team was provided with three precise reports on the location of the French HQ - pointing to three different locations. The French team on the other hand was provided with an intelligence assessment according to which only a weak British volunteer brigade was present on the Wirral Peninsula, a captured British operational plan for a counterattack on the Liverpool map and some mysterious reports about soldiers disembarking in Chester.
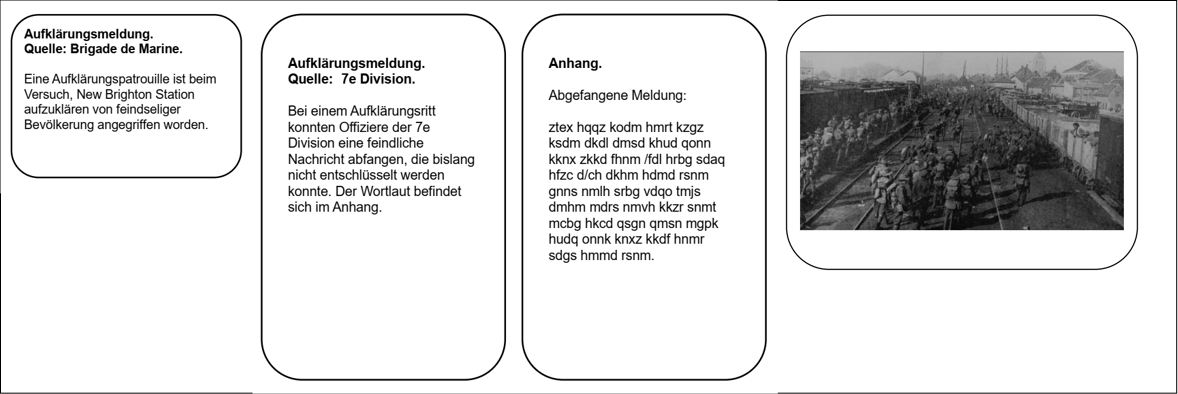
Three typical intelligence reports - a patrol report, intercepted enemy communication and a picture (in German).
II. “Everyone has a plan until they get punched in the mouth” - Grand designs on all sides.
Both plans reflected to some extent how the teams had evaluated the available intelligence. The French team, assuming there were only weak British forces on the Wirral Peninsula, decided to launch a probing attack down the peninsula aiming at - eventually - Chester; the main effort was to be directed against Widnes and Warrington. The British team, deciding it was about to face an infantry division supported by cavalry and artillery, decided to make their attack on the Wirral Pensinsular as strong as possible, reinforcing the division starting there as per the scenario instructions with a powerful cavalry brigade and a mobile infantry brigade.
The respective plans.
Both sides were in for quite a suprise. British forces on the Liverpool map were confronted with nearly the whole French corps and thus massively outnumbered - around 5,000 foot, 1,200 horse and 47 guns (6 heavy, 2 superheavy) facing French force of around 17,300 foot, 1,800 horse and 76 guns (8 heavy, 8 superheavy), making successful defence a daunting task. The French naval brigade was equally surprised when six members of the British team entered the room and started putting their forces on the map. Here, 2,700 French foot supported by 4 guns faced 11,300 British foot, 1,100 horse and no fewer than 52 guns including two heavy railway guns - quite a mismatch!
The British force on the Wirral Peninsual map; in the background (from the left) 5 Division, Cavalry Brigade and Australian Mobile Brigade, in the foreground the Liverpool Loyal Legion.
III. The course of the battle.
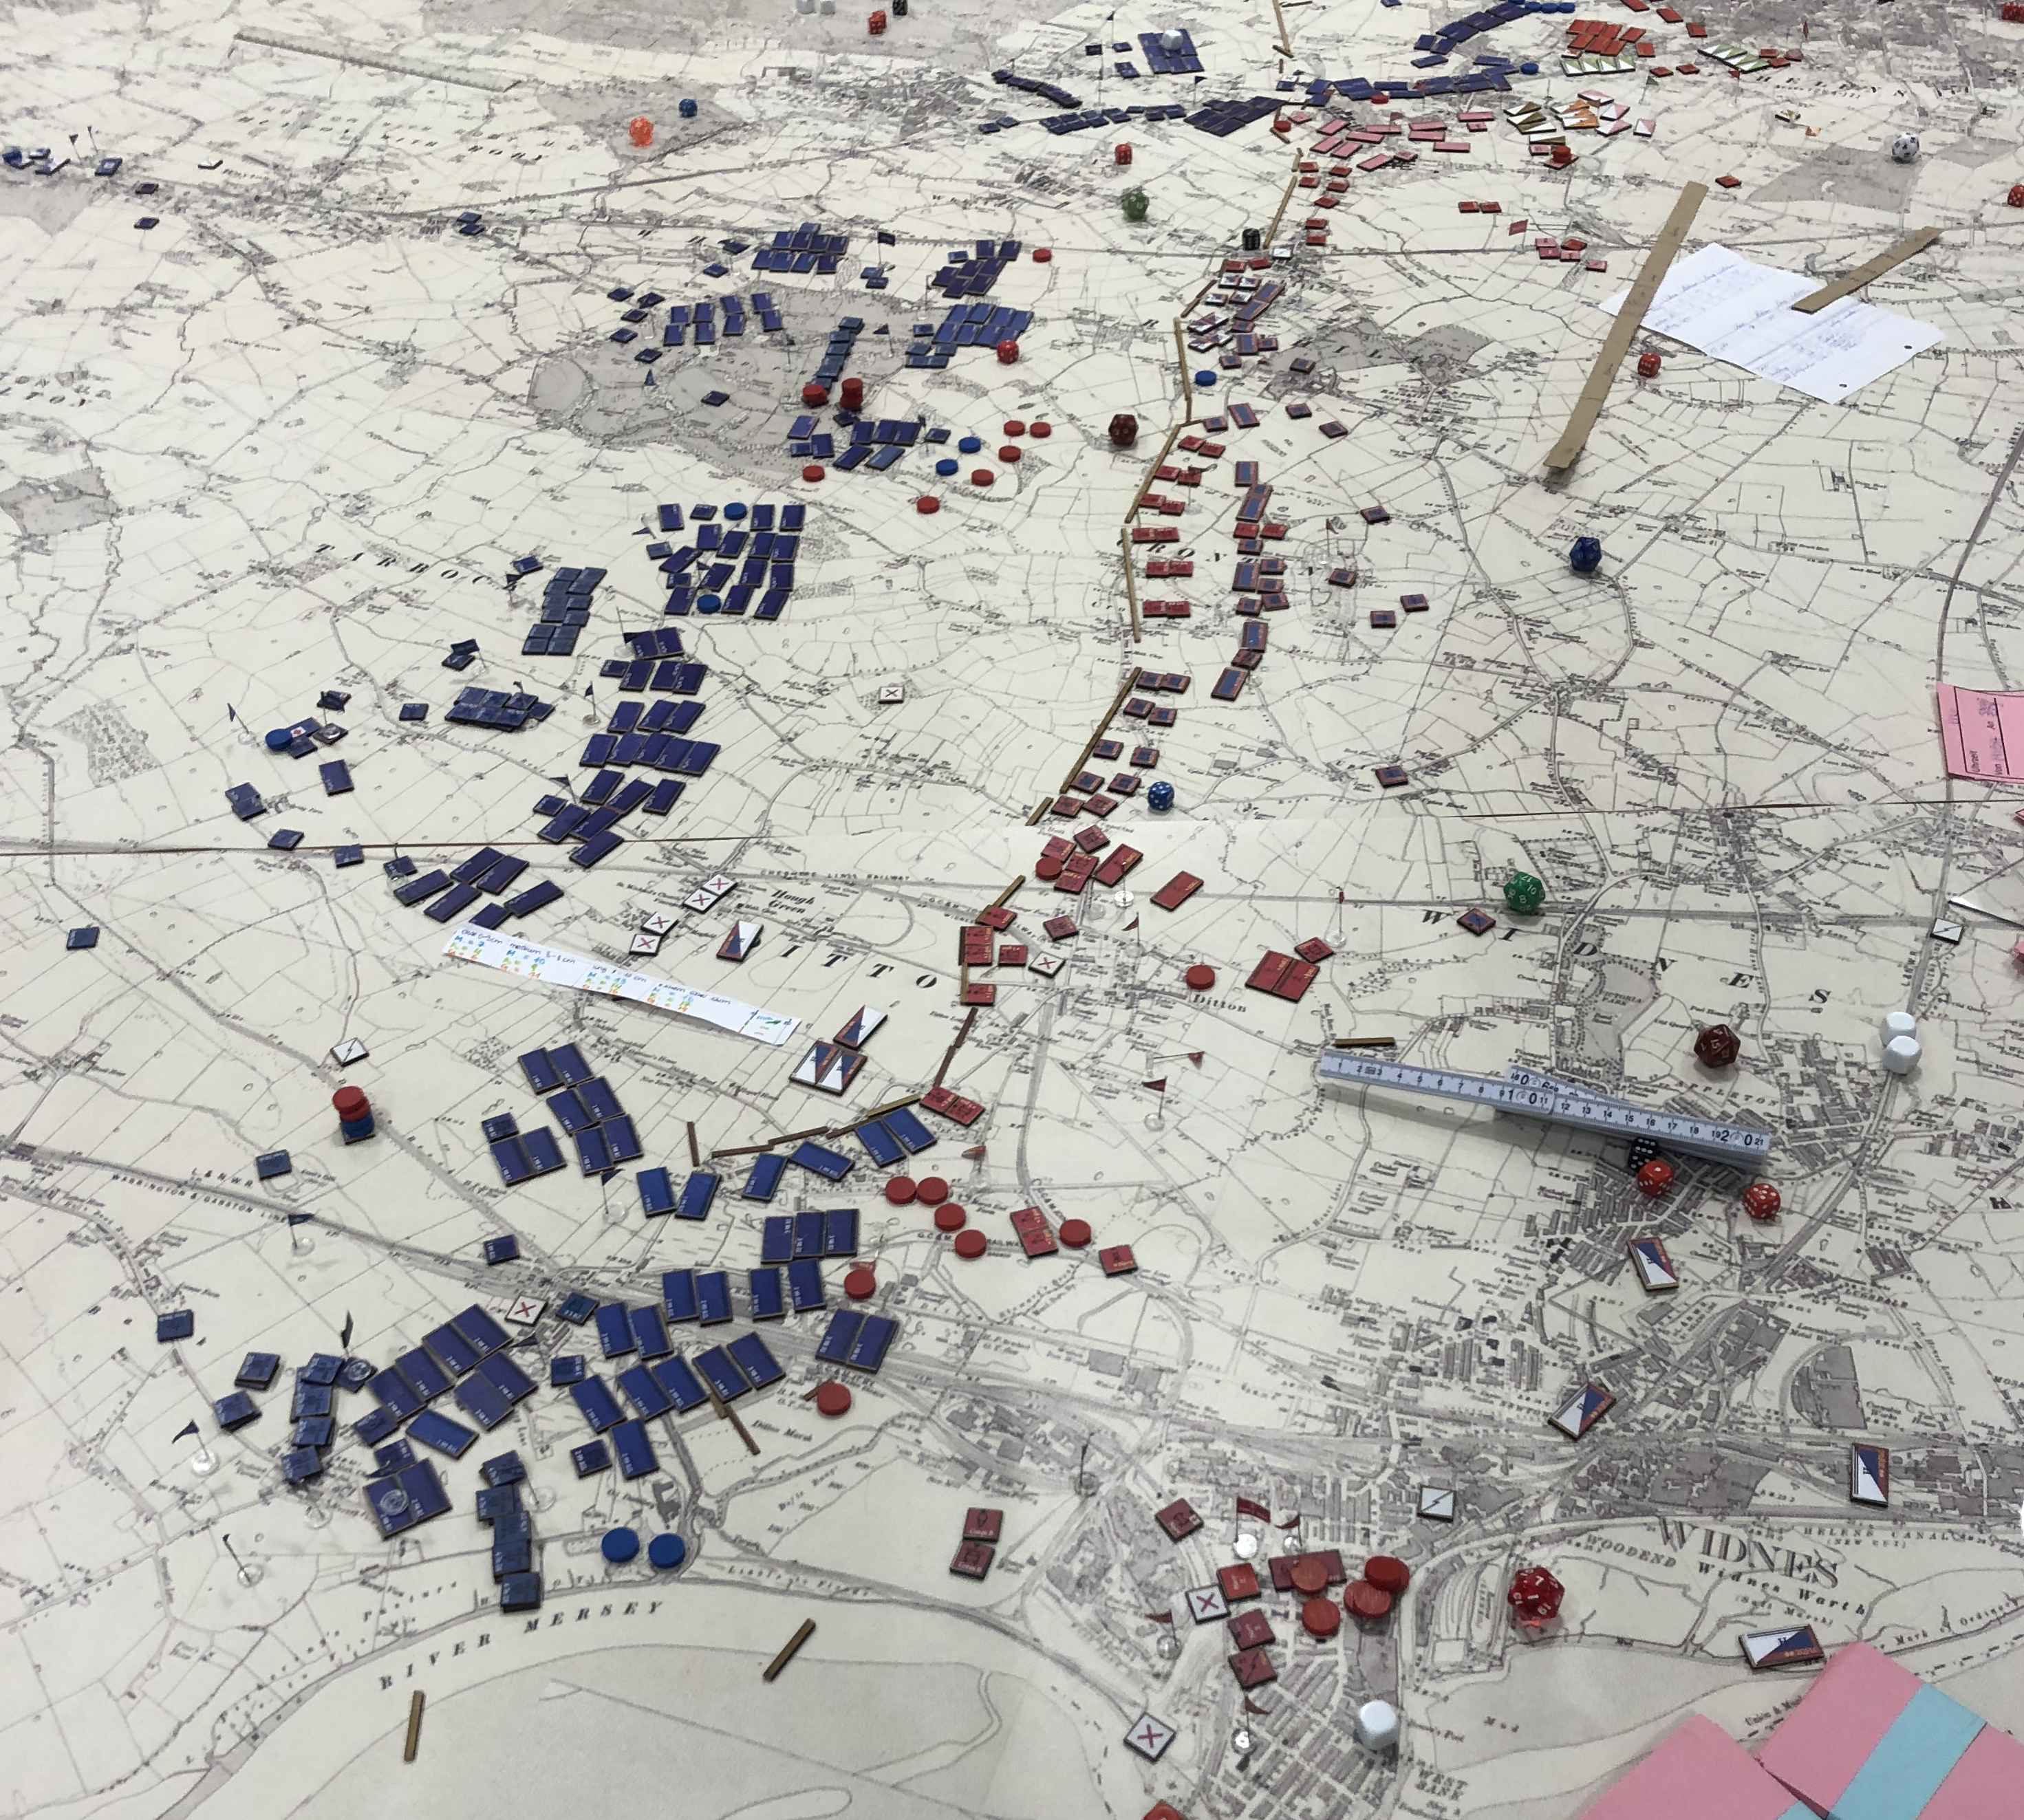
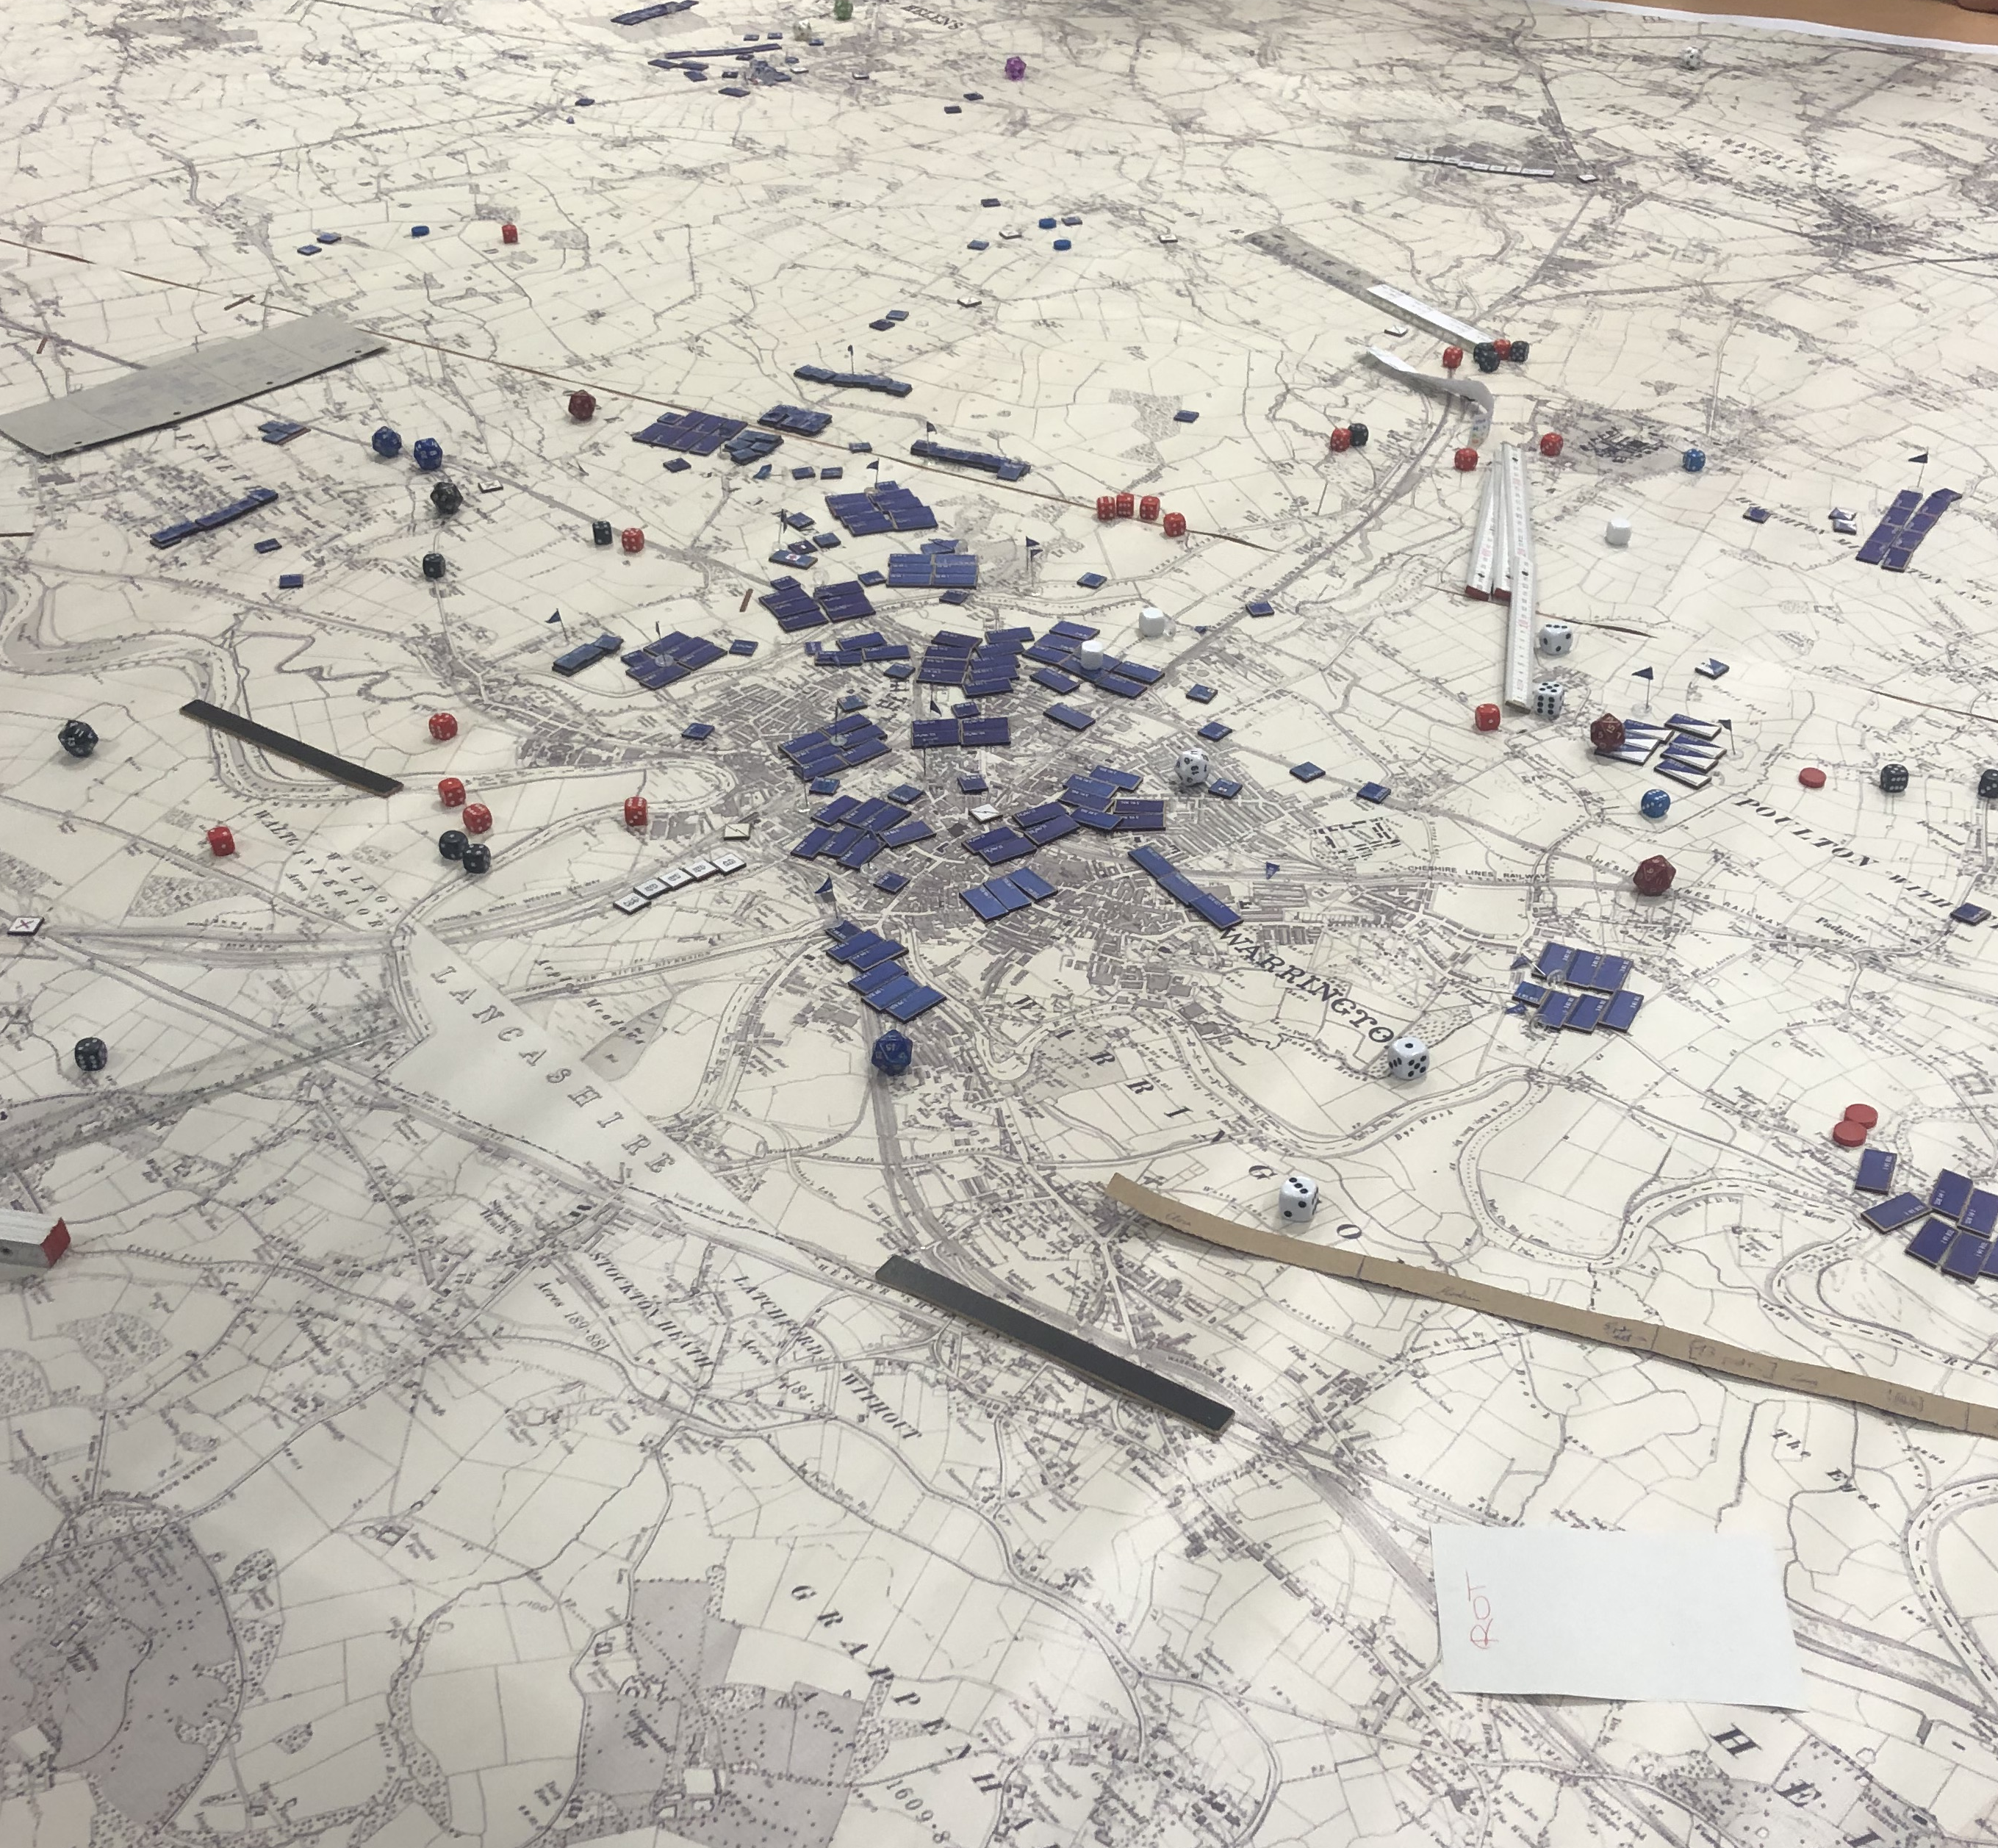
And so it began. On the Liverpool map the British field commanders made the fateful decision to establish a continuous line of defence from St Helens down to Widnes. While certainly impressive on the map it meant they had to feed all their units into this line, basically keeping no reserves. On the other hand the French started moving slowly forward, attacking on a very broad front, with the two infantry divisions operating beside each other, while the cavaly division covered the northern flank. The attack on Widnes was supported by the corps artillery, and once its heavy batteries had opened fire, Widnes was doomed. Without any mobile reserves the British had no means of tyring to push through the wall of French infantry and get at the artillery positions, and by the end of the day Widnes had been reduced to rubble and the naval brigade all but destroyed. Earlier that day, the French cavalry division had managed to achieve a breakthrough around St Helens and was posed to strike a devastating blow to British defence efforts by cutting through the British rear and occupying Warrington which at the time was virtually undefended. For the French, victory - at least on the Liverpool map - seemed within grasp.
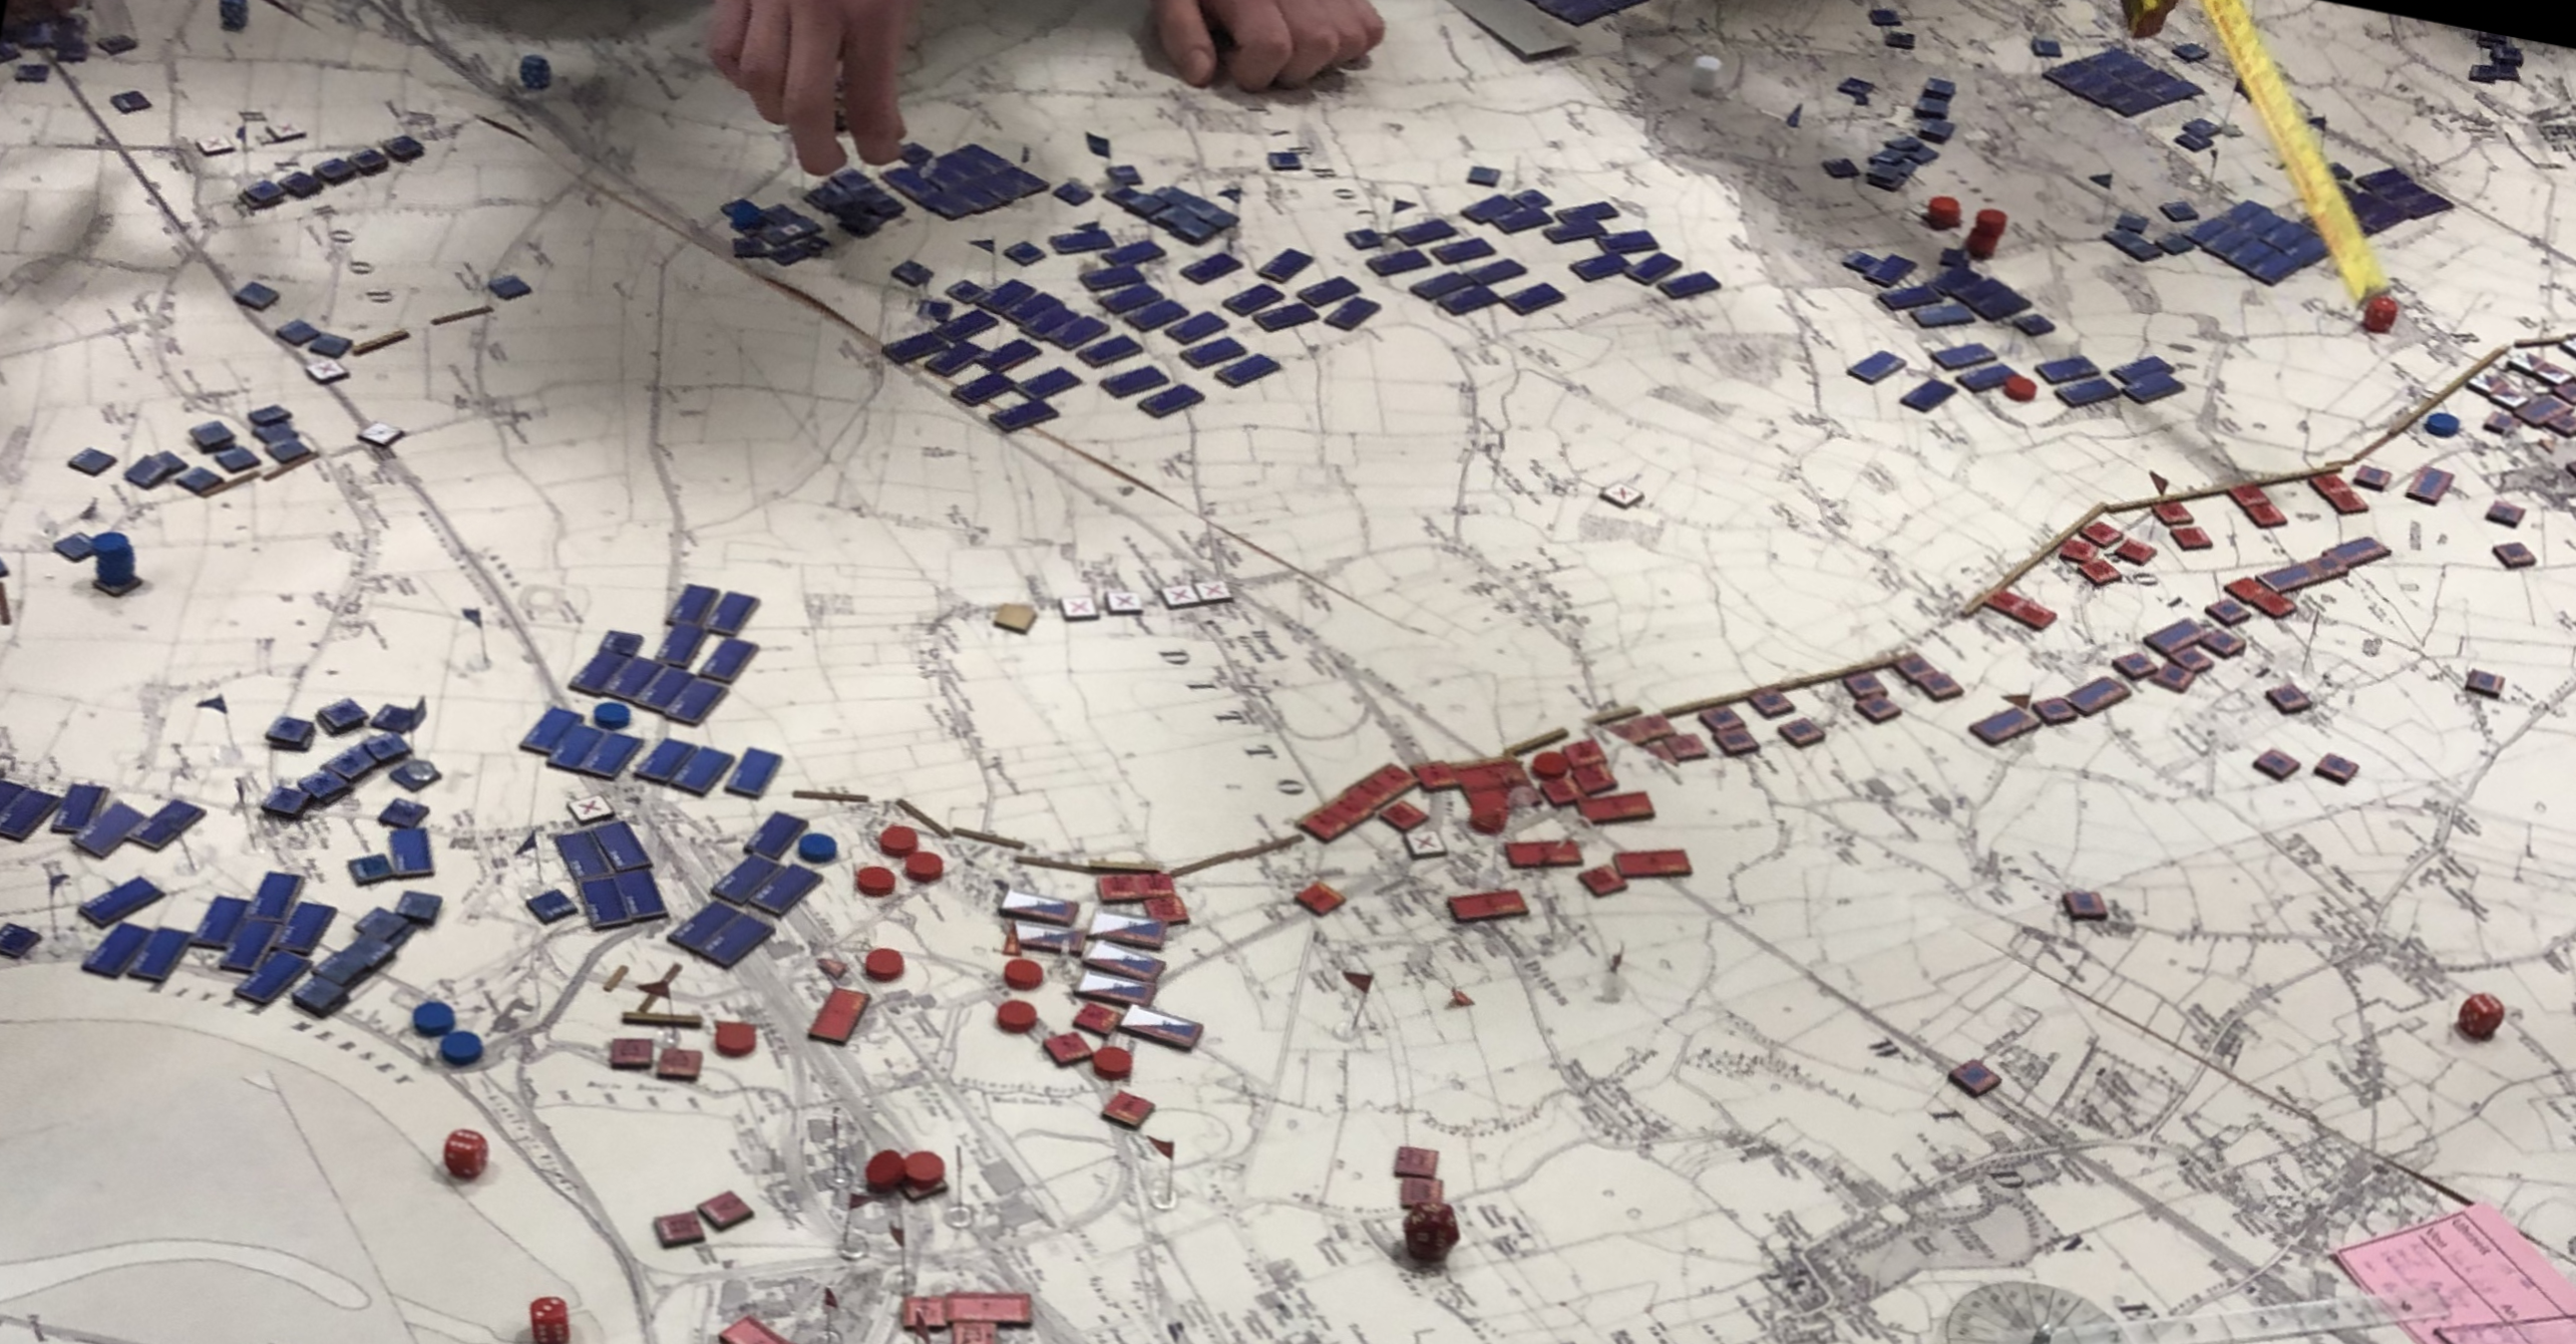
The French onslaught.
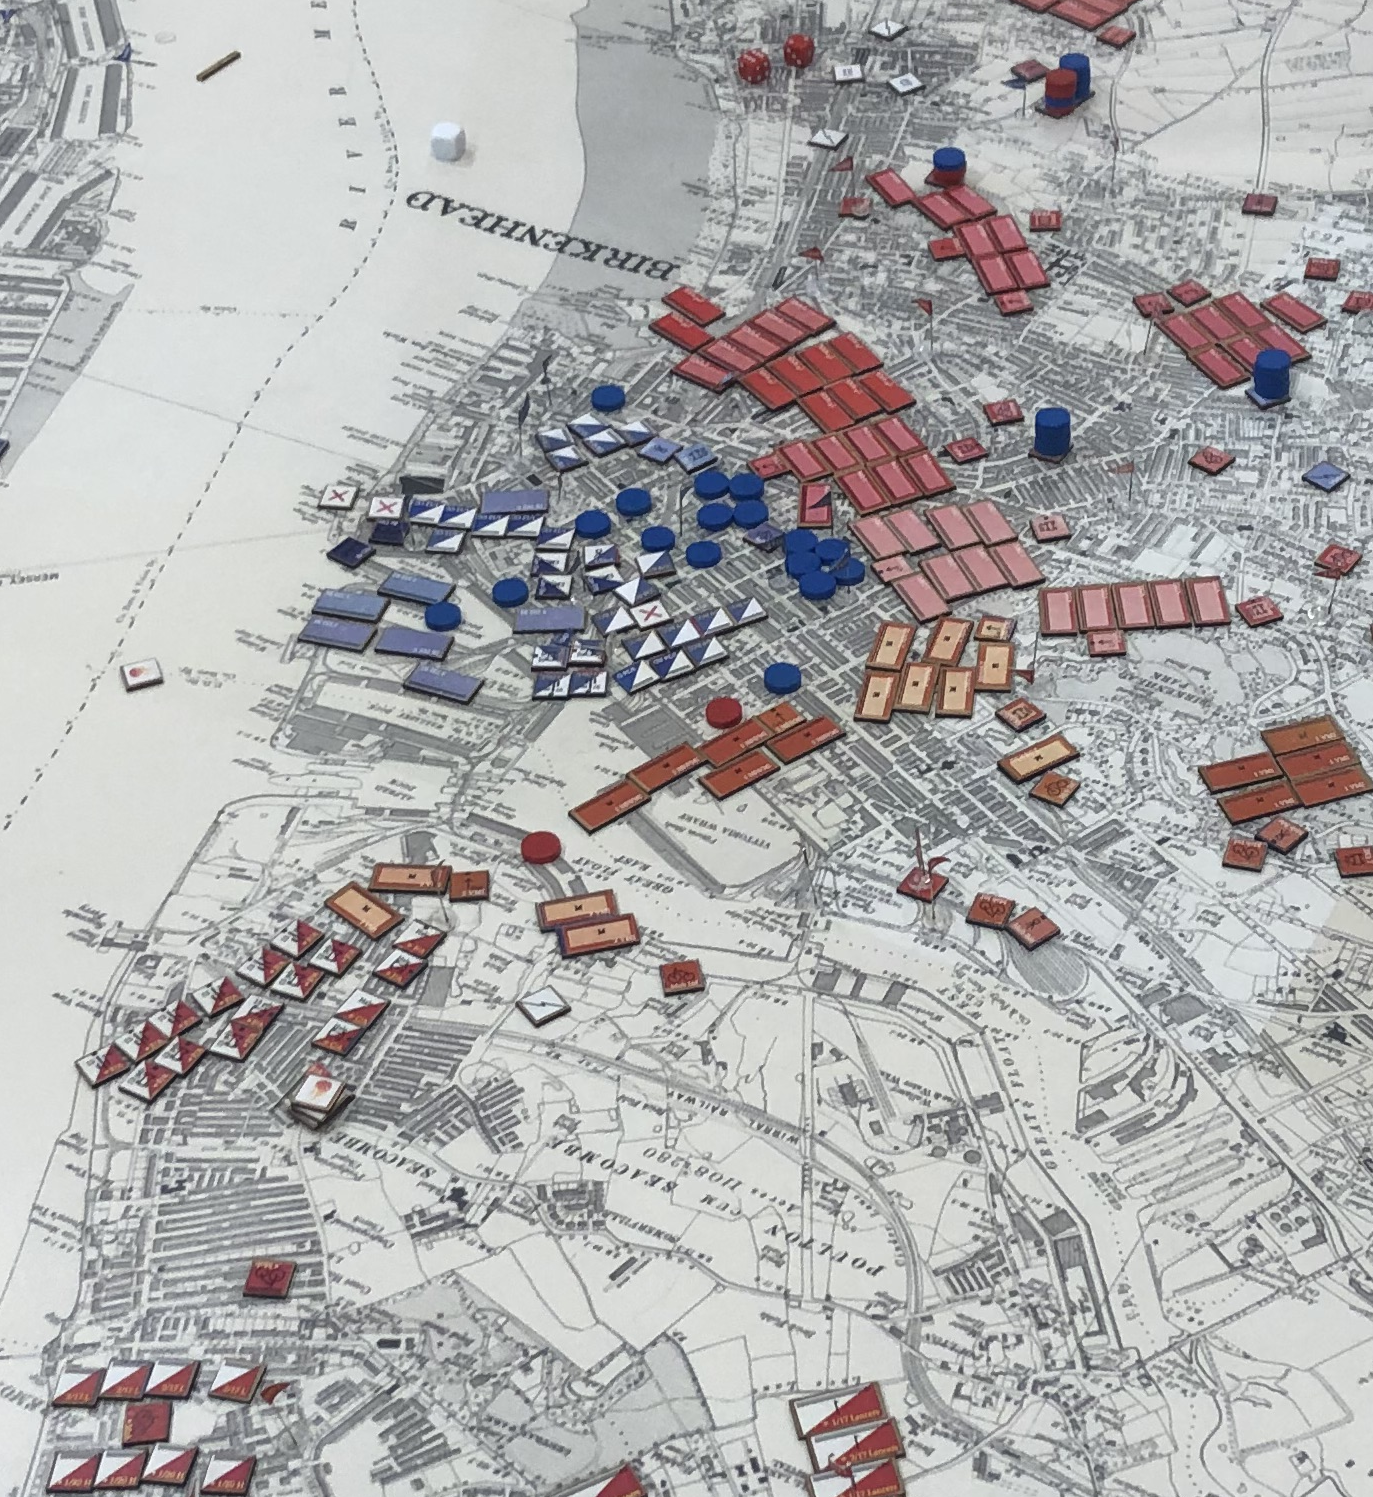
However, then the French staff intervened and ordered the cavalry division back. What had happened? On the Wirral Peninsula, the French naval brigade had offered valiant resistance, but not only had it been pushed back into Birkenhead with heavy losses, British forces had also moved around Birkenhead with speed and determination and were on the verge of occupying the beach of New Brighton, key territoy north of Birkenhead commanding control over the approaches to Liverpool harbour. With artillery in place, they would be able to deny the French any reinforcements. Initial calls for support had resulted in the French staff sending the British republican brigade to Birkenhead and a pontoon bridge to be constructed to allow for further reinforcements. However, the British Workers’ Legion soon suffered significant losses, its inexperienced and ill-equipped soldiers no match for regular British infantry. As a result, calls for reinforcements from Birkenhead became increasingly desperate, and as a result the French staff finally decided to pull the cavalry division out of the front and move it to Birkenhead. With hindsight this proved to be a fateful decision, as it not only prevented the cavalry from achieving a striking success on the Liverpool map, it also once again sent forces of questionable value to Birkenhead, as the cavalrymen could only fight dismounted.
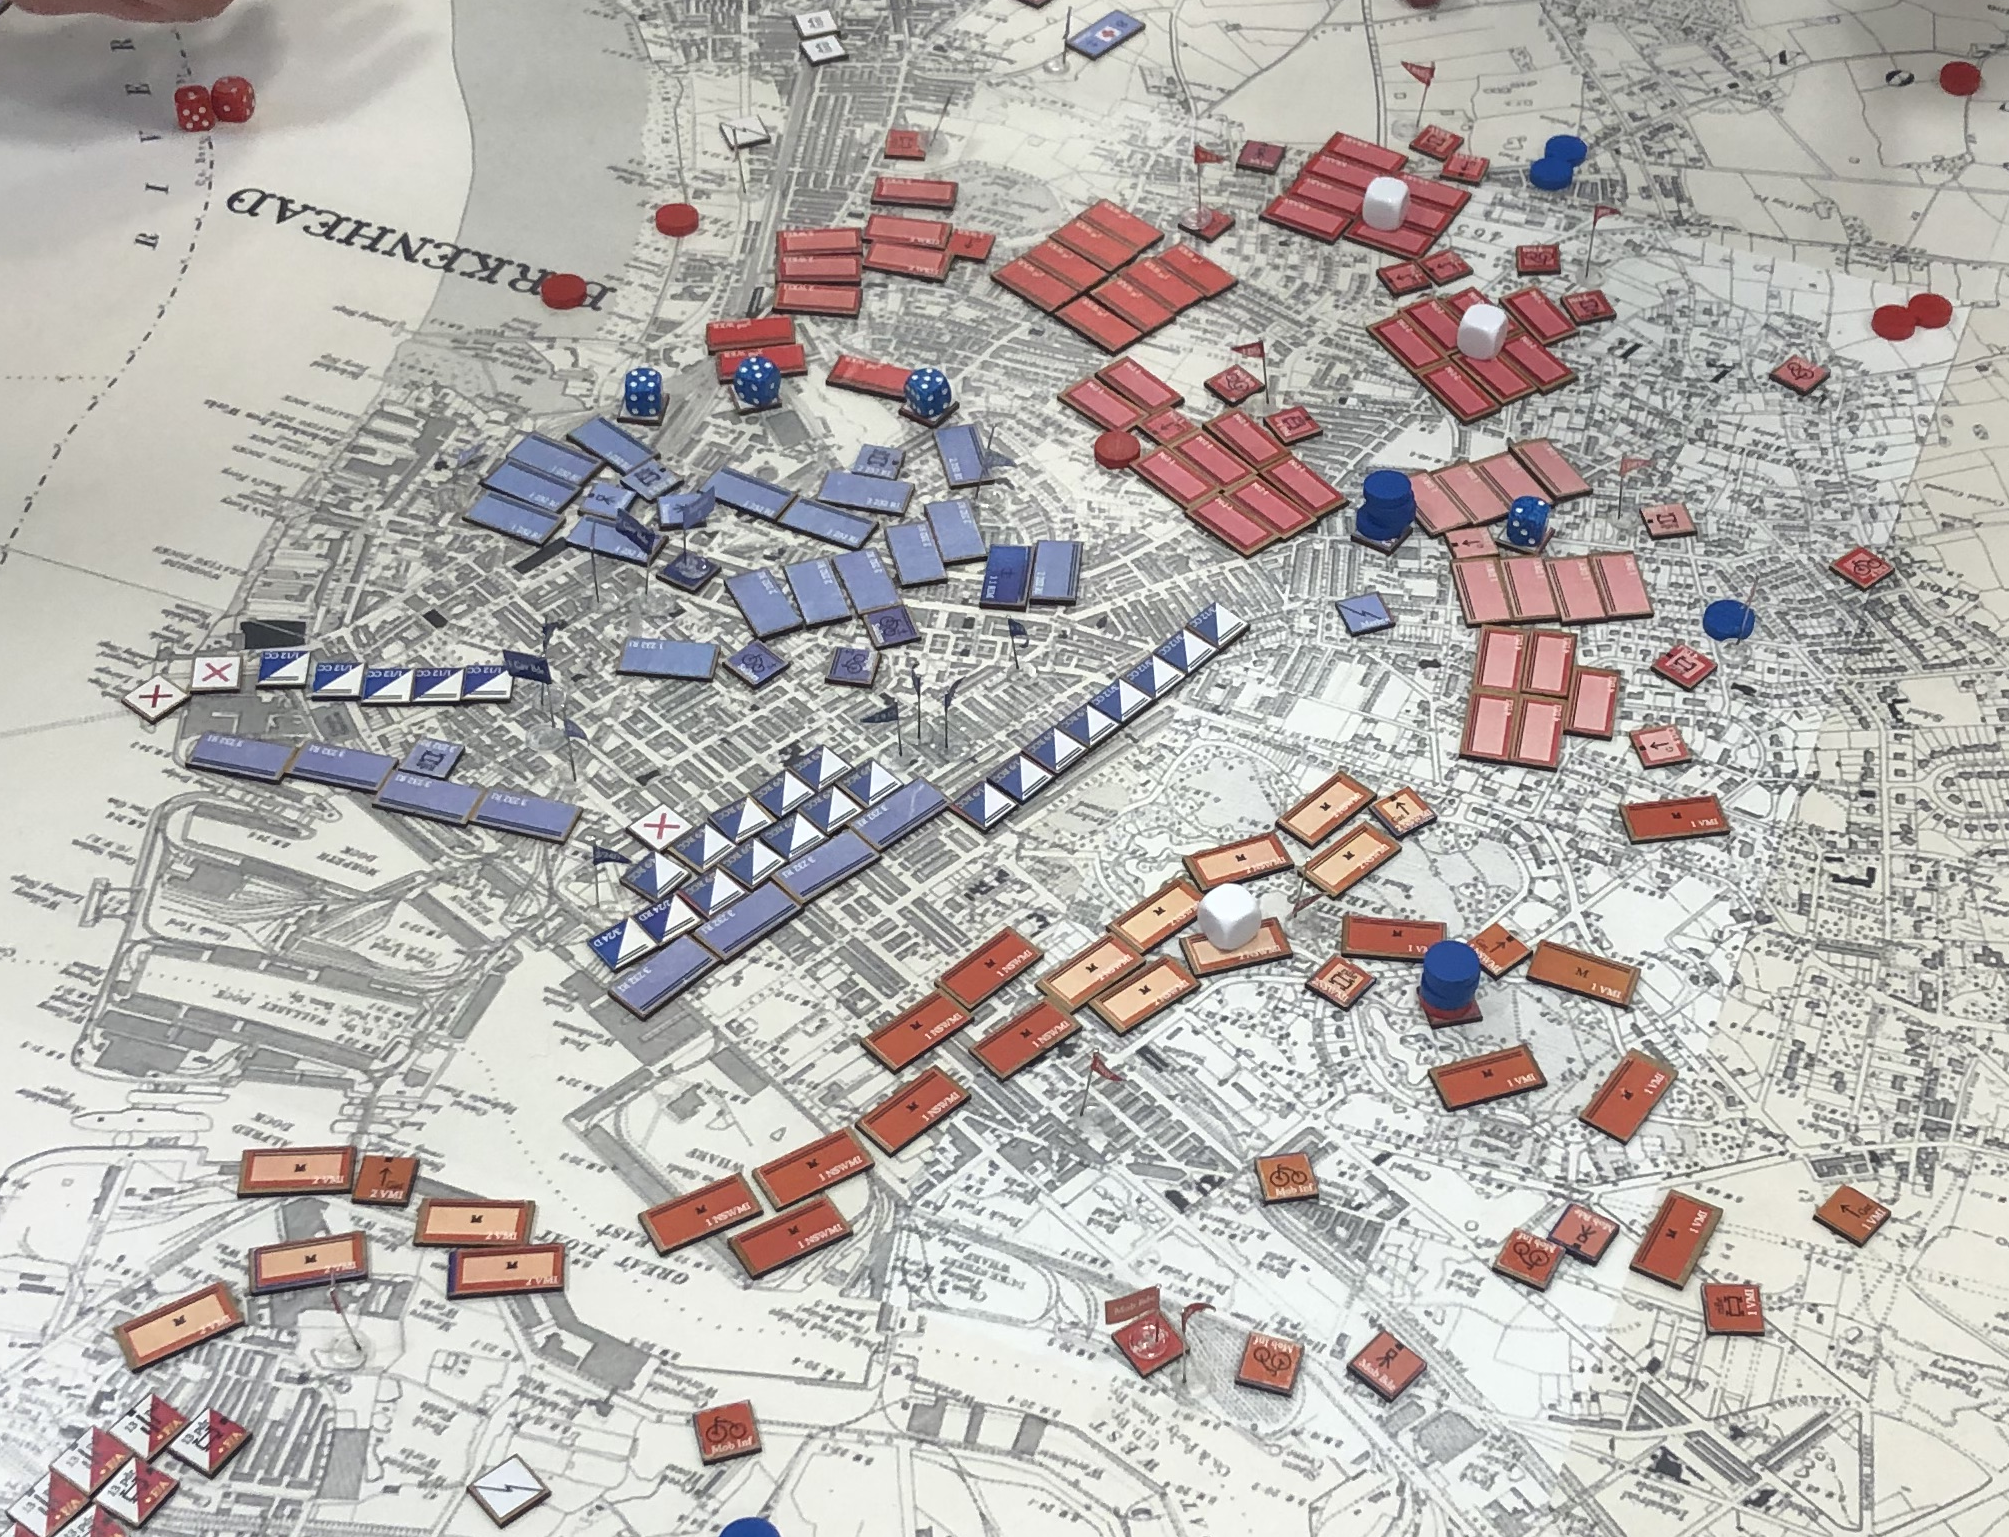
Dismounted cavalry joining the defence of Birkenhead.
To make matters worse, at precisely that point luck also turned against the French team. Just a few minutes before the British staff had ordered “Nelson”, their massive 12in railway gun, to ceize firing on targets west of Widnes and turn to firing at the ponton bridge instead. And while the accuracy of the huge British gun was far from optimal, the fourth shot landed on the pontoon bridge just as the first elements of the cavalry division were crossing it. Losing a squadron of cavalrymen and, crucially, parts of the pontoon bridge, the first brigade made it across into Birkenhead, leaving however divisional command, the second brigade and the divisional artillery on the other side of the Mersey. While most of the cavalrymen dismounted to join the ranks of the French naval brigade, the remaining elements of the cavalry division rejoined the French effort on the Liverpool map.
As the first day was slowly nearing its end, the French onslaught on the Liverpool map proved to be unstoppable. Although British resistance was determined, French heavy artillery took a heavy toll particularly on the British naval brigade in Widnes, and by the end of the day the British line was all but desintegrating. Now both sides were haunted by their decisions not to keep mobile reserves - the British, because it might have bought them more time, the French because they could have exploited their success by pushing through the enemy front at one point. Instead, the latter resolved on continuing their slow approach of grinding down British forces, who in turn tried to contest every square foot of territory.
Widnes has fallen - the evening of day 1.
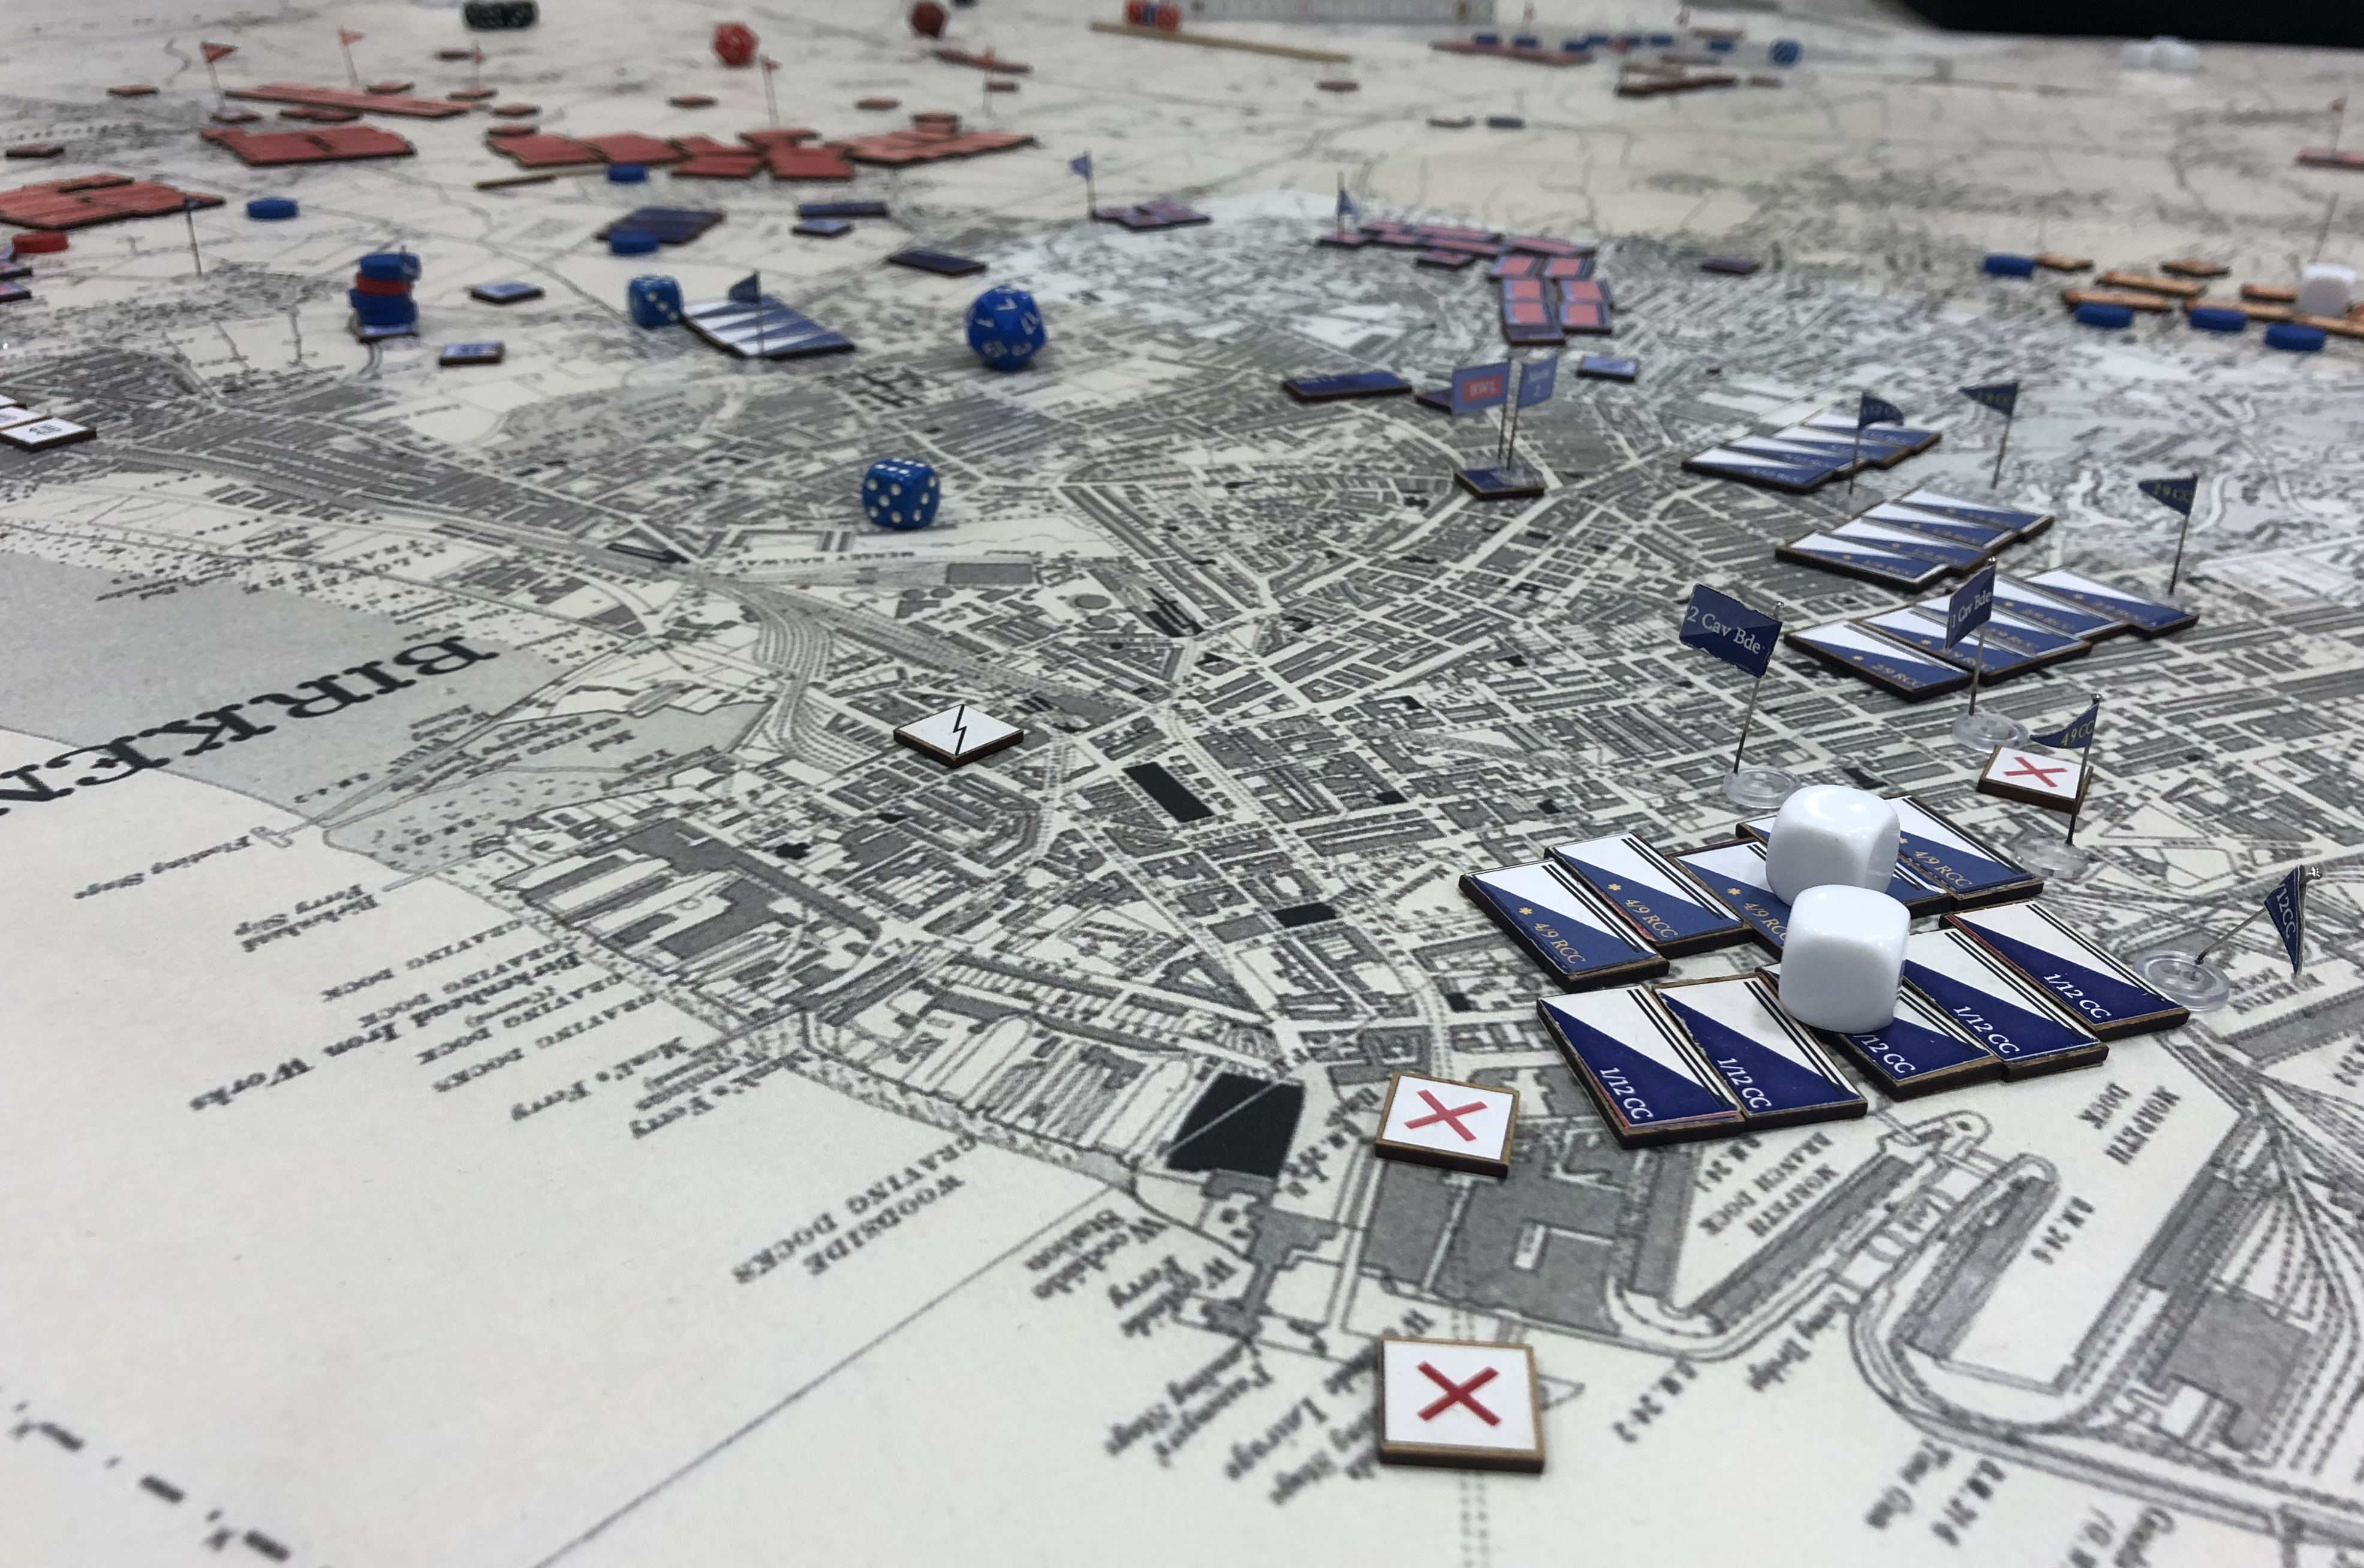
In the evening, both sides were in somewhat precarious positions. The British were about to lose badly on the Liverpool map, with Widnes all but occupied, St Helens fallen and few units left to defend Warrington. Also, while they had inflicted significant losses to the enemy, French forces were still fundamentally intact and capable of continuing operations. On the Birkenhead map, however, the situation was dire for the French. With British artillery emplaced in New Brighton and Birkenhead encircled, no reinforcements were forthcoming, and unless a determined push could dislodge the British from their positions, overall operational success was in danger.
The situation around Birkenhad at the end of day 1.
While the envisaged reinforcements did not appear during the night, a single French infantry regiment actually made it ashore and managed to join the French corps in the early hours of the second day. On the British side, a Canadian brigade, two brigades of Australian infantry and some artillery batteries arrived as reinforcements in Warrington and Earlestown. The French now had to make an important decision: pull out some of the units involved in the previous day’s fighting on the Liverpool map in order to reinforce Birkenhead and regain control over the harbour, or push on towards Warrington as quickly as possible. In the end they decided on the latter and only assigned the newly arrived regiment to the Birkenhead bridgehead. Over on the Wirral Peninsula British forces were exerting ever greater pressure onto Birkenhead, and after prolonged fighting and an ultimately futile attempt at reinforcing the garrison they eventually struck their colours.
The end of Birkenhead.
The French naval brigade had offered stiff resistance and actually hold out significantly longer than the scenario designers had anticipated. By drawing the British into fierce house-to-house fighting they bought those French forces moving towards the Widnes - St Helens as well as the Earlestown - Warrington lines precious time so that they could proceed with their attack. Also, in one of the more heroic - and more absurd - scenes of the weekend, a squadron of French cavalry managed to break out of Birkenhead and made a dash for Chester, where the British corps HQ was located. The British sent a few companies of cyclist infantry in hot pursuit, and for about two hours French cavalry and British cyclists played a deadly game of hide-and-seek on the Wirral peninsula. Eventually, the gallant cavalrymen were overcome, but they had caused British command considerable headache.
The French squadron dashing towards glory and the grave.
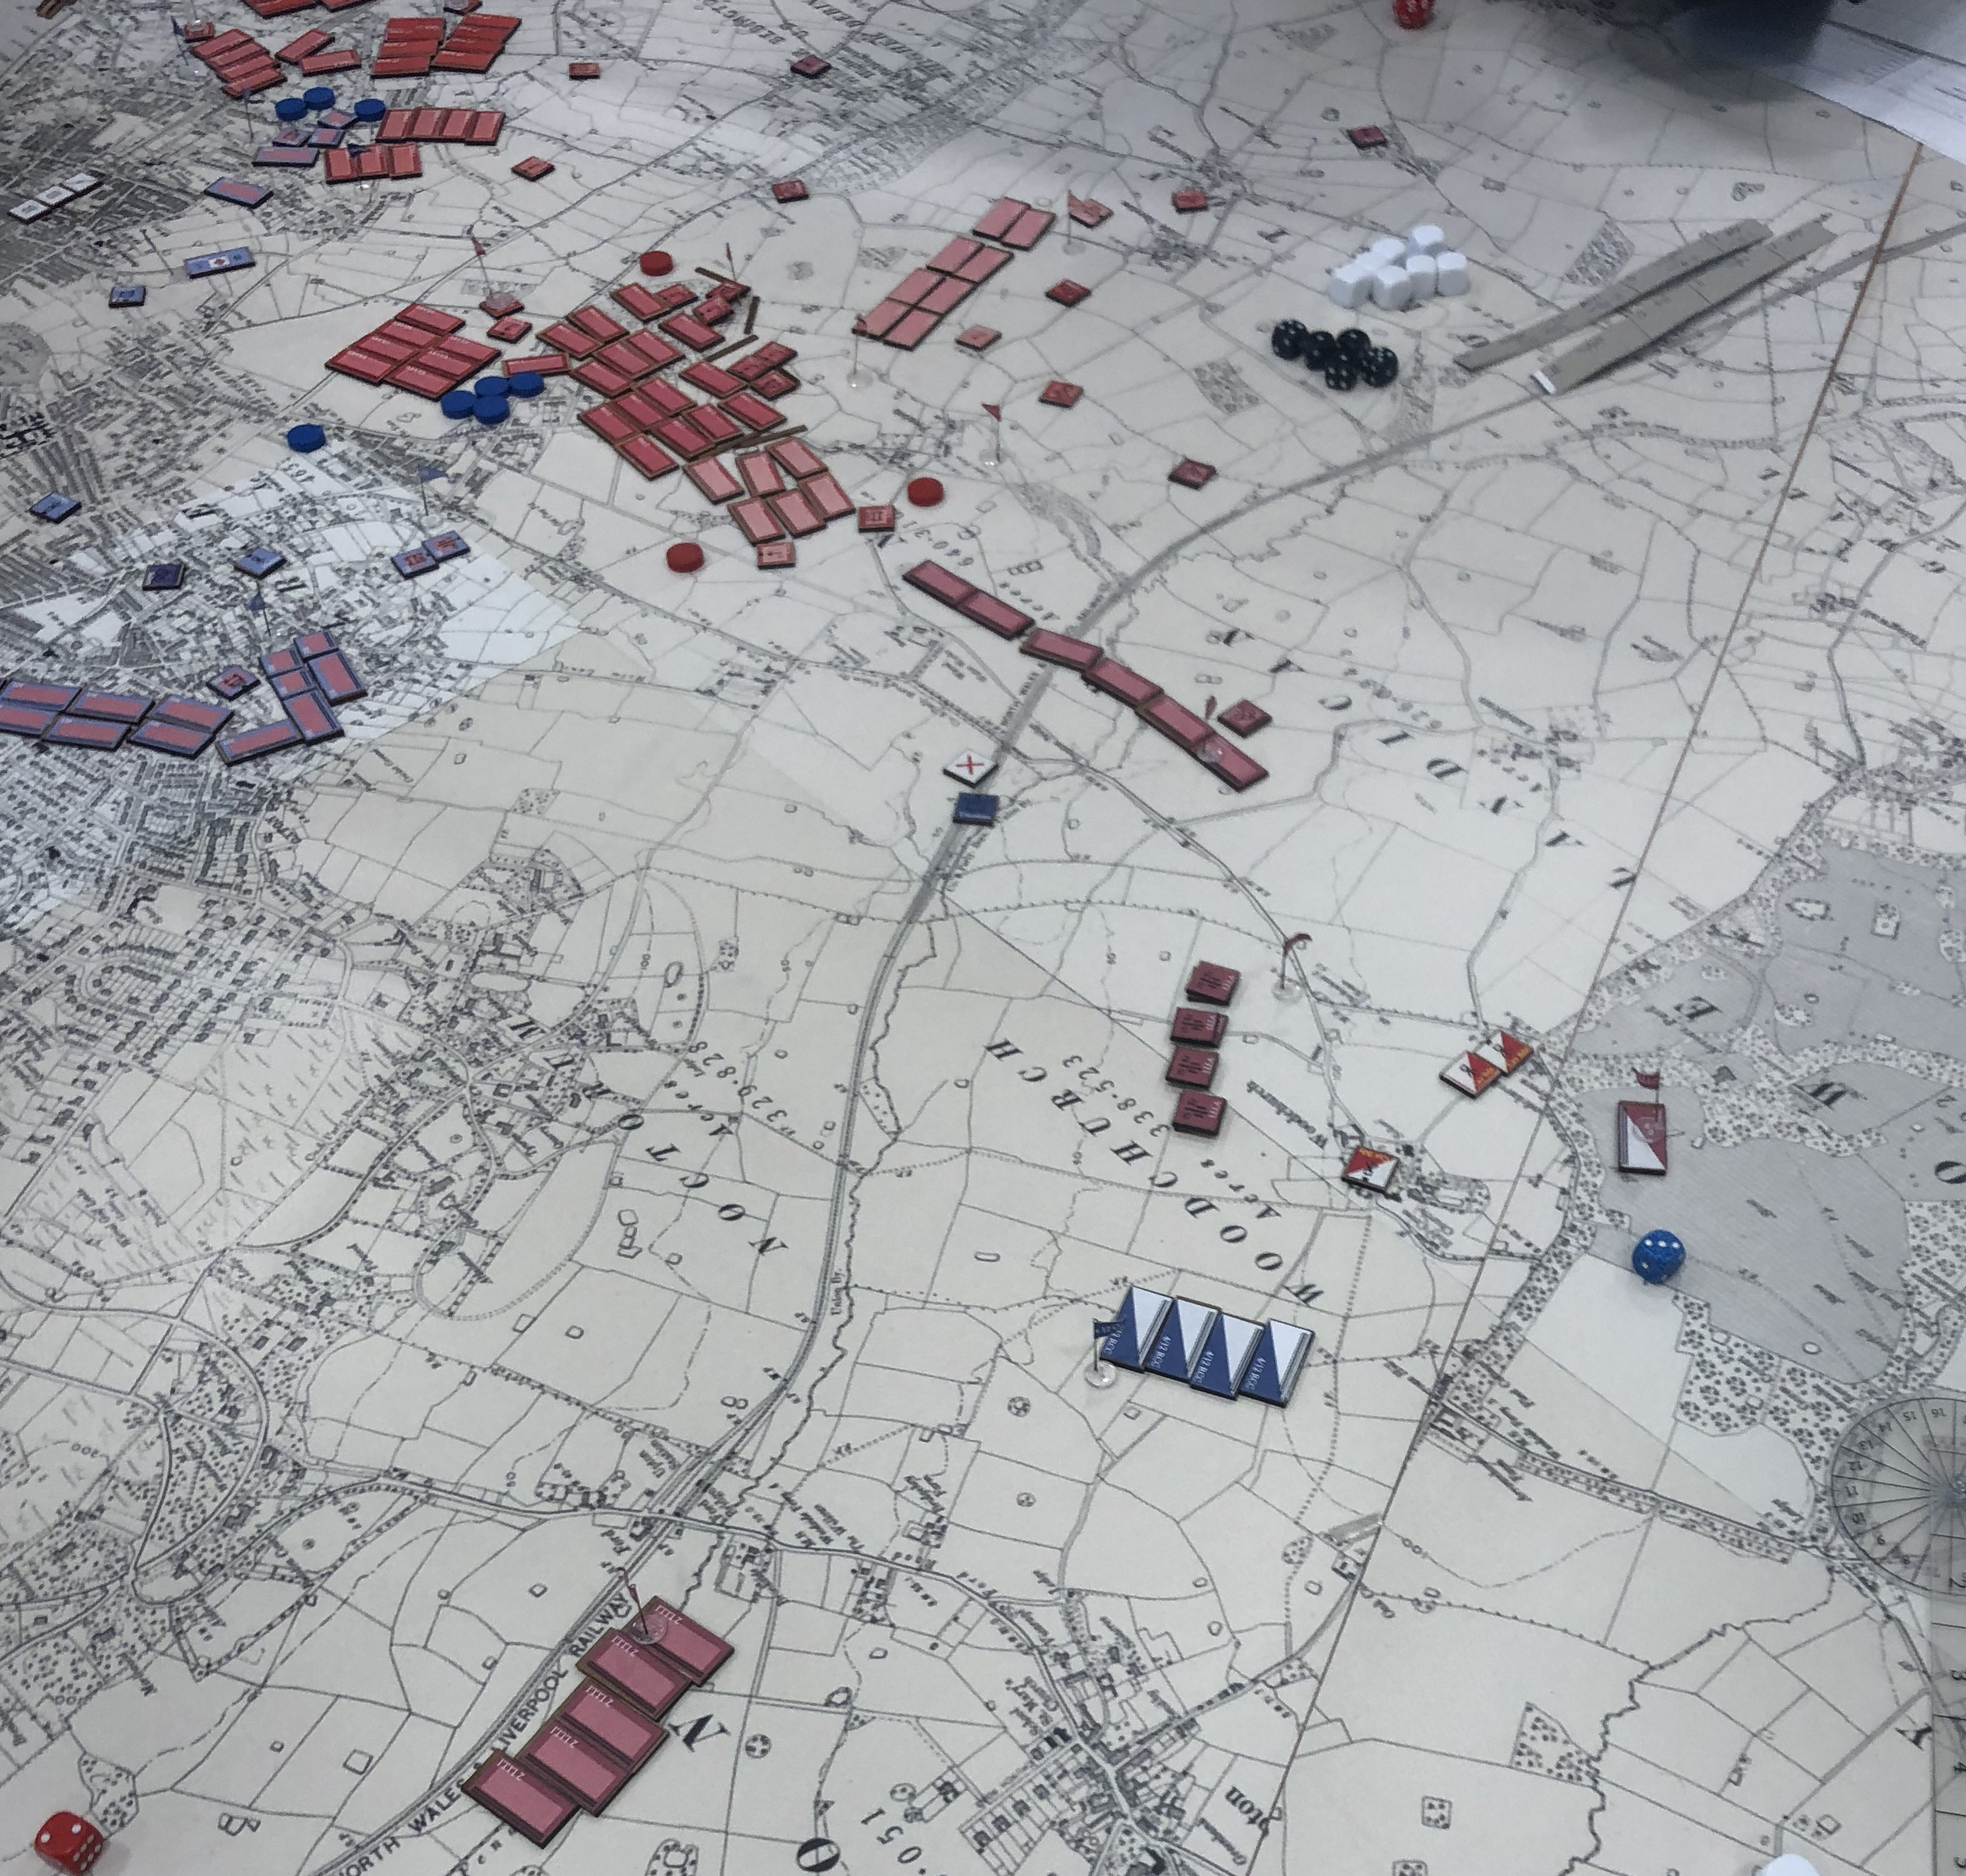
Thus, Birkenhead was captured, and British engineers soon set about repairing the French pontoon bridge so that British infantry could cross over into Liverpool. Also, both railway guns which so far had done good service on the Wirral Peninsula were now sent to Warrington to support the British defence effort there. However, although the three new brigades had managed to establish a new defensive line around Warrington, it soon bent under heavy French blows, and while the two railway guns tried to reduce French heavy artillery, they were eventually both knocked out. Now with unimpeded firing arcs into Warrington and a spotter balloon up in Widnes, the French could rain destruction onto British forces around Warrington and were by the early afternoon pushing into the city. Around 1600, fighting on the Liverpool map effectively came to an end, as British forces had been almost completely wiped out.
The end on the Liverpool map - no British forces in sight.
This undeniably great tactical victory however was bascially negated by the fact that Birkenhead and New Brighton were under firm British control, and even if a last-ditch effort by French horse artillery managed to prevent British engineers from fully repairing the French pontoon bridge, leaving two companies of British infantry stranded in Liverpool, there was nothing the French could do to unsettle the British guns in New Brighton. By all accounts, the harbour was closed and the French, while achieving brilliant tactical success on the Liverpool map, had suffered an operational defeat. It was at that point that the umpires decided to call it a day and ended the wargame.
IV. Some final thoughts.
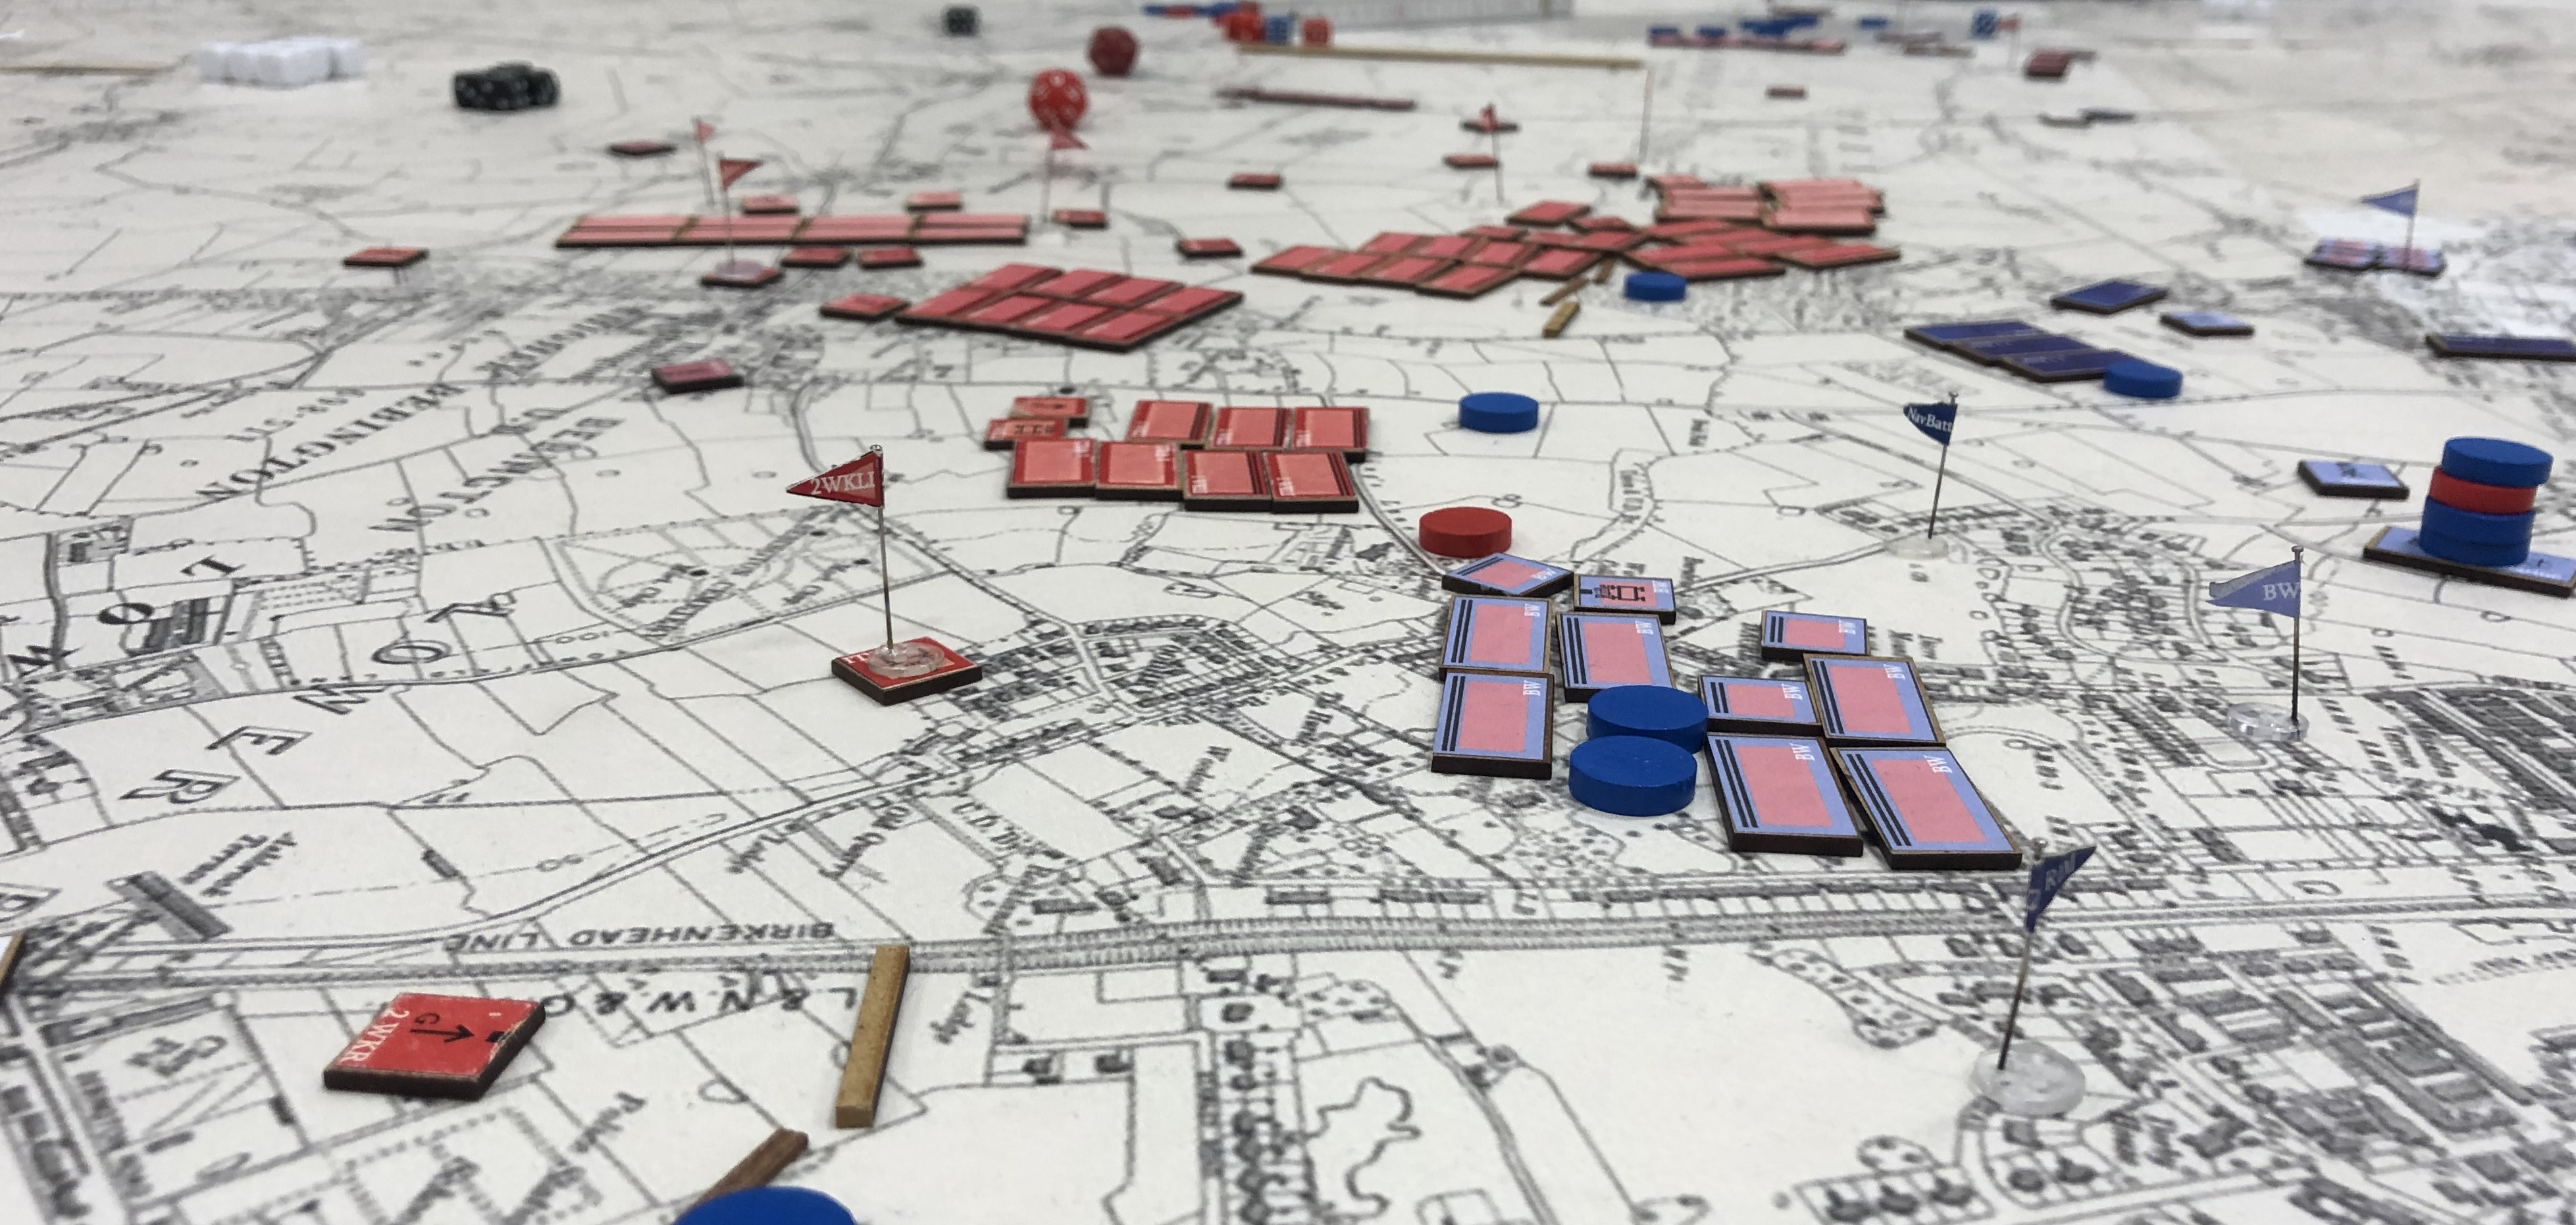
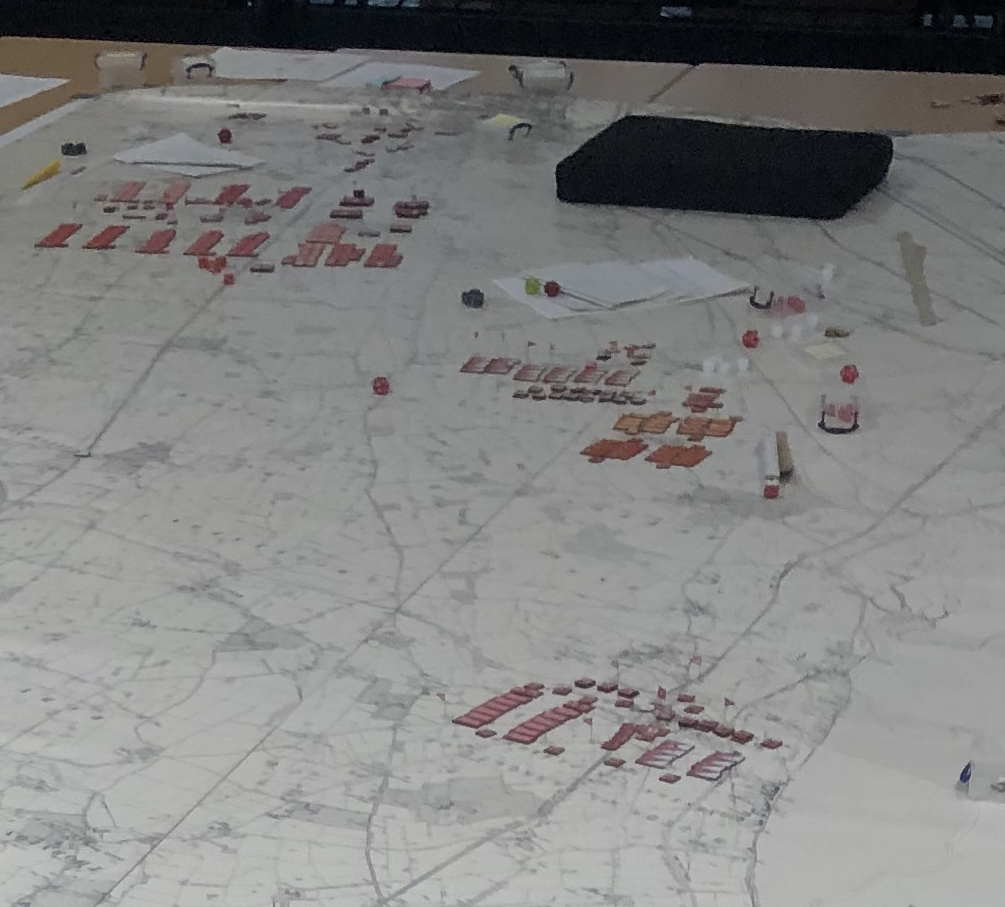
From the umpires’ perspective the wargame was successful, not the least so due to the outstanding effort put into it by the participants. Active participation is what makes or breaks large wargames, and while nearly everybody had his share of bad experiences throughout the two days, on the whole the two teams were keeping up remarkably well. Pluie de Balles once again showed its capability of providing a somewhat overwhelming experience - depicting nearly 40,000 foot, 4,000 horse and 180 guns with tokens reprenting companies of 80-100 infantrymen, troops of about 30 cavalrymen and individual artillery pieces, and taking into account tokens representing command, control and combat support elements resulted in more than 1,000 tokens, flags, pennants and markers to be moved around by the participants.
Some of the material involved.
The wargame also demonstrated two of the strengths of Pluie de Balles: one, the capability to accommodate large numbers of participants; it would have been easy to feed another 10 participants into that very scenario - in fact, the British side was somewhat short of manpower with a staff team of only three -, and scaling the scenario up to accommodate eg 80 participants would be easy. At the same time the amount of actual umpiring required is fairly limited, with one umpire per map room sufficient; thus, for a large scenario with three or four maps, three or four umpires would be necessary.
And two - and that is probably the key strength of Pluie de Balles -, by letting the staff teams live entirely on the reports they got from their overworked force commanders in the map rooms, both sides soon experienced considerable levels of stress which negatively impacted on the quality of communication. In the post-mortem at the end of day 2, one of the participants very acutely noted that a key lesson would be to remember the correct spelling of the villages, towns and other topographical features used as reference points in reports and orders. Both sides repeatedly ran into situations where orders by the staff as well as reports by the force commanders caused irritation if not outright desperation, simply because the recipient did not understand the message. In addition to these two important points, Pluie de Balles in general also encourages a detailed look at the topography, and this wargame was no exception, with both sides avidly trying to find the best positions for their units.
On the whole, the two days once again proved that Pluie de Balles, while probably only a mediocre simulation of 19th c. battlefield mechanics due to its sometimes radical simplifications, excels at confronting its participants with that kind of fog-of-war that is caused by imperfect communication and lack of situational awareness. It is this experience that justifies the use of 19th c. scenarios even in the 21st c. - the fundamental problem of keeping a clear head under stress and communicating in a way someone who is not experiencing the same level or type of stress will understand is as relevant at the beginning of the second decade of the 21st c. as it was when steeds rushed to battle driven.